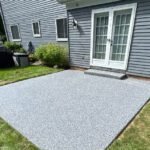
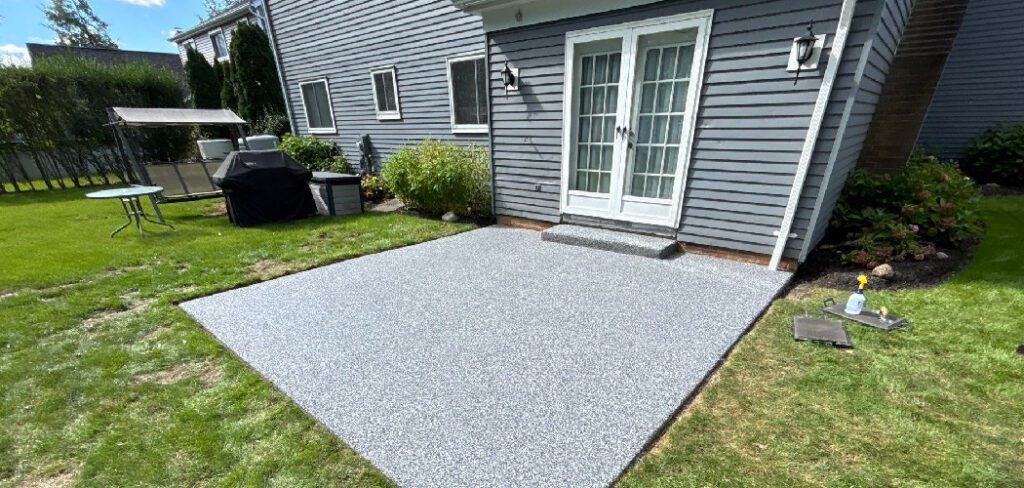
A concrete patio should be a welcoming extension of your home—a place for summer barbecues, morning coffee, and relaxing evenings. However, over time, a poorly finished surface or years of wear and tear can leave it feeling rough, uneven, and unwelcoming underfoot.
This abrasive texture not only looks unappealing but also makes cleaning difficult and can be uncomfortable for bare feet. Many homeowners assume that fixing this issue requires hiring expensive contractors or completely replacing the slab.
The good news is that with the right tools and a bit of weekend effort, you can transform that gritty, uneven surface into a smooth, beautiful space. This guide provides a clear, step-by-step process for how to smooth rough concrete patio surfaces, empowering you to tackle this project yourself and reclaim your outdoor oasis.
7 Step-by-Step Guide on How to Smooth Rough Concrete Patio
Step 1: Deep Clean and Prepare the Surface
Before any smoothing can begin, you must start with a perfectly clean slate. The concrete needs to be completely free of dirt, grease, moss, and any loose debris that could interfere with the resurfacing process. Start by sweeping the entire patio. Then, use a pressure washer to perform a deep clean, paying special attention to any stained or grimy areas.
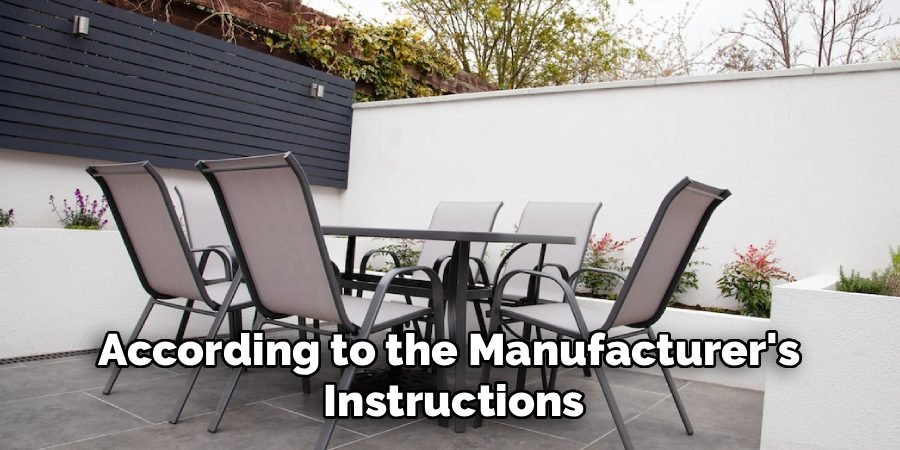
For stubborn oil or grease stains, apply a concrete degreaser according to the manufacturer’s instructions.
A thorough cleaning is not just for appearances; it ensures that the new layer of resurfacer or sealant will properly bond to the old concrete, preventing peeling and cracking down the line. Allow the patio to dry completely before moving on to the next step.
Step 2: Repair Cracks and Major Imperfections
A smooth finish is only possible if the underlying structure is sound. Carefully inspect the entire patio for any cracks, chips, or significant spalling. For small hairline cracks, you can often use a flexible concrete crack sealant. For larger cracks or holes, you will need to use a concrete patching compound.
Chip away any loose material from the damaged area with a hammer and chisel, then clean out the debris. Following the product directions, mix the patching compound and apply it to the crack, using a trowel to press it in firmly and smooth it level with the surrounding surface.
Let all patches cure completely, which may take 24 hours or more depending on the product and weather conditions.
Step 3: Grind Down High Spots for a Level Surface
For patios with significant high spots, bumps, or old paint and sealant that needs to be removed, grinding is a necessary step. You will need to rent a concrete grinder, which is a powerful walk-behind machine fitted with abrasive diamond discs.
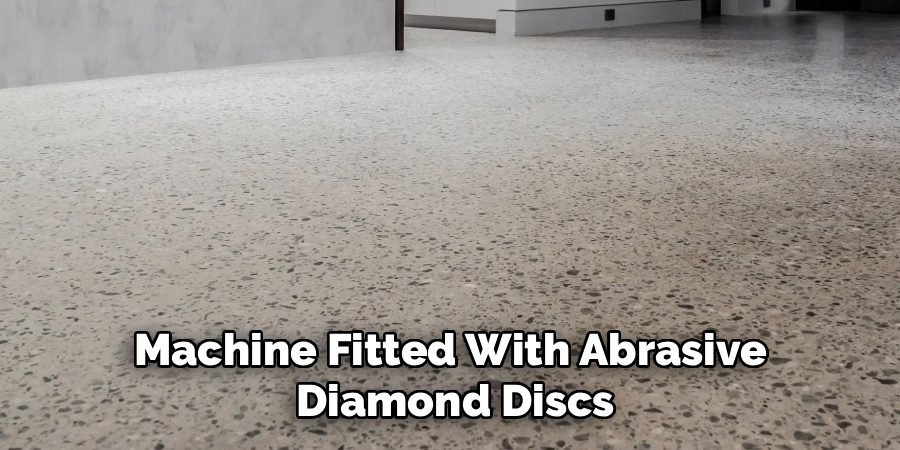
Starting with a coarse-grit disc (around 30-40 grit), move the grinder over the entire surface in slow, overlapping passes, much like mowing a lawn. This process will abrade the rough surface layer, leveling out high spots and creating a uniform texture.
This is a labor-intensive part of learning how to smooth rough concrete patio surfaces, so be sure to wear proper safety gear, including a dust mask, safety glasses, and hearing protection, as it creates a large amount of dust.
Step 4: Apply a Concrete Resurfacer
Once the patio is clean, patched, and level, you are ready to apply a new surface. A concrete resurfacer is a cement-based coating designed to be applied in a thin layer over existing concrete to create a fresh, smooth finish.
Mix the resurfacer powder with water in a large bucket according to the package directions until it reaches a lump-free, pancake-batter consistency. Working in small, manageable sections, pour the mixture onto the dampened patio.
Use a long-handled squeegee to spread the resurfacer evenly across the surface in a thin, consistent layer. Work quickly, as the product begins to set up fast. Overlap each section slightly to ensure seamless coverage.
Step 5: Trowel for a Smooth Finish
Immediately after spreading the resurfacer with a squeegee, you need to create the final smooth texture. While the mixture is still wet, use a steel trowel to finish the surface. Hold the trowel at a slight angle and sweep it across the resurfacer in long, arching motions.
This action flattens any ridges left by the squeegee and brings a layer of fine cement “cream” to the top, resulting in a very smooth finish. Be careful not to overwork any single area, as this can cause imperfections.
The goal is to create a uniform, flat plane across the entire patio. This troweling technique is what separates an amateur job from a professional-looking one.
Step 6: Create a Non-Slip Texture (Optional but Recommended)
While a perfectly glass-smooth surface might look appealing, it can become dangerously slippery when wet. To add a degree of safety without making the patio rough again, you can create a subtle non-slip texture.
After the resurfacer has been troweled smooth but before it has fully hardened (usually within about 20 minutes), lightly drag a clean, soft-bristled push broom across the surface in one direction.
This will create very fine, parallel grooves that provide grip underfoot. This is a common professional technique and is a smart step in the process of how to smooth rough concrete patio areas that will be exposed to rain or pool water.
Step 7: Cure and Seal the New Surface
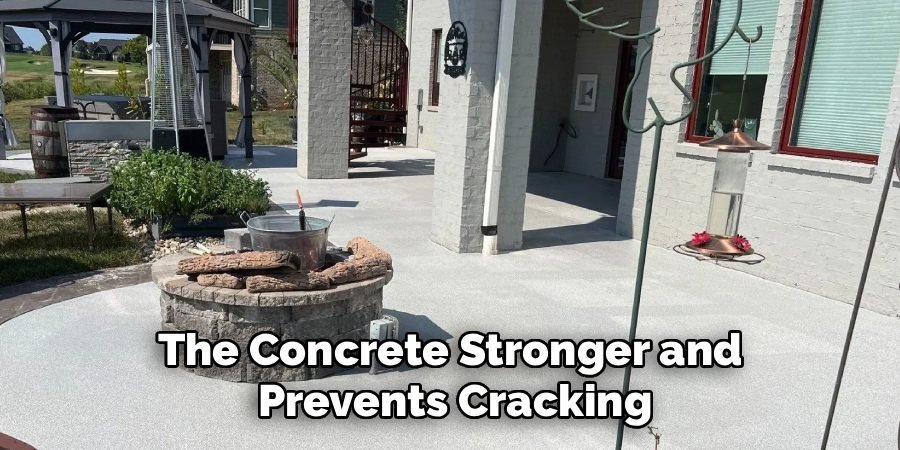
The final step is to protect your hard work. The new resurfacer needs to cure properly, which involves keeping it slightly damp for the first 24-48 hours. Lightly mist the surface with a garden hose several times a day to slow the curing process, which makes the concrete stronger and prevents cracking.
After the curing period recommended by the manufacturer (typically a few days), you should apply a high-quality concrete sealer. A sealer will protect the new surface from water penetration, stains, and UV damage, preserving its color and smooth finish for years to come.
Apply the sealer with a roller according to the product’s instructions, and allow it to dry completely before placing furniture back on the patio.
Frequently Asked Questions (FAQ)
Can I Smooth Concrete Without a Grinder?
Yes, if your patio is only slightly rough and does not have major high spots, you may be able to skip the grinding step.
- Process: After thoroughly cleaning the concrete and repairing any cracks, you can apply a layer of concrete resurfacer directly.
- Limitation: This method will not fix significant levelness issues. The resurfacer will follow the general contour of the existing slab, so any large bumps will still be present underneath the new coating.
What Is the Difference Between Concrete Resurfacer and Concrete?
While both are cement-based, they are designed for different applications.
- Concrete: This is a structural mix containing cement, sand, and large aggregates like gravel. It is used for pouring thick slabs.
- Resurfacer: This is a high-strength polymer-modified overlay containing cement and very fine sand. It is designed to be applied in a very thin layer (about 1/8 inch) and bond to existing concrete to create a new surface.
How Much Does It Cost to Resurface a Concrete Patio?
The cost can vary, but it is a very budget-friendly DIY project. The main expenses are the concrete resurfacer, which costs around $25-$40 per bag (covering about 50 sq. ft.), and the rental of a concrete grinder, which can be about $100-$150 per day.
Compared to the thousands of dollars it would cost to have the patio professionally replaced, resurfacing it yourself can save you a significant amount of money.
How Long Does Resurfaced Concrete Last?
When properly applied and sealed, a resurfaced concrete patio can last for 10 years or more. The longevity depends on several factors, including the quality of the prep work, the climate, the amount of foot traffic, and how well it is maintained. Sealing the concrete every 2-3 years is the most important step you can take to protect the surface and extend its life.
Can I Add Color to My Resurfaced Patio?
Absolutely. You have several options for adding color.
- Integral Color: You can add a liquid cement colorant directly to the resurfacer mixture before applying it. This colors the entire layer.
- Stain: After the resurfacer has cured, you can apply an acid-based or water-based concrete stain to create a marbled, translucent color effect.
- Paint: You can also use a dedicated concrete or porch paint, but this creates an opaque, solid color and may require more frequent touch-ups than a stain.
Conclusion
A rough, uncomfortable concrete patio does not have to be a permanent feature of your backyard. With a clear plan and the right materials, this is a transformative project that is well within the reach of a determined DIYer.
By meticulously cleaning and repairing the existing slab, applying a fresh layer of resurfacer, and protecting it with a quality sealer, you can create a durable, attractive, and smooth surface that rivals the work of a professional.
This project not only improves the usability and aesthetics of your outdoor space but also adds tangible value to your home. Now that you have the knowledge of how to smooth rough concrete patio surfaces, you are ready to turn that neglected slab into the centerpiece of your backyard.
About
Jovie Mathews is a backyard and outdoor expert writer with over 12 years of hands-on experience transforming neglected outdoor spaces into thriving gardens and functional retreats. Raised in a family where weekends meant digging in the soil and building raised beds from scratch, Jovie developed a genuine love for the outdoors long before it became a career.
She writes with a practical, no-fluff approach — always testing ideas in her own backyard before sharing them with readers. From composting systems and native plant selection to patio design and pest control, Jovie covers the full spectrum of backyard life with equal parts expertise and enthusiasm.
Education
B.Sc. in Horticulture Science
University of Florida (UF) · Gainesville, FL · 2014
IFAS College of Agricultural and Life Sciences
Minor in Environmental Studies
University of Florida (UF) · Gainesville, FL · 2014
College of Liberal Arts and Sciences
Areas of expertise
- Lawn & Garden Care
- Soil prep, planting, seasonal care
- Outdoor DIY Projects
- Raised beds, fencing, pathways
- Composting & Soil Health
- Organic methods, amendments
- Native Plants & Wildlife
- Pollinators, habitat gardening
When she is not writing, Jovie can be found testing new composting techniques, growing tomatoes in questionable quantities, or convincing her neighbors that clover lawns are actually a great idea. She currently gardens in the Pacific Northwest.