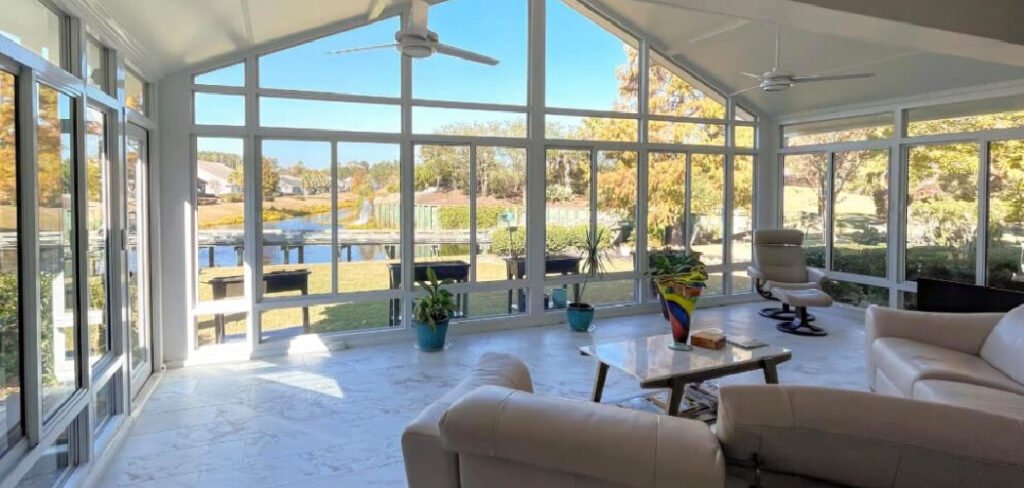
An existing patio is a space full of potential. While great for barbecues on sunny days, its use is often limited by weather, bugs, and the changing seasons. What if you could capture that outdoor feeling and enjoy it year-round? Building a sunroom enclosure over your concrete slab transforms that underutilized space into a bright, versatile new room for your home.
This project can add significant value and square footage, creating a perfect spot for a morning coffee, a home office, or a tranquil reading nook. While it is a significant undertaking, understanding the process is the first step toward success.
This guide will walk you through the essential steps on how to build a sunroom on an existing patio, turning your vision of a sun-drenched sanctuary into a tangible reality.
Building a sunroom on an existing patio combines creativity, effort, and attention to detail. Whether you aim to create a sunny retreat or expand your living space, the process requires careful planning and execution.
From evaluating the structural integrity of your patio to selecting the right materials, each step plays a critical role in ensuring the space is both functional and aesthetically pleasing. With the right approach, transforming your patio into a sunroom can be a rewarding project that enhances your home’s comfort and charm.
Step-by-Step Guide: How to Build a Sunroom on an Existing Patio
Step 1: Assess Your Patio’s Foundation and Check Local Codes
Before you can begin any construction, you must determine if your existing concrete patio slab can support the weight of a sunroom. A simple patio slab is often only four inches thick, which may not be sufficient for a full room addition. You will need to inspect the slab for any major cracks, sinking, or signs of instability.
It is highly recommended to consult a structural engineer to assess its integrity and determine if it requires reinforcement or a new footing. At the same time, you must contact your local building department.

They will inform you about necessary permits, zoning laws, setback requirements, and specific building codes you must follow. This crucial first step ensures your project is safe, legal, and built on a solid foundation.
Step 2: Design Your Sunroom and Choose Your Materials
With a clear understanding of your foundation and local requirements, you can now focus on the fun part: designing your sunroom. Decide on the style, whether it will be a simple three-season room or a fully insulated four-season extension of your home.
Consider the type of roof you want, such as a shed roof or a gable roof that matches your home’s existing architecture. You will also need to select your materials. Common choices for framing include traditional wood or low-maintenance aluminum and vinyl.
For the vast expanses of glass, you will choose between single-pane, double-pane, or high-efficiency low-E glass depending on your climate and budget. A well-thought-out design plan is a critical roadmap for the entire project.
Step 3: Frame the Walls
The next phase is to construct the skeleton of your new room. This process begins by anchoring a bottom plate, or sill plate, made of pressure-treated lumber directly to the concrete patio slab using anchor bolts.
This creates the footprint for your walls. From there, you will build the wall frames, which consist of studs, top plates, and headers for your windows and doors. You can either build the wall sections on the ground and then lift them into place or build them upright piece by piece. Precision is key during this stage.
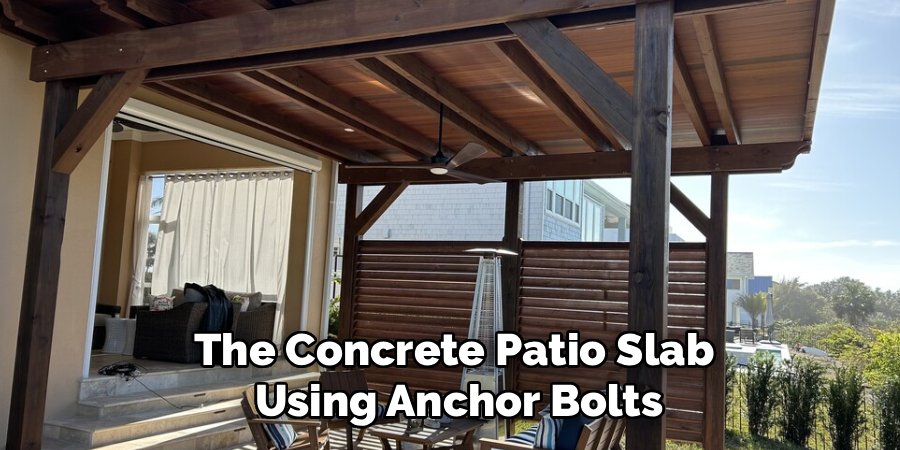
Ensure all walls are plumb (perfectly vertical) and level, and brace them securely as you go. This sturdy frame will support the roof and windows that make your sunroom what it is.
Step 4: Install the Roof Structure
Once the walls are framed and securely braced, it is time to look up and build the roof. The complexity of this step will depend on the design you chose. For a simple shed roof, you will attach a ledger board to your house, then run rafters from the ledger board to the top plate of the new sunroom’s outer wall.

A gable roof is more complex and involves creating trusses or a ridge board. After the main structure is built, you will cover it with sheathing, typically plywood or OSB. This creates the solid surface for your roofing material. Proper installation here is vital to prevent leaks and ensure the structure can handle snow loads in colder climates.
Step 5: Add Roofing and Exterior Finishes
With the sheathing in place, the next step is to make your new sunroom weatherproof. Cover the roof sheathing with roofing felt or a synthetic underlayment, followed by your chosen roofing material, such as shingles that match your main house.
This ensures your room stays dry. On the exterior walls, you will add sheathing and then a house wrap, which acts as a moisture barrier.
Finally, you will install the exterior siding. Choosing a siding that matches your home’s existing finish will help the new sunroom look like a seamless, original part of the house rather than a tacked-on addition.
Step 6: Install Windows and Doors
The windows are the defining feature of any sunroom, and their installation is a milestone in the construction process. Carefully follow the manufacturer’s instructions for each window unit.
This typically involves applying flashing tape around the openings to create a weatherproof seal, setting the window in place, ensuring it is level and plumb, and then securing it to the frame.
The same careful process applies to any exterior doors you have planned. Properly installed windows and doors are essential not only for aesthetics and function but also for energy efficiency and preventing water intrusion. This step truly begins to transform the structure into a room.
Step 7: Run Electrical and Finish the Interior
The final phase brings your sunroom to life. If you planned for electricity, an electrician will run wiring for outlets, lights, and ceiling fans before any insulation or drywall goes up. Once electrical work passes inspection, you will add insulation to the wall cavities and ceiling to help regulate the room’s temperature.

After insulation, the interior walls can be finished with drywall, wood paneling, or another material of your choice. Finally, you can lay your flooring, paint the walls, and install your light fixtures. This is the last major step in how to build a sunroom on an existing patio, turning a construction site into a beautiful, finished living space.
Frequently Asked Questions (FAQ)
Do I Need a Permit to Build a Sunroom on My Patio?
Yes, in almost all cases, you will need a building permit. A sunroom is considered a structural addition to your home, and local building departments require permits to ensure the construction is safe and up to code.
This includes verifying the foundation, framing, and electrical work. Skipping this step can result in fines, forced demolition, and major problems when you try to sell your home.
Can My Existing Patio Slab Support a Sunroom?
It depends. A standard patio slab is often 4 inches thick and not designed to support the weight of a full room. It may lack the proper reinforcement or a deep footing required by local code for a habitable structure.
It is essential to have the slab inspected by a professional engineer to determine if it is adequate or if it needs to be reinforced or replaced.
What Is the Difference Between a Three-Season and Four-Season Sunroom?
- Three-Season Room: Designed for use in spring, summer, and fall. It typically has single-pane glass and is not connected to your home’s HVAC system. It is a more affordable way to enjoy the outdoors without bugs.
- Four-Season Room: A true extension of your home, built with insulated framing, double-pane or low-E glass, and connected to your HVAC. This allows for comfortable, year-round use regardless of the weather.
What Is a Sunroom Kit?
A sunroom kit is a prefabricated package that includes all the major components needed to build your sunroom, such as pre-cut frames, windows, and roof panels, along with detailed instructions.
These kits can simplify the construction process and may be cheaper than sourcing all materials individually. However, you are limited to the manufacturer’s designs, and you are still responsible for the foundation, permits, and labor.
How Much Does It Cost to Build a Sunroom on a Patio?
The cost varies dramatically based on size, materials, location, and whether you do it yourself or hire a contractor. A simple, DIY three-season sunroom might cost between $8,000 and $15,000.
A professionally installed, four-season sunroom that is a true home extension can easily cost $30,000 to $80,000 or more. The foundation assessment and any required upgrades will also be a significant factor in the final cost.
Conclusion
Building a sunroom on your existing patio is an ambitious but deeply rewarding project that adds beauty, functionality, and value to your home. The process requires careful planning, from verifying your foundation’s strength and securing permits to the final touches of paint and flooring.
By breaking down the project into manageable stages—foundation, framing, roofing, and finishing—you can approach the construction with clarity and confidence. While challenges may arise, the reward is a stunning, light-filled space you can enjoy for years.
Now that you have a comprehensive overview of how to build a sunroom on an existing patio, you can take the first step toward creating your own personal slice of paradise.
About
Jovie Mathews is a backyard and outdoor expert writer with over 12 years of hands-on experience transforming neglected outdoor spaces into thriving gardens and functional retreats. Raised in a family where weekends meant digging in the soil and building raised beds from scratch, Jovie developed a genuine love for the outdoors long before it became a career.
She writes with a practical, no-fluff approach — always testing ideas in her own backyard before sharing them with readers. From composting systems and native plant selection to patio design and pest control, Jovie covers the full spectrum of backyard life with equal parts expertise and enthusiasm.
Education
B.Sc. in Horticulture Science
University of Florida (UF) · Gainesville, FL · 2014
IFAS College of Agricultural and Life Sciences
Minor in Environmental Studies
University of Florida (UF) · Gainesville, FL · 2014
College of Liberal Arts and Sciences
Areas of expertise
- Lawn & Garden Care
- Soil prep, planting, seasonal care
- Outdoor DIY Projects
- Raised beds, fencing, pathways
- Composting & Soil Health
- Organic methods, amendments
- Native Plants & Wildlife
- Pollinators, habitat gardening
When she is not writing, Jovie can be found testing new composting techniques, growing tomatoes in questionable quantities, or convincing her neighbors that clover lawns are actually a great idea. She currently gardens in the Pacific Northwest.