Building or renovating an above-ground pool is a significant investment in your home’s entertainment value. While the sturdy metal wall provides the necessary structure, it can be harsh and unforgiving against the delicate vinyl liner that holds the water. Over time, rust, corrosion, and bolt heads can puncture your liner, leading to expensive leaks and repairs.
This is where wall foam becomes an essential, yet often overlooked, component of pool installation. It acts as a protective barrier, cushioning the liner against the hard metal surface while adding a layer of insulation that helps retain water heat. Applying this padding might seem like an optional luxury, but it is actually a crucial step for extending the lifespan of your pool liner.
This guide is designed to take the intimidation out of the process, providing you with clear, beginner-friendly instructions on how to install pool wall foam correctly, ensuring your swimming oasis remains safe, smooth, and enjoyable for years to come.
Pool wall foam installation might seem daunting at first, but with the right preparation and tools, it can be a straightforward and rewarding process. By creating a uniform surface and adding an essential layer of protection, pool wall foam safeguards your liner from potential damage while enhancing the overall swimming experience.
Whether you’re a first-time pool owner or simply looking to upgrade your setup, following these steps will help ensure a smooth installation and lasting results.
Step-by-Step Guide on How to Install Pool Wall Foam
Step 1: Clean and Prep the Metal Wall Surface
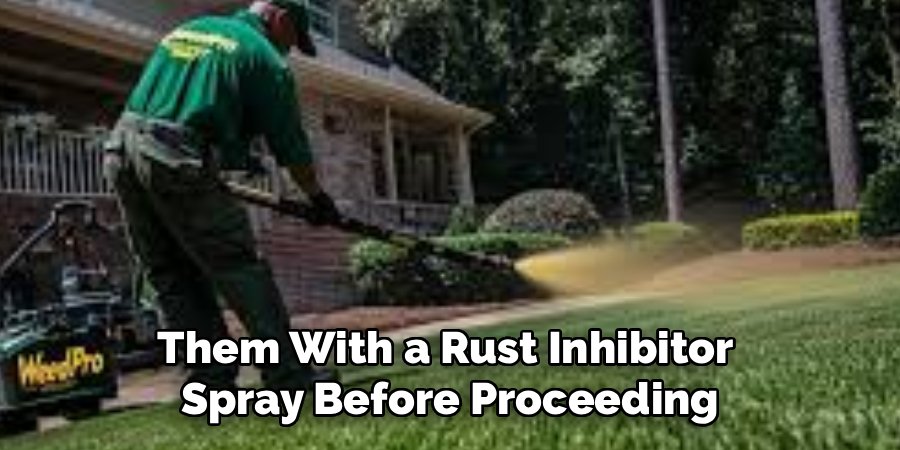
Before you unroll any foam, the foundation must be pristine. The metal wall of your above-ground pool needs to be completely free of dirt, dust, and oily residues to ensuring strong adhesion. Take a clean cloth and a mild degreaser or simply warm soapy water to wipe down the entire interior surface of the wall. If you are retrofitting an older pool, pay special attention to any rust spots; sand them down and treat them with a rust inhibitor spray before proceeding.
The goal is to create a smooth, clean canvas. Any debris left behind could get trapped under the foam, creating unsightly bumps or preventing the spray adhesive from sticking properly. Allow the wall to dry completely before moving to the next phase, as moisture is the enemy of a good bond.
Step 2: Apply Spray Adhesive to the Wall Section
Working with spray adhesive requires a strategic approach rather than a haphazard one. You should not try to coat the entire pool wall at once, as the glue will dry out before you can attach the foam. instead, work in manageable sections of about three to four feet wide. Shake your can of heavy-duty spray adhesive vigorously to ensure an even mixture.
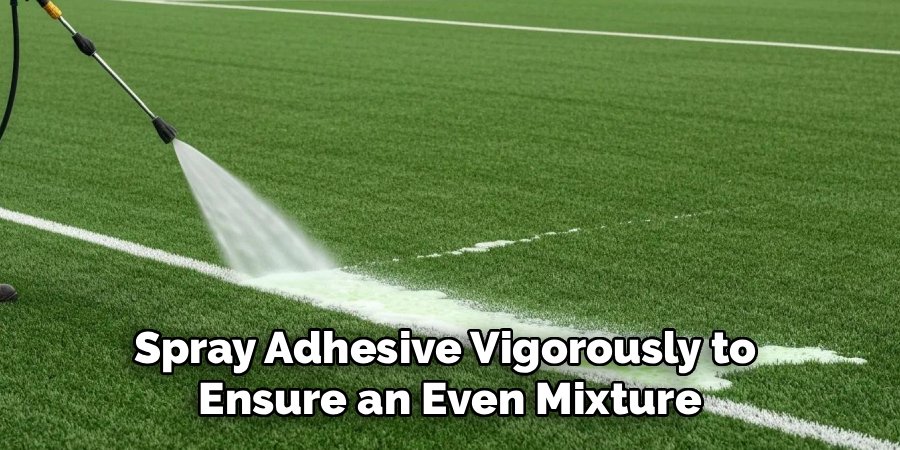
Hold the can approximately six to eight inches away from the metal wall and apply a generous, even coat. Focus on the top and bottom edges, as these are critical areas where peeling is most likely to occur. This sectional method gives you control and ensures that the adhesive remains tacky and effective when you are ready to press the foam into place.
Step 3: Align and Attach
With your first section of wall coated in tacky adhesive, it is time to position the foam. Unroll the beginning of your foam roll and align the top edge of the foam with the top edge of the pool wall. It is crucial to leave a small gap, about a quarter to half an inch, below the top rail or coping track to allow room for the liner bead or coping strips later.
Press the foam firmly against the glued metal, smoothing it out with your hands from the center towards the edges to push out any air bubbles. Ensuring proper alignment at the start is vital because if you start crooked, the entire roll will spiral downwards or upwards as you go around the pool.
Step 4: Continue Rolling and Gluing Around the Perimeter
Once your starting section is secure, you establish a rhythm for the rest of the installation. Unroll another few feet of foam, spray the next section of the metal wall with adhesive, and press the foam into place. It helps to have a second person to hold the heavy roll of foam while you manage the spraying and smoothing. Keep tension on the foam as you apply it to prevent wrinkles or sagging.
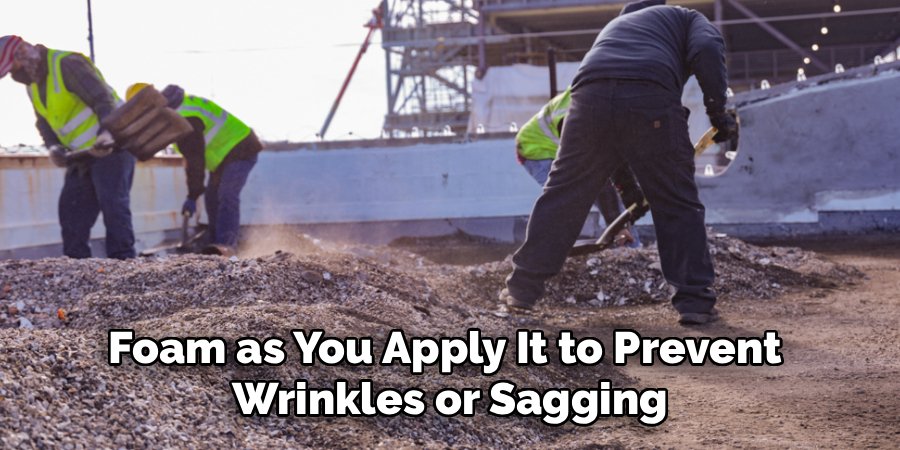
The foam should be taut against the wall but not stretched to the breaking point. Continue this process of spraying, unrolling, and pressing until you have circumnavigated the entire pool. Consistency is key here; verify frequently that your top edge remains level and parallel to the top of the wall.
Step 5: Cut the Foam for Skimmers and Returns
Your pool wall is not a solid circle; it has cutouts for the skimmer, the water return jet, and possibly pool lights. You cannot simply cover these over. Once the foam is securely glued around the entire pool, locate these openings by feeling through the foam with your hands. Using a sharp utility knife or box cutter, carefully trace the outline of these openings.

You want to cut the foam away cleanly so that the faceplates and gaskets can form a watertight seal directly against the liner and the wall structure. Do not remove too much foam; cut precisely along the inside edge of the metal cutout. This ensures that the protective cushioning extends right up to the hardware without interfering with the plumbing connections.
Step 6: Trim the Excess and Create a Seamless Seam
When you reach the point where you started, you will have an overlap of foam. You need to create a clean butt seam where the two ends meet perfectly without overlapping, as a double layer would create a noticeable bulge under the liner. Cut the excess foam off the roll using a straight edge and your utility knife. Ideally, the two ends should touch snugly.
\If you have a small gap, cut a thin strip to fill it, but a tight fit is preferred. Once the vertical seam is handled, check the bottom of the wall. If the foam roll was wider than your wall height, trim any excess material at the bottom, ensuring it does not interfere with the pool cove or the sand base. Secure the final seam with duct tape for extra stability.
Step 7: Secure Seams with Tape for a Smooth Finish
The final step in mastering how to install pool wall foam involves reinforcing your work. While the adhesive holds the foam to the wall, tape ensures the seams stay flat and do not curl up over time. Use a high-quality duct tape or a specific foam tape to cover the vertical seam where your start and end points met. Additionally, tape over the top edge of the foam where it sits near the top rail.
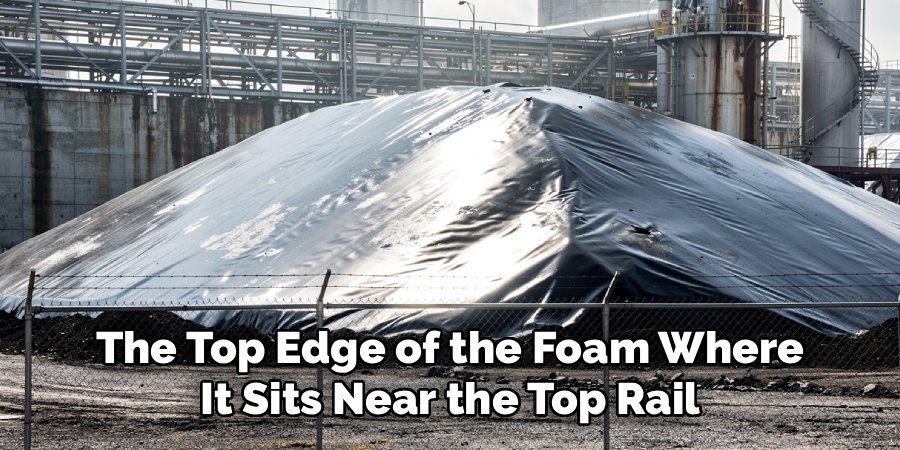
This prevents the foam from peeling down when you are dragging the heavy vinyl liner over the wall during installation. Run your hand over all taped areas to ensure they are smooth. Any ridge or lifted tape edge could potentially show through the liner, so taking this extra moment to flatten everything ensures a professional-looking result.
Frequently Asked Questions (FAQ)
Do I Need to Remove the Top Rails to Install Wall Foam?
In most cases, yes, or at least loosen them significantly. The wall foam needs to sit flush against the metal wall, often tucking slightly under the top rail structure depending on your pool model.
Removing the top rails allows you unobstructed access to the very top edge of the metal wall, ensuring you can align the foam correctly without gaps. It also makes it much easier to eventually install the liner over the foam without the rails getting in the way.
Can I Use Regular Glue Instead of Spray Adhesive?
It is highly recommended to use a spray adhesive specifically designed for pool wall foam or heavy-duty construction.
- Application: Spray adhesive provides an even, thin coat that prevents lumps.
- Tackiness: It becomes tacky quickly, holding the foam in place vertically while you work.
- Reaction: Some standard liquid glues might contain solvents that could chemically eat away at the foam or not bond well to the galvanized metal wall. Stick to the recommended spray products for a secure bond.
Does Wall Foam Help with Heat Retention?
Yes, wall foam acts as an insulator. While its primary purpose is to protect the liner from the metal wall, the foam material (usually closed-cell polyethylene) creates a thermal break.
This prevents the heat from the pool water from transferring directly into the cold metal wall and dissipating into the outside air. While it won’t replace a solar cover, it definitely contributes to keeping your pool water warmer for longer, potentially extending your swimming season.
What Happens if the Foam Gets Wet Behind the Liner?
Pool wall foam is typically made from closed-cell foam, which means it is resistant to absorbing moisture. If water from rain or splashes gets between the liner and the foam, the foam itself will not rot or degrade like open-cell foam or carpet padding would.
Additionally, most pool walls have weep holes at the bottom track to allow condensation or trapped water to escape. However, ensuring your skimmer and return gaskets are sealed tightly is crucial to prevent significant water leaks behind the liner.
Is Wall Foam Necessary for Resin Pools?
While resin pools do not rust like steel or aluminum pools, wall foam is still a valuable addition.
- Protection: Even resin walls can have rough edges, bolt heads, or seams that can wear down a liner over years of water pressure.
- Feel: The foam provides a softer, more premium feel to the pool walls.
- Insulation: You still gain the thermal insulation benefits regardless of the wall material.
So, while the anti-rust benefit isn’t applicable, the protection and insulation factors make it a worthwhile upgrade for resin pools too.
Conclusion
Installing wall foam is one of the smartest, most cost-effective upgrades you can make to your above-ground pool. It serves as a vital insurance policy for your liner, shielding it from punctures and corrosion while adding a touch of luxury and warmth to your swimming experience.
By taking the time to clean the walls properly, apply adhesive in sections, and trim carefully around your skimmer and return, you ensure a flawless application that enhances the structural integrity of your pool setup. The effort you put in now prevents headaches and repairs down the road.
With this knowledge of how to install pool wall foam, you are ready to tackle this project with confidence, setting the stage for a summer filled with worry-free fun and relaxation in your beautifully protected pool.
About
Jovie Mathews is a backyard and outdoor expert writer with over 12 years of hands-on experience transforming neglected outdoor spaces into thriving gardens and functional retreats. Raised in a family where weekends meant digging in the soil and building raised beds from scratch, Jovie developed a genuine love for the outdoors long before it became a career.
She writes with a practical, no-fluff approach — always testing ideas in her own backyard before sharing them with readers. From composting systems and native plant selection to patio design and pest control, Jovie covers the full spectrum of backyard life with equal parts expertise and enthusiasm.
Education
B.Sc. in Horticulture Science
University of Florida (UF) · Gainesville, FL · 2014
IFAS College of Agricultural and Life Sciences
Minor in Environmental Studies
University of Florida (UF) · Gainesville, FL · 2014
College of Liberal Arts and Sciences
Areas of expertise
- Lawn & Garden Care
- Soil prep, planting, seasonal care
- Outdoor DIY Projects
- Raised beds, fencing, pathways
- Composting & Soil Health
- Organic methods, amendments
- Native Plants & Wildlife
- Pollinators, habitat gardening
When she is not writing, Jovie can be found testing new composting techniques, growing tomatoes in questionable quantities, or convincing her neighbors that clover lawns are actually a great idea. She currently gardens in the Pacific Northwest.