A patio umbrella is the centerpiece of any comfortable outdoor space, providing essential shade on hot, sunny days. It is incredibly frustrating when a sudden gust of wind or an unfortunate accident leaves you with a snapped or bent pole, rendering your umbrella useless. The immediate thought for many is to discard the entire thing and purchase a costly replacement. However, in many cases, a broken pole is a completely fixable problem that you can tackle yourself with a few basic tools and materials.
A successful DIY repair not only saves you money but also keeps a bulky item out of the landfill. This guide will provide simple, clear instructions on how to fix broken patio umbrella pole issues, empowering you to restore your beloved source of shade and get back to enjoying your patio.
When a patio umbrella pole breaks, it can be frustrating and seem like the end of its usefulness. However, with just a bit of effort and some basic tools, you can breathe new life into your umbrella. Repairing the pole yourself is not only cost-effective but also an environmentally friendly alternative to disposing of the entire umbrella. Whether it’s a clean snap or a bent section, most common damages can be fixed at home, saving you both time and money.
Tools and Materials Needed
To successfully repair your patio umbrella pole, you will need the following tools and materials:
- Rubber mallet – for gently shaping or realigning bent sections.
- Hacksaw or pipe cutter – to trim broken or damaged areas if necessary.
- Metal tubing or dowel rod – to reinforce or replace the broken section of the pole.
- Drill and drill bits – for creating holes to secure the reinforcement.
- Screws or bolts – to fasten the reinforcing material securely in place.
- Measuring tape – to ensure proper alignment and fit.
- Metal file or sandpaper – to smooth sharp edges after cutting.
- Epoxy adhesive or strong glue – for extra reinforcement, if needed.
Having these tools and materials on hand will make the repair process straightforward and efficient.
How to Fix Broken Patio Umbrella Pole: A Step-by-Step Guide
Step 1: Assess the Damage and Gather Your Tools
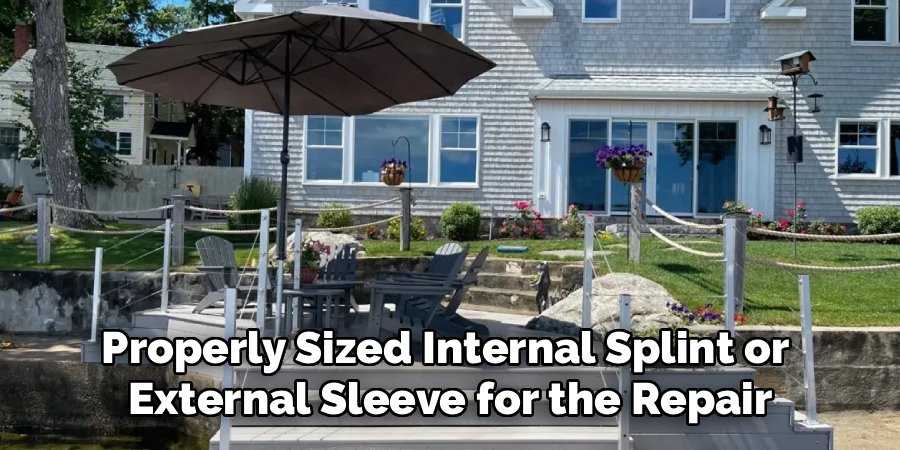
Before you can begin any repair, you must carefully examine the break. Is the pole cleanly snapped in two, or is it merely bent? The type of break will determine the best repair strategy. A clean snap is often easier to fix than a severely crimped or bent section. You will also need to measure the outer diameter of the pole to find a properly sized internal splint or external sleeve for the repair.
Once you understand the nature of the break, gather your tools. You will typically need a metal file, sandpaper, a strong two-part epoxy formulated for metal, a hacksaw, and a measuring tape. For the repair itself, you will need a piece of pipe or a solid rod that can act as a splint.
Step 2: Find a Suitable Splint
The core of this repair is reinforcing the break from the inside out. You need to find a piece of metal tubing or a solid rod that fits snugly inside your umbrella pole. This internal “splint” will bridge the broken section and provide the necessary structural integrity. Take your measurement of the pole’s inner diameter to a local hardware store.
Look for a steel pipe, a solid aluminum rod, or even a sturdy wooden dowel that has an outer diameter just slightly smaller than the inner diameter of your pole. The splint should be long enough to extend at least six inches on either side of the break to ensure maximum stability and support.
Step 3: Prepare the Broken Ends of the Pole
For the epoxy to create a strong bond, the surfaces of the break must be clean and rough. If the pole snapped cleanly, use a metal file to smooth out any sharp, jagged edges that could prevent the two pieces from fitting together flush. If the pole is bent, you may need to use a hacksaw to cut away the damaged, crimped section entirely, creating two clean ends.
Once the edges are neat, use coarse-grit sandpaper to thoroughly scuff up the inside surfaces of the pole for about six to seven inches on both sides of the break. This roughened texture gives the epoxy something to grip onto, creating a much stronger and more durable bond.
Step 4: Mix and Apply Epoxy
Now it is time to prepare your adhesive. A two-part epoxy is the best choice for this job, as it creates a waterproof, high-strength bond capable of withstanding outdoor conditions. Following the manufacturer’s instructions, squeeze out equal parts of the resin and the hardener onto a disposable surface like a piece of cardboard.
Mix them together thoroughly until the color is uniform. Using a popsicle stick or a small brush, liberally coat the entire outer surface of your internal splint with the mixed epoxy. You should also apply a generous layer of epoxy to the roughened inside surfaces of both broken pole pieces.
Step 5: Insert the Splint and Join the Pieces
This step requires you to work quickly before the epoxy begins to set. Carefully slide the epoxy-coated splint into one half of the broken pole, pushing it in until half of the splint remains exposed. Then, take the other half of the pole and slide it over the exposed end of the splint, pushing the two pieces firmly together until the broken edges meet flush.
As you push them together, some excess epoxy will likely squeeze out of the seam. This is a good sign, as it indicates you have complete coverage. Wipe away the excess adhesive immediately with a paper towel or a rag dampened with acetone.
Step 6: Clamp and Cure the Pole
The epoxy needs time to cure under pressure to achieve its maximum strength. To keep the pieces tightly joined, use C-clamps or wrap the repaired section tightly with duct tape or electrical tape. This pressure ensures that the two pole sections remain perfectly aligned and in firm contact with the internal splint as the adhesive hardens.
Check the epoxy’s packaging for the recommended curing time; this can range from several hours to a full 24 hours. It is crucial to be patient and let the epoxy cure completely. Do not try to move or use the umbrella before the full curing time has passed, as this could compromise the bond.
Step 7: Reinforce with an External Sleeve (Optional)
For added strength, especially on a heavily used or large umbrella, you can add an external sleeve over the repaired area. This is simply a piece of pipe with an inner diameter that is just slightly larger than the outer diameter of your umbrella pole. Cut a section of this pipe that is long enough to cover the break by a few inches on each side.
Slide it over the cured repair, center it over the break point, and secure it by drilling holes through the sleeve and pole and fastening it with bolts or metal screws. This external reinforcement provides an extra layer of protection against future bending or snapping at the same weak point.
The Repair Process
To begin the repair process, gather all necessary tools and materials, including a pipe sleeve, a drill, bolts or metal screws, a saw, and a wrench or screwdriver. Start by inspecting the damaged area of the umbrella pole to ensure it is clean and free of rust or debris. If needed, sand or wipe down the surface to prepare it for repair. Next, measure and cut the pipe sleeve so that it extends a few inches beyond the break on both sides.
Slide the sleeve over the damaged section, ensuring it is centered over the weak point. Once positioned, use the drill to create evenly spaced holes through both the pipe sleeve and the umbrella pole. Finally, secure the sleeve in place by inserting bolts or screws through the holes and tightening them firmly. This process not only restores the functionality of the umbrella pole but also reinforces the repair to prevent future damage.
Frequently Asked Questions (FAQ)
What Is the Best Adhesive to Use for This Repair?
A two-part marine-grade or industrial-strength epoxy is your best option. These adhesives are designed to bond strongly to metal and are completely waterproof once cured, making them perfect for outdoor furniture. Look for brands like J-B Weld or Gorilla Epoxy. Avoid using super glue or construction adhesives, as they do not have the shear strength required to hold the pole together under the stress of wind.
My Umbrella Pole Is Wood. Can I Still Fix It?
Yes, the same general principle applies to a wooden pole. Instead of a metal splint, you would use a solid wooden dowel that fits snugly inside the pole (if it is hollow) or use metal mending plates on the outside. For the adhesive, a high-quality waterproof wood glue combined with external screws or plates will create a strong, durable repair for a broken wooden umbrella pole.
Can I Fix a Bent Umbrella Pole Without Cutting It?
It depends on the severity of the bend. If it is only a slight bend, you may be able to gently straighten it by placing the bent section between two wooden blocks and carefully applying pressure. However, this often weakens the metal. For a sharp bend or a crimp, the metal is already fatigued and will likely break again. Cutting out the damaged section and using an internal splint is a much more reliable and long-lasting repair.
What if I Can’t Find a Splint That Fits Perfectly?
A snug fit is ideal, but you have options if it is not perfect. If the splint is slightly too small, you can wrap it with electrical tape or a thin metal shim to increase its diameter until it fits snugly inside the pole. This is known as “shimming.” If the splint is slightly too large, you will need to grind or sand it down until it fits. The goal is to eliminate as much wiggle room as possible before you add the epoxy.
How Can I Prevent My Umbrella Pole from Breaking Again?
Prevention is always the best strategy.
- Close It: Always close your patio umbrella when it is not in use, especially on windy days. An open umbrella acts like a sail and puts immense stress on the pole.
- Heavy Base: Ensure you are using a sufficiently heavy base for the size of your umbrella. A base that is too light can allow the umbrella to tip over in the wind, causing the pole to snap on impact.
Conclusion
A broken patio umbrella does not have to signal the end of its useful life or lead to an unnecessary expense. With a bit of DIY determination and the right materials, you can confidently mend a snapped or bent pole and restore your umbrella to its former glory. The process of assessing the damage, creating a strong internal splint, and using high-strength epoxy provides a durable, long-lasting solution.
This repair saves you money and gives you the satisfaction of fixing something with your own two hands. Now that you have a clear guide on how to fix broken patio umbrella pole, you are well-equipped to tackle this common problem and ensure your outdoor space remains a cool, comfortable retreat for many more sunny seasons to come.

About
Jovie Mathews is a backyard and outdoor expert writer with over 12 years of hands-on experience transforming neglected outdoor spaces into thriving gardens and functional retreats. Raised in a family where weekends meant digging in the soil and building raised beds from scratch, Jovie developed a genuine love for the outdoors long before it became a career.
She writes with a practical, no-fluff approach — always testing ideas in her own backyard before sharing them with readers. From composting systems and native plant selection to patio design and pest control, Jovie covers the full spectrum of backyard life with equal parts expertise and enthusiasm.
Education
B.Sc. in Horticulture Science
University of Florida (UF) · Gainesville, FL · 2014
IFAS College of Agricultural and Life Sciences
Minor in Environmental Studies
University of Florida (UF) · Gainesville, FL · 2014
College of Liberal Arts and Sciences
Areas of expertise
- Lawn & Garden Care
- Soil prep, planting, seasonal care
- Outdoor DIY Projects
- Raised beds, fencing, pathways
- Composting & Soil Health
- Organic methods, amendments
- Native Plants & Wildlife
- Pollinators, habitat gardening
When she is not writing, Jovie can be found testing new composting techniques, growing tomatoes in questionable quantities, or convincing her neighbors that clover lawns are actually a great idea. She currently gardens in the Pacific Northwest.