A concrete patio can transform your backyard into a functional and beautiful outdoor living space. It provides a durable, low-maintenance surface perfect for entertaining guests, grilling, or simply relaxing. While the project might seem intimidating, learning how to construct a concrete patio is an achievable goal for a determined DIY enthusiast.
With the right tools, materials, and a clear plan, you can create a professional-looking patio that will add value to your home and provide enjoyment for years to come. This guide will walk you through every step of the process, from initial planning to the final finishing touches.
Why Build Your Own Concrete Patio?
Creating your own outdoor space is a rewarding experience that offers more than just a place to set up furniture. Building a concrete patio yourself gives you complete creative control over the size, shape, and finish. You can design it to perfectly complement your home’s architecture and your landscaping. Beyond the customization, the cost savings can be significant compared to hiring a professional contractor. This project is an excellent way to develop valuable new skills, from excavation and form-building to mixing and finishing concrete. The sense of accomplishment you’ll feel when you’re finished is a benefit you can’t put a price on.
9 Step-by-Step Guide: How to Construct a Concrete Patio
Step 1: Design and Plan Your Patio
Before you break ground, a solid plan is essential. Determine the exact size, shape, and location of your new patio. Consider factors like sun exposure, proximity to the house, and how you intend to use the space. Use stakes and string to outline the proposed area in your yard, which helps visualize the final result.
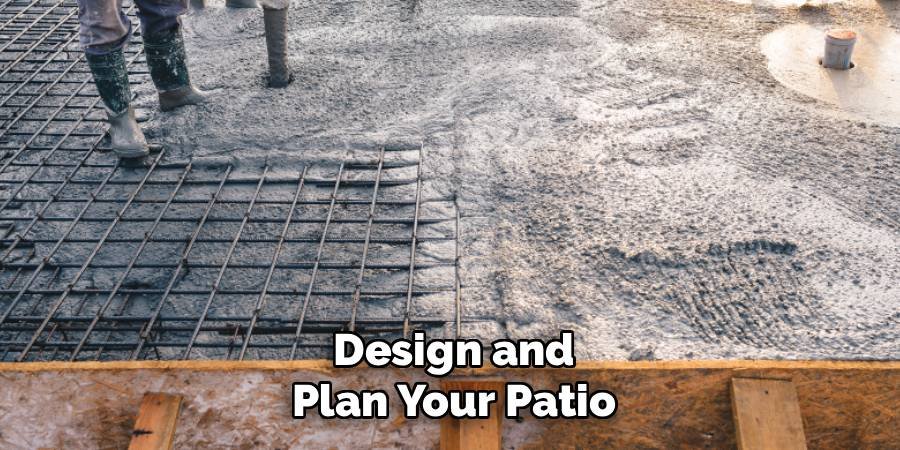
This is also the time to calculate the amount of materials you will need. You’ll need to figure out the volume of gravel for the sub-base and the cubic yards of concrete required. Proper planning at this stage prevents costly mistakes and ensures a smoother construction process.
Step 2: Excavate the Area
Once your design is finalized, it’s time to start digging. Using your staked outline as a guide, excavate the patio area to a depth of about 8 inches. This depth accommodates a 4-inch layer of gravel sub-base and a 4-inch slab of concrete. It is crucial to ensure the excavated area is level and has a slight slope away from your house foundation—a grade of about one-quarter inch per foot is standard. This slope ensures proper water drainage, preventing pooling on the patio or water damage to your home. A shovel and wheelbarrow are all you need for smaller patios.
Step 3: Build and Set the Forms
The forms act as a mold for your wet concrete, defining the patio’s final shape and edges. Use 2×4 lumber to construct a sturdy frame around the perimeter of the excavated area. Secure the boards together at the corners with screws. Drive wooden stakes into the ground every few feet along the outside of the frame to hold it firmly in place, ensuring it won’t bow under the pressure of the concrete. Use a level to check that the tops of the forms are even and maintain the drainage slope you established during excavation.
Step 4: Add and Compact the Gravel Sub-base
A stable sub-base is critical for a long-lasting concrete patio. Fill the area inside the forms with a 4-inch layer of all-purpose gravel or crushed stone. Spread the gravel evenly with a rake.
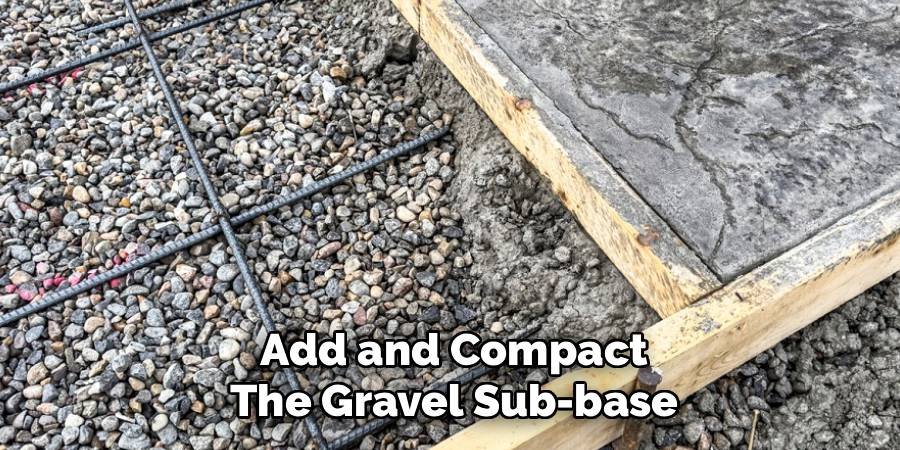
This layer provides essential support for the concrete slab and promotes good drainage, which helps prevent cracking caused by ground frost in colder climates. Once the gravel is spread, you must compact it thoroughly. For best results, rent a power tamper (also called a plate compactor) to create a solid, firm base. A compacted base prevents the slab from settling and cracking over time.
Step 5: Install Reinforcement
To add strength and crack resistance to your patio, you should add steel reinforcement. There are two common options: wire mesh or rebar. Lay the wire mesh over the compacted gravel, cutting it to fit inside the forms. Use small concrete blocks or plastic “chairs” to elevate the mesh so it sits in the middle of the concrete slab’s thickness, not on the bottom. If using rebar, lay the steel rods in a grid pattern with about 2-foot spacing and tie the intersections together with wire. This reinforcement will significantly improve the structural integrity of your patio. This is a key step in learning how to construct a concrete patio that lasts.
Step 6: Mix and Pour the Concrete
Now for the main event: pouring the concrete. For smaller patios, you can mix bags of concrete mix in a wheelbarrow or a rented mixer. For larger projects, ordering ready-mix concrete delivered by a truck is a much more practical option.
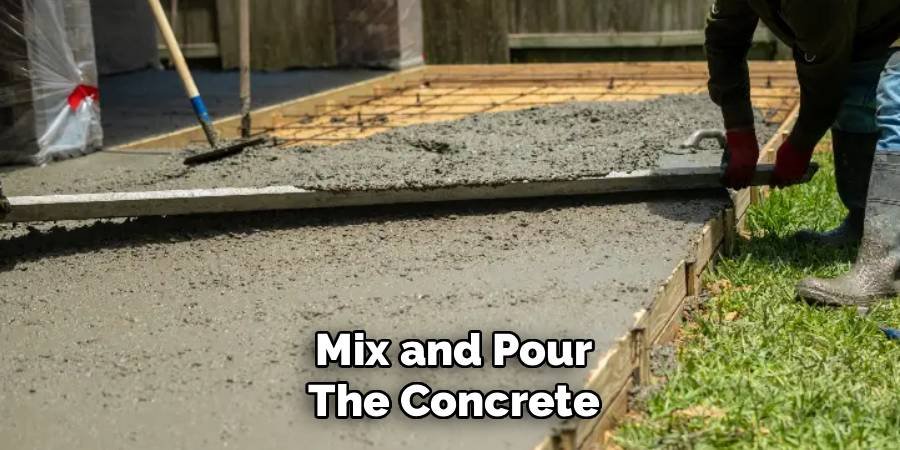
Have friends ready to help, as you’ll need to work quickly once the concrete arrives. Start pouring in one corner and work your way across the forms. Use a shovel or rake to spread the concrete evenly, making sure it fills all corners and is slightly higher than the tops of the forms.
Step 7: Screed and Float the Concrete
Immediately after pouring, you need to level the surface. This process is called screeding. Take a long, straight 2×4 board and rest it across the tops of the forms. Work with a partner to slide the board back and forth in a sawing motion, pulling it toward you to level the concrete and scrape off any excess. After screeding, use a bull float—a long-handled tool with a large, flat blade—to smooth the surface further. Pushing the float away from you and pulling it back embeds the coarse aggregate and brings a layer of cement “cream” to the top.
Step 8: Edge and Finish the Surface
After floating the concrete and letting it firm up slightly—when your finger leaves only a small indent—it’s time for finishing. Use an edging tool to create a rounded, clean edge along the inside of the forms. This prevents the edges from chipping later.
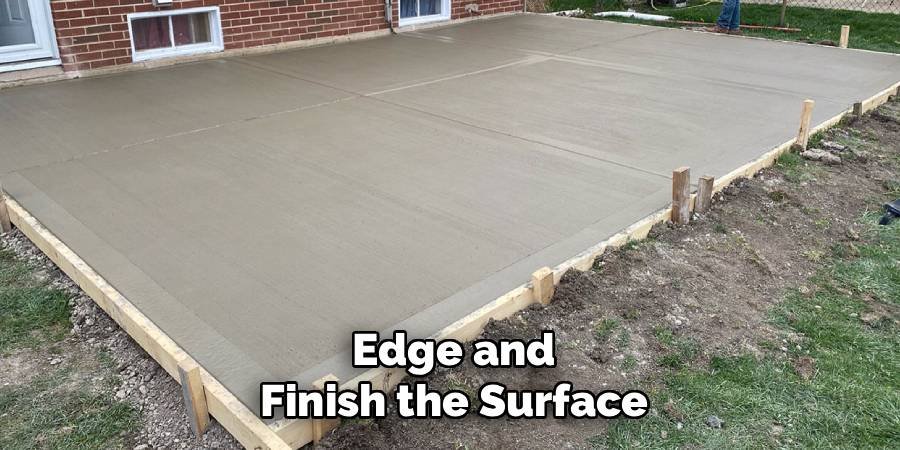
If you want control joints to help manage cracking, use a grooving tool and a straightedge to press lines into the slab every 8-10 feet. For a non-slip surface, use a concrete broom to lightly drag across the slab, creating a fine-textured finish. Be sure to pull the broom in one continuous direction for a uniform look.
Step 9: Cure the Concrete
Curing is perhaps the most critical step for achieving strong, durable concrete, yet it is often overlooked. Freshly poured concrete needs to retain its moisture to cure properly, a chemical process called hydration. To cure your new patio, cover it with plastic sheeting or use a liquid membrane-forming curing compound.
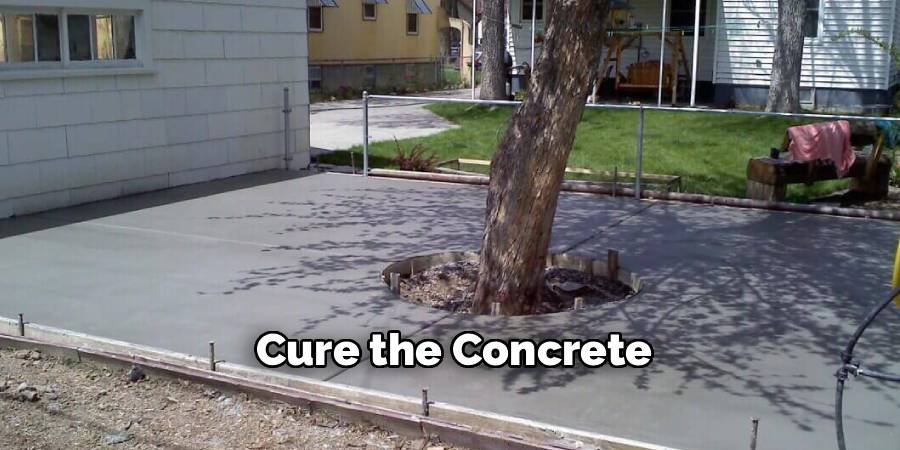
For the first week, you can also mist the surface with water several times a day to keep it damp. Proper curing significantly reduces the chances of surface cracking and ensures the slab reaches its maximum strength. Wait at least 24 hours before walking on it and several days before placing heavy furniture.
Frequently Asked Questions
How Thick Should a Concrete Patio Be?
For a standard residential patio intended for foot traffic, patio furniture, and a grill, a thickness of 4 inches is sufficient. This depth provides the necessary strength and durability for everyday use. If you plan to place extremely heavy objects on the patio, such as a large hot tub or an outdoor kitchen structure, you might consider increasing the thickness to 5 or 6 inches and adding more rebar for extra support.
Do I Need a Permit to Build a Concrete Patio?
Permit requirements vary significantly by location. Many municipalities do not require a permit for a simple on-grade patio that is not attached to the house foundation or covered by a roof. However, it’s always best to check with your local building department before starting your project. They can provide definitive information on permits, setback requirements from property lines, and any other local regulations you need to follow.
What Is the Best Time of Year to Pour a Concrete Patio?
The ideal conditions for pouring concrete are mild and dry. Spring and fall are generally the best seasons, as temperatures are moderate (between 50°F and 80°F). Pouring in extreme heat can cause the concrete to set too quickly and crack, while pouring in freezing temperatures can ruin the concrete’s strength. If you must pour in hot weather, do it early in the morning and keep the surface moist during curing.
Can I Add Color to My Concrete Patio?
Yes, you can absolutely add color to your concrete. One of the most common methods is to add integral color pigment to the concrete mix before you pour. This colors the entire slab, so any future chips will not reveal plain gray concrete. Another option is to use a color hardener, which is a powder broadcasted onto the surface of the wet concrete and troweled in. You can also use stains or dyes after the concrete has fully cured.
How Do I Prevent Weeds From Growing Through a Concrete Patio?
Proper site preparation is the key to preventing weeds. The combination of a thoroughly excavated area, a thick layer of compacted gravel sub-base, and a 4-inch concrete slab creates an impenetrable barrier. Weeds cannot grow through this solid construction. Any weeds that appear on the patio surface will have grown from seeds that blew into the expansion joints or small surface cracks, and these can be easily removed or treated.
Conclusion
Building your own backyard patio is a project that delivers immense satisfaction and lasting value. By following these steps carefully, you can successfully create a durable and attractive outdoor space for you and your family to enjoy. From planning the design and preparing the ground to pouring and finishing the slab, each stage is a crucial part of the process. While it requires hard work and attention to detail, learning how to construct a concrete patio is a rewarding investment in your home and your DIY skills. Now you have the knowledge to get started and build the patio of your dreams.
About
Jovie Mathews is a backyard and outdoor expert writer with over 12 years of hands-on experience transforming neglected outdoor spaces into thriving gardens and functional retreats. Raised in a family where weekends meant digging in the soil and building raised beds from scratch, Jovie developed a genuine love for the outdoors long before it became a career.
She writes with a practical, no-fluff approach — always testing ideas in her own backyard before sharing them with readers. From composting systems and native plant selection to patio design and pest control, Jovie covers the full spectrum of backyard life with equal parts expertise and enthusiasm.
Education
B.Sc. in Horticulture Science
University of Florida (UF) · Gainesville, FL · 2014
IFAS College of Agricultural and Life Sciences
Minor in Environmental Studies
University of Florida (UF) · Gainesville, FL · 2014
College of Liberal Arts and Sciences
Areas of expertise
- Lawn & Garden Care
- Soil prep, planting, seasonal care
- Outdoor DIY Projects
- Raised beds, fencing, pathways
- Composting & Soil Health
- Organic methods, amendments
- Native Plants & Wildlife
- Pollinators, habitat gardening
When she is not writing, Jovie can be found testing new composting techniques, growing tomatoes in questionable quantities, or convincing her neighbors that clover lawns are actually a great idea. She currently gardens in the Pacific Northwest.