You might believe that rock collecting requires expensive travel to distant mountain ranges or desert canyons, but a fascinating world of geology is often waiting right outside your door. Many homeowners walk over incredible mineral specimens every day without ever realizing what lies just beneath the grass.
From quartz crystals to fossilized coral, the soil around your home can hold surprising secrets left behind by glaciers, rivers, or human activity from decades past. Rockhounding is an accessible, inexpensive hobby that connects you with nature and history simultaneously.
It turns a simple afternoon of gardening or landscaping into an exciting treasure hunt suitable for all ages. Whether you live in a rocky region or a suburban development, patience and observation are your best tools.
This guide is designed to teach you exactly how to find cool rocks in your backyard, transforming your own property into a personal excavation site filled with potential discoveries.
Why Look for Rocks in Your Backyard?
Searching for rocks in your backyard is more than just a pastime—it’s an opportunity to connect with the natural world and uncover hidden treasures right beneath your feet. Rocks can tell stories about the geological history of your region, offering a fascinating glimpse into the past.
Beyond their educational value, rock hunting can spark creativity, whether you’re starting a collection, crafting decorations, or identifying unique formations.
It’s an activity that fosters curiosity, encourages mindfulness, and can be enjoyed alone or shared with family and friends. Plus, it requires minimal equipment, making it an accessible and rewarding hobby for everyone.
7 Step-by-Step Guide: How to Find Cool Rocks in Your Backyard
Step 1: Research Your Local Geology
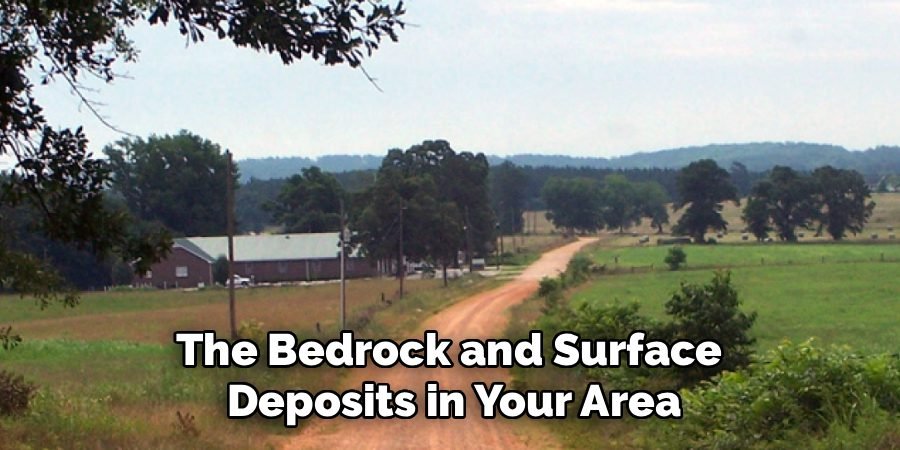
Before you start digging holes, it helps to know what you might actually encounter. Every region has a specific geological history that dictates the types of stones present in the soil. You can look up geological maps of your county online or visit a local library to find information about the bedrock and surface deposits in your area.
For instance, if you live in an area shaped by glaciers, you might find “glacial erratics”—stones carried from hundreds of miles away. Understanding the difference between sedimentary, igneous, and metamorphic environments helps you set realistic expectations.
This knowledge doesn’t just help you identify finds; it tells you where to look, such as near natural waterways or construction fill, making the process of learning how to find cool rocks in your backyard much more efficient and rewarding.
Step 2: Scout After Heavy Rainstorms
Timing is everything when it comes to surface collecting. One of the best times to inspect your property is immediately after a heavy rainfall. Water is a rockhound’s best friend because it washes away the top layer of dust, mud, and debris that often obscures the true colors and textures of stones.
Furthermore, the water makes many minerals shine, catching the sunlight and drawing your eye to specimens that would otherwise look like dull, gray lumps. Walk slowly along drip lines under your roof, near downspouts, or in natural drainage ditches where water flows.
The erosion caused by the rain can also expose new layers of dirt, bringing fresh material to the surface. This simple strategy of waiting for the right weather is a crucial technique for spotting interesting specimens without needing to dig deep.
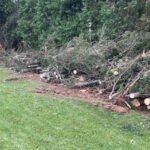
Step 3: Inspect Areas of Erosion and Disturbance
Nature and human activity often do the hard work of excavation for you. Look for areas on your property where the earth is naturally exposed or has been recently disturbed. The roots of overturned trees are goldmines for collectors because they pull up rocks from deeper soil layers that you wouldn’t normally see.

similarly, check along the banks of any creeks, streams, or dried-up riverbeds running through your land. Water naturally sorts stones by weight and size, often depositing heavier, interesting minerals in gravel bars. If you have a garden, check the soil you turn over during spring planting.
Even construction sites or areas where a fence post was recently dug can reveal hidden treasures. focusing on these disturbed zones allows you to bypass the sod and topsoil to access the rocky layers beneath.
Step 4: Utilize the Right Screening Tools
Sometimes the best specimens are too small to spot easily with the naked eye amidst a pile of dirt. To maximize your efficiency, consider building or buying a simple sieve or screen. This involves taking a shovel full of loose dirt or gravel and shaking it through a mesh frame.
The loose soil falls through, leaving only the rocks and pebbles behind for inspection. You can use different mesh sizes to filter out larger stones first and then examine the smaller gravel. This technique is particularly effective if you are looking for small crystals, shark teeth, or arrowheads.
Washing the contents of the screen with a hose reveals the true nature of the material instantly. Using a screen is a professional method that significantly increases your chances of success when you are figuring out how to find cool rocks in your backyard excavation sites.
Step 5: Clean and Test Your Finds
Once you have collected a bucket of potential candidates, the real discovery process begins at your cleaning station. Many “boring” rocks are actually stunning specimens covered in years of clay and oxidation. Scrub your finds with an old toothbrush and warm, soapy water to remove the grime.

For tougher encrustations, a soak in vinegar can help dissolve calcium deposits, though you should test this on a small area first as it can damage some minerals. After cleaning, inspect the stones with a magnifying glass. You can perform simple hardness tests using a steel nail or a piece of glass to determine what you have found.
A rock that scratches glass might be quartz, while a soft stone could be calcite. This processing phase turns a muddy bucket of debris into a curated collection of beautiful objects.
Step 6: Identify Through Comparison
Now that your rocks are clean, the next step is identification. This is where your initial research comes full circle. Use field guides, rock identification apps, or online forums to compare your specimens with known minerals from your region.
Look for specific characteristics like cleavage (how the rock breaks), luster (how it reflects light), and crystal habit. Don’t be discouraged if you can’t identify everything immediately; even experts get stumped.
Joining a local rock and gem club can be invaluable, as seasoned members can often tell you exactly what you have found just by looking at a photo. Labeling your finds with the date and location adds a scientific element to your hobby.
This step transforms you from a mere collector into an amateur geologist, deepening your appreciation for the natural history of your own home.
Step 7: Create a Display or Rock Garden
The final step in your backyard geology adventure is deciding what to do with your treasures. Rather than letting them gather dust in a box, curate your best finds into a display. Small, high-quality crystals or fossils deserve a spot on a shelf or in a shadow box where they can be admired.
Larger, rugged stones can be returned to the yard as part of a deliberate rock garden or decorative border. You can even use a rock tumbler to polish harder stones like agates or jaspers into smooth, gem-like keepsakes. Integrating your finds back into your living space or landscape completes the cycle.
It serves as a constant reminder of the beauty hidden in plain sight and encourages visitors to ask questions, sparking conversations about the natural world right outside your window.
Frequently Asked Questions (FAQ)
What Are the Most Common Rocks Found in Backyards?
The types of rocks you find depend heavily on your location, but a few are widespread.
- Quartz: This is one of the most common minerals on Earth, often appearing as white, milky, or clear stones.
- Sedimentary Rocks: Limestone, sandstone, and shale are very common, often containing fossils.
- Igneous Rocks: Granite and basalt are frequently found, especially in areas with past volcanic activity or glacial movement.
- Man-made “Rocks”: You might also find slag (glassy byproduct of smelting) or concrete chunks that have been tumbled smooth over time.
Is It Legal to Keep Rocks I Find?
If you are digging on your own private property, you generally own whatever rocks and minerals you find to a certain depth. However, laws can vary regarding mineral rights versus surface rights.
- Private Property: You are usually safe to keep surface finds and shallow digs.
- Renters: If you rent, you should technically ask the landlord before digging holes or removing landscaping features.
- Artifacts: If you find Native American artifacts (arrowheads, pottery) or human remains, specific laws apply, and you should contact local authorities or archaeologists.
Do I Need Expensive Equipment to Start?
No, you do not need expensive gear to start rockhounding in your yard.
- Basics: A sturdy garden trowel or shovel, a bucket, and an old toothbrush for cleaning are all you need to begin.
- Safety: Gloves are recommended to protect your hands from sharp edges and glass.
- Upgrades: As you get more serious, you might invest in a geologist’s hammer, a loupe (magnifying glass), or a rock tumbler, but these are not required for beginners.
How Can I Tell if a Rock Is Valuable?
Value is subjective in rock collecting, but there are clues.
- Rarity: Unusual colors, perfect crystal formations, or identifiable fossils generally make a rock more desirable.
- Hardness and Durability: Gemstones are typically hard and durable (scratch-resistant).
- Clarity: Translucent or transparent stones are often more prized than opaque ones.
- Market: While most backyard finds won’t make you rich, finding a large agate, a geode, or a pristine fossil can have monetary value to collectors.
Can I Find Geodes in My Backyard?
It is possible, though it depends on your geography.
- Location: Geodes are most common in desert regions, volcanic ash beds, or limestone deposits (like in the Midwest US).
- Appearance: On the outside, geodes often look like lumpy, round, ordinary rocks (resembling cauliflower). They are usually lighter in weight than solid rocks of the same size.
- Verification: The only way to know for sure is to crack them open with a hammer or cut them with a rock saw to reveal the hollow, crystal-filled center.

Conclusion
Embarking on a geological survey of your own property is a rewarding pursuit that combines exercise, education, and the thrill of discovery. It shifts your perspective, encouraging you to look closer at the environment you inhabit every day.
By researching your local history, utilizing water and screening tools, and learning to identify your finds, you can build an impressive collection without ever leaving your property line. The stones you uncover tell a story that spans millions of years, connecting you to the ancient forces that shaped the earth beneath your home.
Whether you find a sparkling quartz crystal or a fascinating fossil, the real treasure is the curiosity and joy the process brings. Now that you understand how to find cool rocks in your backyard, grab your trowel and step outside—the next great discovery might be just a few inches beneath the grass.
About
Jovie Mathews is a backyard and outdoor expert writer with over 12 years of hands-on experience transforming neglected outdoor spaces into thriving gardens and functional retreats. Raised in a family where weekends meant digging in the soil and building raised beds from scratch, Jovie developed a genuine love for the outdoors long before it became a career.
She writes with a practical, no-fluff approach — always testing ideas in her own backyard before sharing them with readers. From composting systems and native plant selection to patio design and pest control, Jovie covers the full spectrum of backyard life with equal parts expertise and enthusiasm.
Education
B.Sc. in Horticulture Science
University of Florida (UF) · Gainesville, FL · 2014
IFAS College of Agricultural and Life Sciences
Minor in Environmental Studies
University of Florida (UF) · Gainesville, FL · 2014
College of Liberal Arts and Sciences
Areas of expertise
- Lawn & Garden Care
- Soil prep, planting, seasonal care
- Outdoor DIY Projects
- Raised beds, fencing, pathways
- Composting & Soil Health
- Organic methods, amendments
- Native Plants & Wildlife
- Pollinators, habitat gardening
When she is not writing, Jovie can be found testing new composting techniques, growing tomatoes in questionable quantities, or convincing her neighbors that clover lawns are actually a great idea. She currently gardens in the Pacific Northwest.