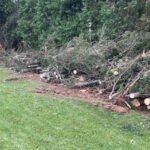
Looking out at a backyard choked with vines, saplings, and dense underbrush can feel incredibly daunting. What could be a beautiful garden, a play area for kids, or a relaxing patio currently looks more like an impenetrable jungle.
Many homeowners inherit properties where nature has reclaimed the land, leaving them unsure of where to even begin. While hiring a professional landscaping crew is always an option, the cost can be prohibitive for many budgets.
The good news is that with the right plan, some sweat equity, and proper safety measures, tackling this project yourself is entirely achievable. It transforms from an overwhelming burden into a rewarding journey of uncovering the potential hidden on your property.
This guide is designed to walk you through how to clear a wooded backyard safely and effectively, helping you strip away the chaos to reveal the blank canvas waiting underneath. By breaking the process down into manageable chunks, we will help you reclaim your land without losing your mind.
Step-by-Step Guide: How to Clear a Wooded Backyard
Step 1: Assess the Territory and Mark Boundaries
Before you start cutting, you need a clear understanding of the landscape you are dealing with. Walk the perimeter of your property to identify property lines, as you definitely do not want to accidentally clear your neighbor’s trees.

During this inspection, look for hazards such as large rocks, hidden holes, or old wire fencing that could damage your equipment. It is also crucial to identify which trees and shrubs you want to keep. Mark these “keeper” plants clearly with bright flagging tape or spray paint so they do not become casualties of your clearing efforts.
This initial reconnaissance phase helps you formulate a strategic plan, determining where to start and where you will pile the debris. Taking time to survey the land prevents costly mistakes and ensures you are only removing what is necessary.
Step 2: Gather the Right Safety Gear and Tools
Clearing land is physically demanding and potentially dangerous work, so proper protection is non-negotiable. You must equip yourself with heavy-duty work gloves, eye protection, and sturdy boots to protect against thorns, falling branches, and flying debris.
Long pants and long sleeves are essential to guard your skin against poison ivy and insect bites. In terms of tools, you will need a mix of hand tools and power equipment depending on the density of the growth. A sharp pair of loppers and a hand saw are great for small saplings, while a chainsaw is necessary for larger trees.
A string trimmer with a brush cutter attachment is invaluable for slicing through thick weeds. Having the right arsenal ready before you begin the physical labor of learning how to clear a wooded backyard makes the job significantly safer and more efficient.
Step 3: Remove Underbrush and Small Vegetation First
The most effective strategy is to work from the ground up, clearing the smallest vegetation first to gain access to the larger trees. Start by using a brush cutter or a heavy-duty weed whacker to take down tall grasses, weeds, and brambles.

This clears your line of sight and removes tripping hazards, making the workspace safer for the heavier work to follow. Focus on clearing a specific zone completely before moving to the next, rather than jumping around the yard. Pile this lighter debris into a designated area immediately to keep your workspace clean.
By tackling the undergrowth first, you expose the trunks of saplings and larger trees, allowing you to assess their condition and determine the best felling direction without fighting through a tangle of vines.
Step 4: Cut Down Saplings and Small Trees
Once the ground level is relatively clear, move on to removing saplings and small trees that are less than a few inches in diameter. A pair of high-quality loppers or a bow saw will handle the smaller stems easily. For slightly thicker trunks, a chainsaw or a reciprocating saw with a pruning blade works wonders.
When cutting these down, aim to cut the stump as flush to the ground as possible if you plan to mow over the area later. If you leave sharp, protruding stumps (punji sticks), they become major hazards for both people and tires.
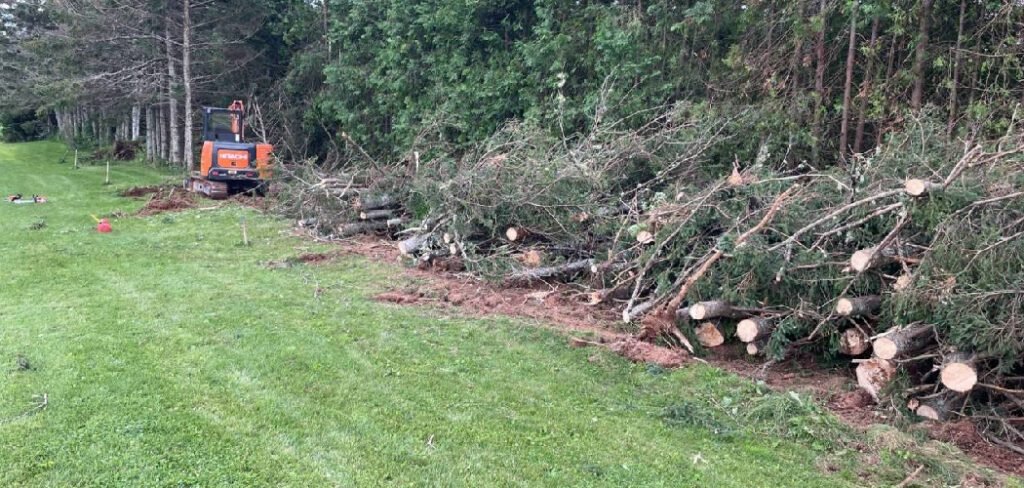
Drag these cut trees to your brush pile immediately. This stage makes a dramatic visual difference, opening up the canopy and letting light flood into the area, which is a huge morale booster during the process.
Step 5: Tackle Larger Trees with Caution
Felling large trees is the most dangerous part of the process and requires extreme caution. If a tree is significantly tall or located near your home or power lines, it is safer to hire a professional arborist. For manageable trees, determine the natural lean of the trunk and plan your escape route before making a single cut.
Use the proper notching technique—cutting a wedge on the side you want the tree to fall towards, followed by a back cut. Never work alone during this phase; always have a spotter who can watch for falling limbs.

Once the tree is down, limb it by removing the branches before cutting the trunk into manageable firewood or logs. This systematic approach ensures that even the heaviest work is handled with precision and safety.
Step 6: Remove or Grind the Stumps
After the vegetation is gone, you are left with the stumps, which are often the most stubborn part of the cleanup. For small saplings, you can often dig around the root ball with a mattock and shovel to pry them out manually.
However, for larger stumps, manual removal is back-breaking work. renting a stump grinder is often the most efficient solution. This machine chews the wood down well below the soil surface, turning the stump into mulch.
Alternatively, you can drill holes in the stump and use a chemical stump remover to accelerate decomposition, though this takes months. Dealing with the root systems effectively is a critical part of the process when figuring out how to clear a wooded backyard for future landscaping or lawn installation.
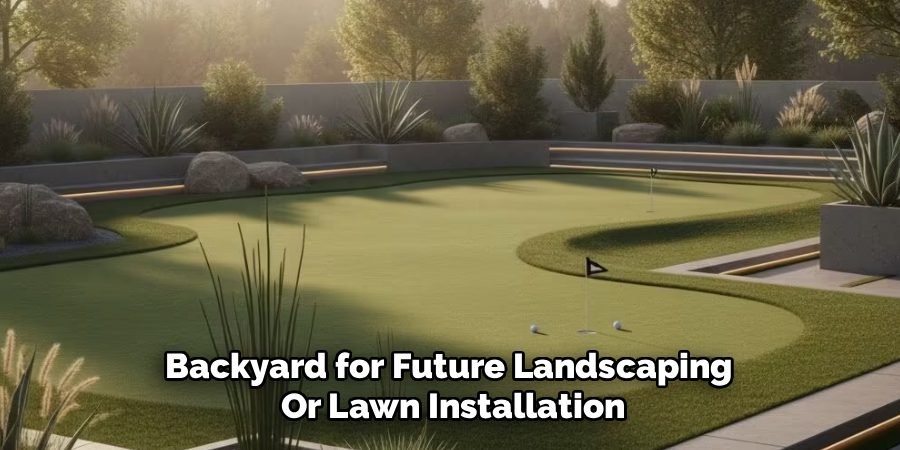
Step 7: Grade and Prepare the Soil
With the clearing and stump removal complete, you will likely be left with uneven ground full of holes, wood chips, and disturbed soil. The final step is to smooth out the land to prepare it for its new purpose. Use a heavy-duty garden rake or rent a small tiller to break up compacted soil and mix in the organic matter from the stump grinding.
Fill in any holes left by root removal with topsoil to prevent future settling. If you plan to plant grass seed, this is the time to grade the surface so that water flows away from your home’s foundation. This preparation phase is the bridge between a construction site and a usable backyard, setting the stage for whatever green oasis you plan to build next.
Frequently Asked Questions (FAQ)
Do I Need a Permit to Clear My Backyard?
It depends heavily on your local regulations and the scope of the work.
- Tree Protection Ordinances: Many cities have strict rules about removing trees over a certain diameter or specific species, even on private property.
- Wetlands: If your property contains designated wetlands or is near a body of water, federal or state environmental protections likely apply.
- HOA Rules: If you live in a community with a Homeowners Association, check their bylaws regarding tree removal and landscaping changes.
Always check with your local building or zoning department before you start cutting down large trees.
What Is the Best Time of Year to Clear Land?
Late autumn and winter are generally considered the best times for this type of heavy work.
- Visibility: With the leaves gone, it is much easier to see the terrain, identify hazards, and spot poison ivy vines.
- Temperature: Physical labor is safer and more comfortable in cooler weather compared to the heat of summer.
- Pests: Stinging insects like bees and wasps, as well as mosquitoes, are dormant during the colder months.
- Dormancy: Plants are dormant, making the wood slightly drier and lighter to haul.
How Should I Dispose of All the Brush and Debris?
You have several options for getting rid of the massive pile of organic waste you will generate.
- Wood Chipper: Renting a wood chipper allows you to turn branches and brush into nutrient-rich mulch for your garden.
- Burning: If your local laws permit it, burning the brush pile is effective, but requires strict safety precautions and a burn permit.
- Hauling: You can rent a dumpster or hire a junk removal service to haul it away, though this is the most expensive option.
- Composting: creating a dedicated brush pile in a hidden corner for wildlife habitat and natural decomposition is an eco-friendly choice.
How Do I Identify Poison Ivy Before Clearing?
Identifying toxic plants is crucial to avoid a painful rash.
- The Rhyme: Remember “Leaves of three, let it be.” Poison ivy typically has clusters of three leaflets.
- Vines: In winter, look for “hairy” vines clinging to tree trunks; these are often poison ivy vines and are still toxic even without leaves.
- Roots: Be aware that the roots contain urushiol oil as well, so handle them with care.
- Disposal: Never burn poison ivy, as the smoke can carry the oil into your lungs and cause severe respiratory issues.
Can I Use Goats to Clear My Yard?
Yes, renting goats is an increasingly popular and eco-friendly method for clearing underbrush.
- Efficiency: Goats are voracious eaters and can clear dense thickets, including poison ivy and brambles, that are difficult for humans to reach.
- Terrain: They are excellent for uneven or rocky terrain where machinery cannot go.
- limitations: They will eat everything, including plants you might want to save, so they need to be fenced in carefully. They also do not remove trees or stumps, only the leafy vegetation.

Conclusion
Reclaiming a wooded backyard is a labor of love that demands patience, physical effort, and a solid strategy. It is not a project that happens in a single afternoon, but rather a transformation that unfolds step by step.
By methodically assessing the land, prioritizing safety, and working from the smallest brush up to the largest stumps, you can convert an overgrown tangle into a valuable asset for your home. The sense of accomplishment you feel when you look out over your newly cleared space is unmatched.
Whether you envision a lush lawn, a vegetable garden, or simply a safe place for family gatherings, the effort is worth the reward. Now that you are equipped with the knowledge of how to clear a wooded backyard, it is time to put on your gloves, fire up the tools, and start uncovering the potential of your property.
About
Jovie Mathews is a backyard and outdoor expert writer with over 12 years of hands-on experience transforming neglected outdoor spaces into thriving gardens and functional retreats. Raised in a family where weekends meant digging in the soil and building raised beds from scratch, Jovie developed a genuine love for the outdoors long before it became a career.
She writes with a practical, no-fluff approach — always testing ideas in her own backyard before sharing them with readers. From composting systems and native plant selection to patio design and pest control, Jovie covers the full spectrum of backyard life with equal parts expertise and enthusiasm.
Education
B.Sc. in Horticulture Science
University of Florida (UF) · Gainesville, FL · 2014
IFAS College of Agricultural and Life Sciences
Minor in Environmental Studies
University of Florida (UF) · Gainesville, FL · 2014
College of Liberal Arts and Sciences
Areas of expertise
- Lawn & Garden Care
- Soil prep, planting, seasonal care
- Outdoor DIY Projects
- Raised beds, fencing, pathways
- Composting & Soil Health
- Organic methods, amendments
- Native Plants & Wildlife
- Pollinators, habitat gardening
When she is not writing, Jovie can be found testing new composting techniques, growing tomatoes in questionable quantities, or convincing her neighbors that clover lawns are actually a great idea. She currently gardens in the Pacific Northwest.