

Foraging for wild food or harvesting from your own garden is one of the most rewarding experiences for a nature lover, but the prickly pear cactus demands a unique level of respect. These vibrant fruits, known as tunas, offer a sweet, watermelon-like flavor that is absolutely delicious, provided you pick them at the peak of perfection. However, harvesting too early results in a bland, sour disappointment, while waiting too long can leave you with a mushy mess.
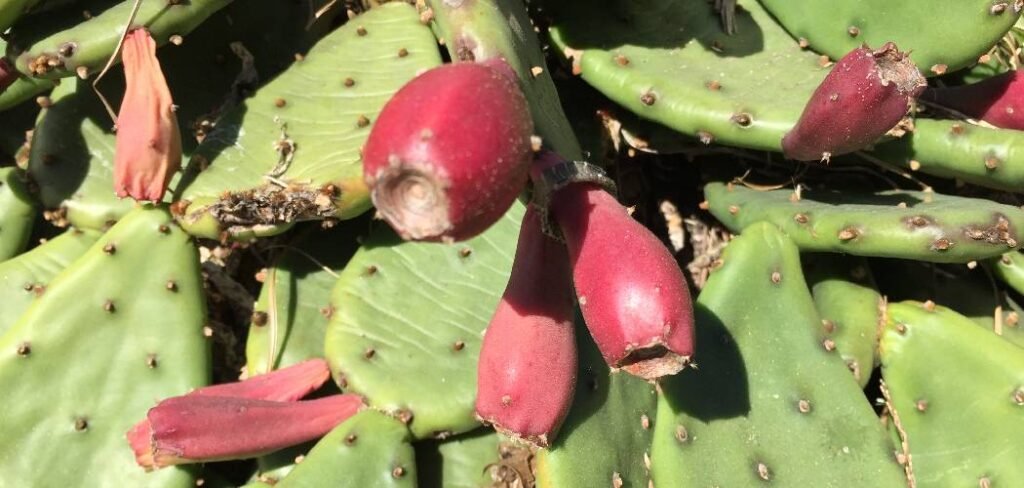
The challenge lies in navigating the formidable defenses of the cactus while accurately judging the fruit’s maturity. Many beginners make the mistake of relying solely on size, which is often misleading. To ensure you get that perfect, sugary reward, learning how to tell if a prickly pear is ripe is essential. This guide will walk you through the subtle signals nature provides so you can harvest with confidence and safety.
The Importance of Perfect Timing in Prickly Pear Harvesting
Understanding why ripeness matters goes beyond just flavor; it is about texture, nutritional value, and the ease of processing the fruit. Prickly pears are unique because they do not continue to ripen significantly once they are pulled from the cactus pad, or cladode. Unlike bananas or avocados that can soften on your kitchen counter, the sugar content in a prickly pear is determined the moment you sever it from the plant. If you pick it green or hard, it will remain that way, offering a tart and often unpalatable experience that can discourage you from trying again.
Furthermore, the physical act of harvesting is safer when the fruit is fully mature. A ripe prickly pear has a weaker connection to the mother pad, meaning it requires less force to remove. This is crucial when your hands are near thousands of tiny, hair-like spines called glochids. When the fruit is ready, it practically yields itself to you, minimizing the twisting and pulling that often leads to accidental contact with the cactus spines. Waiting for the right moment ensures you get the highest concentration of antioxidants, the best culinary versatility for syrups or jams, and a harvest experience that doesn’t end in painful splinters.
8 Step-by-Step Guide on How to Tell if a Prickly Pear Is Ripe
Step 1: Observing the Skin Color Transformation
The most visually apparent indicator of maturity is a dramatic shift in the skin color of the fruit. Most prickly pear varieties start as green nodules that blend in perfectly with the cactus pads. As they mature, they transition into vibrant shades of deep ruby red, magenta, bright orange, or even yellow, depending on the specific species you are growing. You must look for a complete saturation of color across the entire surface of the fruit. If you see patches of green lingering near the base or the top, the sugars likely haven’t fully developed yet.
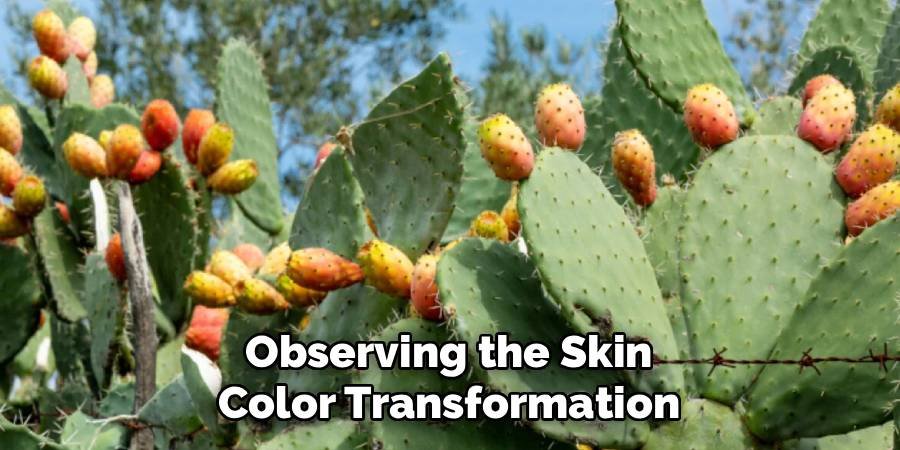
However, color alone can sometimes be tricky if you don’t know your specific variety. Some species, like the Opuntia ficus-indica, might ripen to a yellow-green or a pale orange rather than a deep red. It is important to observe the plant throughout the season to understand its specific color cycle. A fully ripe fruit will have a rich, duller finish rather than a shiny, waxy green sheen. When the color looks deep and opaque, it is your first strong signal that the fruit is ready for further inspection.
Step 2: Checking the Glochids and Spines
A fascinating biological change occurs as the fruit reaches its peak maturity regarding its defenses. The tiny, hair-like spines known as glochids, as well as the larger spines, tend to spread out or even shed slightly as the fruit swells to its maximum size. On an immature fruit, the glochid tufts are often tightly packed and very dense. As the skin stretches with the influx of water and sugar, the distance between these spine clusters increases, making the fruit look fuller and less armored, even though it is definitely still prickly.
While this does not mean the fruit is safe to touch with bare hands—never touch a prickly pear without tongs or heavy gloves—it is a visual cue of expansion. The fruit has swelled to its capacity, stretching its skin. If the fruit looks shriveled or the spine clusters look incredibly dense on a small surface area, it is likely under-ripe or dehydrated. You want to see a plump, stretched surface where the warning signs of the glochids seem to have taken a backseat to the volume of the fruit itself.
Step 3: Assessing the Shape and Fullness
When you are learning how to tell if a prickly pear is ripe, the shape of the fruit offers critical clues that go beyond simple size. An immature fruit tends to be more cylindrical or tapered, looking somewhat like an extension of the cactus pad itself. As it ripens, the fruit fills out, becoming more egg-shaped, oval, or barrel-like. The top of the fruit, where the flower once bloomed, should flatten out or become slightly depressed, rather than staying pointy or tapered.
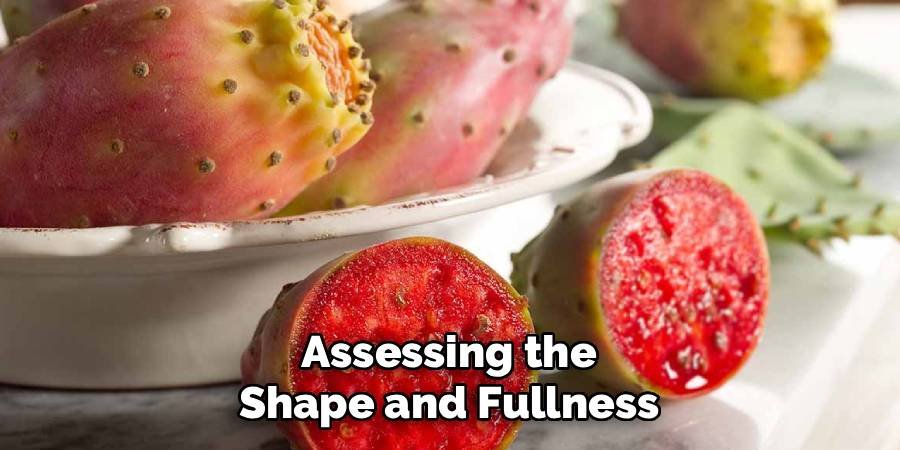
This fullness indicates that the pulp inside has developed fully and is rich with juice. You should look for fruits that look like they are bursting with content. If a fruit looks lean or skinny, it likely contains mostly thick skin and undeveloped seeds rather than the sweet, juicy flesh you are after. Compare the fruits on the pad; the ones that look the most swollen and rounded are generally the ones that have claimed the most resources from the plant and are ready for harvest.
Step 4: The Gentle Pressure Test
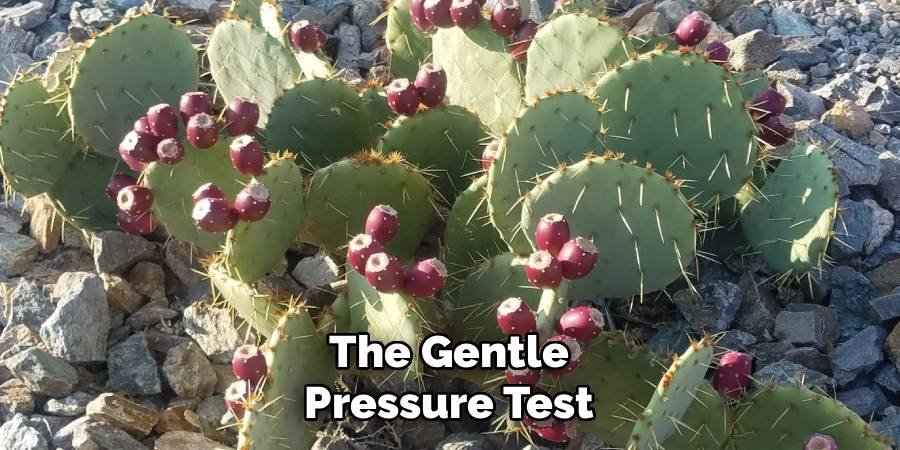
Just like checking a peach or an avocado at the grocery store, the firmness of a prickly pear is a definitive ripeness test. Using a pair of tongs—never your fingers—gently squeeze the fruit. A rock-hard fruit is unripe and will lack sweetness and juice. On the other hand, a fruit that collapses under slight pressure or feels mushy is over-ripe and has likely begun to ferment or rot inside. You are looking for a firmness that is similar to a ripe plum or a firm tomato.
There should be a slight “give” to the skin when you apply pressure with your tongs. It should feel resilient and springy, bouncing back rather than denting permanently. This texture indicates that the flesh inside has softened enough to be palatable but still maintains its structural integrity. If the fruit feels spongy or watery, leave it for the birds, as it will likely taste sour or overly fermented. This tactile feedback is one of the most reliable ways to gauge the internal condition of the fruit.
Step 5: How to Tell if a Prickly Pear Is Ripe by the Detachment Ease
One of the most practical ways to determine ripeness is by seeing how easily the fruit separates from the cactus pad. This is the plant’s natural way of distributing seeds; when the seeds are ready, the plant wants the fruit to drop. When you grasp a ripe fruit with your tongs and give it a gentle twist or bend, it should pop off the pad with minimal resistance. You should hear a clean snap, and the break should be relatively smooth.
If you find yourself wrestling with the cactus, twisting hard, or having to saw at the connection point, the fruit is telling you it is not ready to leave the plant. Forcing a fruit off the pad usually results in tearing the cactus pad itself, which can damage the plant and introduce disease. A stubborn fruit is an unripe fruit. If you apply gentle torque and it doesn’t yield, move on to the next one and give that stubborn fruit a few more days to sweeten up.
Step 6: Inspecting the Flower Scar
Every prickly pear fruit develops from a flower, and the remnants of that bloom can tell you a lot about the fruit’s age. On the top of the fruit, opposite the connection to the pad, you will see a scar or a cavity where the flower fell off. On unripe fruit, this area might still have green remnants or look very deep and narrow. As the fruit ripens and swells, the “shoulders” of the fruit rise, often making the flower cavity appear shallower or wider.
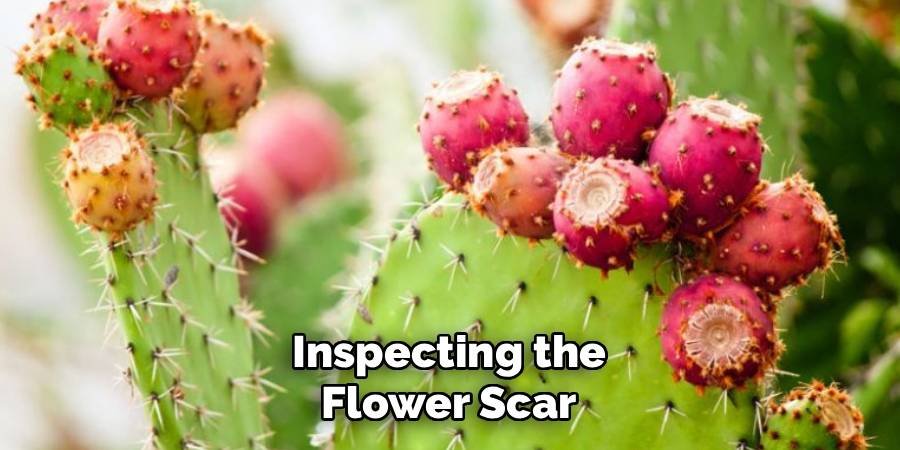
In some cases, if the flower is still attached and fresh, the fruit is definitely not ripe. The flower must be completely dried up and usually fallen off long before the fruit is ready. If you see a dry, dark scar that sits in a slight depression caused by the plumping of the fruit around it, you are looking at a mature specimen. This is a subtle detail, but when combined with color and firmness, it helps confirm your assessment before you commit to picking.
Step 7: Watching for Wildlife Activity
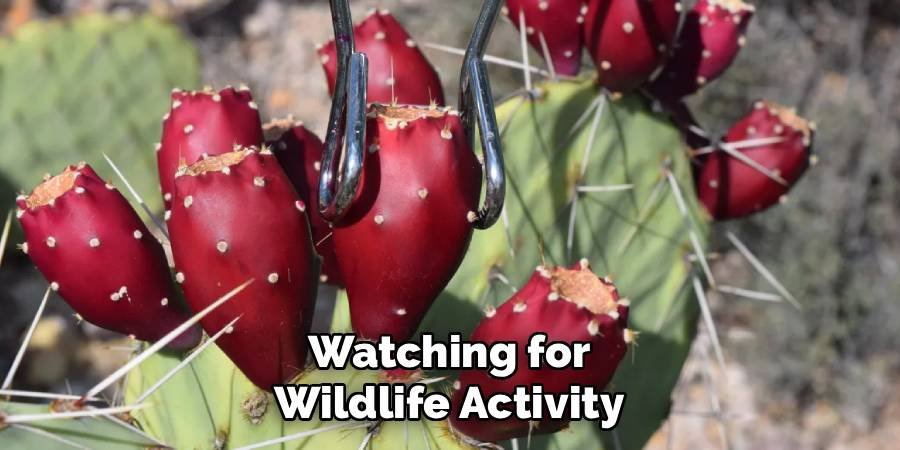
Nature has its own experts on harvesting, and they are usually the local birds, squirrels, and insects. Local wildlife is incredibly adept at sensing sugar content and nutritional value. If you notice that birds have started pecking at specific fruits, or if you see ants gathering around the glochids of certain tunas, it is a strong sign that the sugar levels have peaked. Animals rarely waste energy trying to break into hard, sour, unripe fruit.
While you certainly don’t want to eat fruit that has been half-eaten or contaminated by animals, you can use their behavior as a guide. If the birds are ignoring the cactus entirely, it might be too early in the season. Once you see the first signs of animal interest, it is your cue to get your tongs and bucket ready. You can harvest the intact fruits adjacent to the ones the birds have sampled, as they ripen in clusters and likely share the same maturity level.
Step 8: The Sacrificial Slice Test
Sometimes, despite your best observations of color, shape, and firmness, the only way to be 100% certain is to sacrifice one fruit for the greater good of the harvest. Pick what you believe to be the most perfect-looking fruit on the pad using the criteria above. Take it to a safe area, remove the glochids, and slice it open. This “test fruit” will give you the baseline for the rest of the plant.
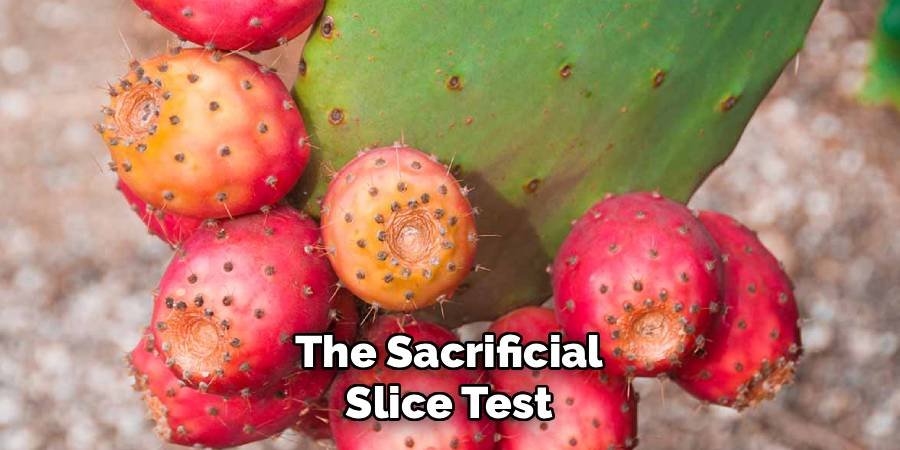
Inside, the flesh should be vibrantly colored—usually a deep red, orange, or purple—and very juicy. If the inside is pale, dry, or white (unless it is a white-fleshed variety), the fruit needs more time. Taste a small piece; it should be sweet, similar to watermelon or bubblegum. If it is sour or starchy, the rest of the cactus likely needs another week or two. Using one fruit to benchmark the rest saves you from harvesting a whole bucket of disappointment.
Frequently Asked Questions
What Is the Best Time of Year to Harvest Prickly Pears?
The harvest season depends heavily on your location and climate. In the Northern Hemisphere, particularly in the American Southwest, prickly pears generally ripen from late summer to early winter. You will typically see the fruits begin to turn color in August, with the peak harvest occurring in September and October. However, warmer climates may see ripening as early as July, while cooler areas might wait until November.
Is It Safe to Eat Prickly Pears With Green Skin?
It depends entirely on the variety of the cactus. Some species of Opuntia produce fruit that remains green or yellowish-green even when fully ripe. However, for the common purple or red varieties, a green skin usually indicates the fruit is unripe. Eating an unripe prickly pear is generally safe but unappealing; it will be hard, sour, and lacking the medicinal and nutritional benefits of the mature fruit.
How Should I Store Prickly Pears After Picking?
Once harvested, prickly pears should be handled carefully to avoid bruising. They can be stored at room temperature if you plan to use them within two or three days. For longer storage, place them in the crisper drawer of your refrigerator, where they can last for up to a week or two. Do not wash or de-spine them until you are ready to use them, as this can accelerate spoilage.
Can Prickly Pears Ripen After Being Picked?
No, prickly pears are non-climacteric fruits, meaning they do not continue to ripen significantly once removed from the plant. They do not produce ethylene gas in the same way bananas do. If you pick them hard and green, they will soften slightly as they dehydrate, but they will not become sweeter. Therefore, it is critical to pick them only when they are fully ripe on the cactus pad.
Do All Prickly Pears Have Spines and Glochids?
Almost all varieties of prickly pear fruit have glochids, which are the tiny, hair-like barbs that are difficult to see but painful to touch. While there are “spineless” varieties of cactus pads, the fruits themselves usually retain these defensive tufts. Even if a fruit looks smooth, you should always assume glochids are present and handle the fruit with tongs or thick gloves to avoid irritation.
Conclusion
Harvesting prickly pears is a timeless tradition that connects you directly to the rhythms of the desert. By paying close attention to the vibrant color changes, the firmness of the flesh, and the ease with which the fruit releases from the pad, you can ensure a harvest that is both safe and delicious. Patience is your best tool; waiting for that perfect moment when the fruit is bursting with juice makes all the difference in the kitchen.
Now that you have the knowledge to identify the perfect tuna, grab your tongs and head out to the garden. Remember to respect the spines, watch for wildlife, and trust your senses. Learning how to tell if a prickly pear is ripe unlocks a world of culinary potential, from refreshing summer drinks to exotic jams, making every careful pick well worth the effort.

About
Jovie Mathews is a backyard and outdoor expert writer with over 12 years of hands-on experience transforming neglected outdoor spaces into thriving gardens and functional retreats. Raised in a family where weekends meant digging in the soil and building raised beds from scratch, Jovie developed a genuine love for the outdoors long before it became a career.
She writes with a practical, no-fluff approach — always testing ideas in her own backyard before sharing them with readers. From composting systems and native plant selection to patio design and pest control, Jovie covers the full spectrum of backyard life with equal parts expertise and enthusiasm.
Education
B.Sc. in Horticulture Science
University of Florida (UF) · Gainesville, FL · 2014
IFAS College of Agricultural and Life Sciences
Minor in Environmental Studies
University of Florida (UF) · Gainesville, FL · 2014
College of Liberal Arts and Sciences
Areas of expertise
- Lawn & Garden Care
- Soil prep, planting, seasonal care
- Outdoor DIY Projects
- Raised beds, fencing, pathways
- Composting & Soil Health
- Organic methods, amendments
- Native Plants & Wildlife
- Pollinators, habitat gardening
When she is not writing, Jovie can be found testing new composting techniques, growing tomatoes in questionable quantities, or convincing her neighbors that clover lawns are actually a great idea. She currently gardens in the Pacific Northwest.




