A propane fire pit is a fantastic centerpiece for any outdoor living space, providing warmth and ambiance at the turn of a knob. While many models come standard with porous lava rocks, upgrading your fire media can dramatically transform the look and feel of your patio.
Fire glass, with its vibrant colors and reflective surfaces, offers a sleek, modern alternative that makes flames dance and sparkle. However, achieving that stunning look requires more than just dumping a bag of glass into the pan. The placement is crucial for safety, proper flame distribution, and optimal performance. This guide will walk you through the essential steps, showing you exactly how to place glass rocks in propane fire pit burners to ensure a beautiful, safe, and mesmerizing flame display for years to come.
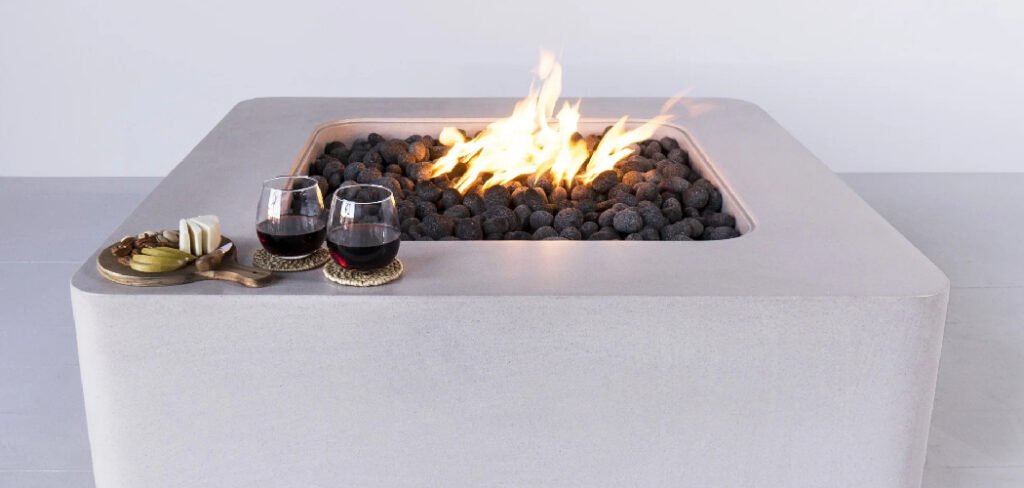
Glass rocks have become a popular choice for enhancing the style and functionality of propane fire pits. Their dazzling appearance not only creates an inviting ambiance but also serves as an eye-catching design element in outdoor spaces. To make the most of these decorative pieces, it’s essential to understand the proper techniques for arranging them in your fire pit. With the right approach, you can achieve both safety and a stunning visual effect that elevates your fire feature to a whole new level.
Choosing the Right Glass Rocks
Before diving into the placement process, it’s important to choose the right glass rocks for your fire pit. There are a variety of options available, including different colors, shapes, and sizes. It’s important to select glass rocks that are specifically designed for use in fire pits or fireplaces to prevent any potential hazards.
When selecting glass rocks, consider the overall aesthetic you want to achieve. Do you want a uniform color scheme or a mix of colors? Do you prefer larger or smaller glass pieces? Also, make sure to check with your local fire regulations as some areas may have restrictions on the types of materials allowed in fire pits.
7 Step-by-Step Guide on How to Place Glass Rocks in Propane Fire Pit
Step 1: Prepare Your Workspace
Before you begin, safety must be your top priority. Ensure that the propane tank is turned completely off at the valve and, for added security, disconnect the gas line from the fire pit unit itself. This eliminates any risk of accidental gas release while you work. If your fire pit has existing lava rocks or other media, allow the unit to cool down completely before handling them. Gather your tools; you will need work gloves to protect your hands, a small shop vacuum or brush to clean the burner pan, and the new fire glass. It is also wise to consult your fire pit’s owner’s manual to confirm the manufacturer’s recommendations for media depth and type.
Step 2: Remove Old Media and Clean the Burner Pan
With your gloves on, carefully remove the old lava rocks or ceramic logs from the fire pit pan. You can place them in a bucket or on a tarp for disposal or repurposing. Once the pan is empty, you will likely see an accumulation of dust, soot, and small debris. It is critical to clean this out thoroughly. Use a brush to sweep out the loose particles, then follow up with a shop vacuum to remove the fine dust. Pay close attention to the burner ring or H-burner itself. Ensure that all the gas ports—the small holes where the flame emerges—are clear of any obstruction. A clogged port can lead to uneven flames and inefficient gas combustion.
Step 3: Create a Base Layer
This is a professional tip that many DIYers overlook. Instead of filling the entire pan with expensive decorative fire glass, you can use a filler material for the base. Smaller-sized lava rock is an excellent choice for this. Pour a layer of this filler into the pan, ensuring it fills the space below the burner element but does not cover it. This technique creates a raised platform for the decorative glass, improves drainage, and allows for better air circulation around the burner. It also means you will use less of your premium fire glass, saving you money while achieving the same beautiful surface appearance.
Step 4: Add the First Layer of Fire Glass
Now you can begin adding your new fire glass. Start by gently pouring a layer of the glass rocks over the base filler and around the burner element. The goal of this initial layer is to completely hide the base material and fill the pan up to the level of the top of the burner. Use your hands (with gloves still on) to spread the glass evenly. Be careful not to simply dump the bag in the center, as this can create a dense pile that obstructs gas flow. You want to ensure the glass settles naturally around the burner without packing it down too tightly.
Step 5: Cover the Burner
Once the pan is filled to the top of the burner, you need to add the final decorative layer. This layer will go directly over the burner element. Gently pour the glass rocks over the burner, aiming for a depth of about one inch above the gas ports. It is extremely important that you do not create a layer that is too deep. A thick covering can impede gas flow, leading to a smaller, sooty flame, or worse, causing the gas to pool before ignition, which is a safety hazard. The one-inch depth is the sweet spot that allows gas to percolate through the glass easily for a full, clean burn while completely concealing the metal burner from view.
Step 6: Test the Gas Flow and Flame
With the glass in place, it is time for a safety and performance check. Reconnect the gas line and slowly turn on the propane tank valve. Following your fire pit’s standard lighting procedure, ignite the burner. Watch the flame closely. It should ignite smoothly and distribute evenly across the surface of the glass bed. If you notice large areas where there is no flame, or if the flame seems weak and low, it is likely that the glass is too deep or too tightly packed in those spots. Let the unit cool down completely before making any adjustments to the glass depth.
Step 7: Make Final Adjustments for an Even Flame
If your initial test revealed an uneven flame, you will need to make some minor adjustments. After ensuring the unit is off and completely cool, use your gloved hands to gently shift the glass rocks around. In the areas where the flame was weak, you may need to thin out the glass layer slightly. Create more space between the rocks to allow the propane to flow through more freely. The goal is to create a consistent depth and density across the entire burner surface. Once you have made your adjustments, perform another test ignition. Repeat this process until you achieve a beautiful, full, and evenly distributed flame.
Frequently Asked Questions (FAQ)
Can You Use Any Type of Glass in a Fire Pit?
No, absolutely not. You must only use glass specifically manufactured for use in fire pits. This “fire glass” is tempered to withstand extreme temperatures without shattering, melting, or releasing toxic fumes. Using regular glass (like from bottles or landscaping) is extremely dangerous, as it can explode when heated, sending sharp projectiles flying.
How Much Fire Glass Do I Need for My Fire Pit?
The amount depends on the size and shape of your fire pit pan. Most online fire glass calculators ask for the dimensions of your fire pit (length and width for square/rectangular, or diameter for round) and your desired depth. As a rule of thumb, you want the glass to cover the burner by about one inch. It is always better to buy slightly more than you think you need.
Does Fire Glass Ever Need to Be Replaced?
High-quality tempered fire glass is designed to last a lifetime and does not burn, melt, or discolor. However, it can get dirty over time from dust, pollen, and outdoor debris. You may need to clean it periodically by rinsing it in a bucket of water with a little mild soap, but you should not need to replace it unless you simply want to change the color.
What Is the Difference Between Fire Glass and Lava Rock?
- Aesthetics: Fire glass comes in countless colors and has a reflective, modern look. Lava rock is porous, typically black or red, and has a more rustic, natural appearance.
- Heat: Fire glass radiates more heat than porous lava rock, making it slightly more efficient at warming a space.
- Cleanliness: Lava rock can shed dust and small particles, while fire glass is a cleaner medium.
Can I Mix Fire Glass with Lava Rock?
Yes, mixing them is a popular and cost-effective strategy. You can use lava rock as a base filler underneath the fire glass to reduce the amount of expensive glass needed. You can also mix them together on the surface for a unique, textured look that combines the rustic feel of lava rock with the sparkling elegance of fire glass.
Conclusion
Upgrading to fire glass is one of the easiest and most impactful ways to enhance the beauty and functionality of your outdoor space. By following a careful, step-by-step process, you can ensure your installation is not only stunning but also safe and efficient. The keys to success are proper preparation, careful cleaning, and most importantly, correct placement of the glass to allow for optimal gas flow. A shallow, even layer over the burner is all you need to create a mesmerizing display of dancing flames. Now that you have the complete guide on how to place glass rocks in propane fire pit systems, you can confidently tackle this project and give your patio the brilliant, sparkling centerpiece it deserves.

About
Jovie Mathews is a backyard and outdoor expert writer with over 12 years of hands-on experience transforming neglected outdoor spaces into thriving gardens and functional retreats. Raised in a family where weekends meant digging in the soil and building raised beds from scratch, Jovie developed a genuine love for the outdoors long before it became a career.
She writes with a practical, no-fluff approach — always testing ideas in her own backyard before sharing them with readers. From composting systems and native plant selection to patio design and pest control, Jovie covers the full spectrum of backyard life with equal parts expertise and enthusiasm.
Education
B.Sc. in Horticulture Science
University of Florida (UF) · Gainesville, FL · 2014
IFAS College of Agricultural and Life Sciences
Minor in Environmental Studies
University of Florida (UF) · Gainesville, FL · 2014
College of Liberal Arts and Sciences
Areas of expertise
- Lawn & Garden Care
- Soil prep, planting, seasonal care
- Outdoor DIY Projects
- Raised beds, fencing, pathways
- Composting & Soil Health
- Organic methods, amendments
- Native Plants & Wildlife
- Pollinators, habitat gardening
When she is not writing, Jovie can be found testing new composting techniques, growing tomatoes in questionable quantities, or convincing her neighbors that clover lawns are actually a great idea. She currently gardens in the Pacific Northwest.