A fire pit is more than just a source of warmth; it is the heart of your outdoor living space, a place where memories are forged over crackling flames and quiet conversation. But when that handsome metal bowl or sleek steel frame starts to show signs of orange-brown decay, it can be disheartening. Rust is the natural enemy of most metal fire pits, a chemical reaction that occurs when iron or steel is exposed to oxygen and moisture.
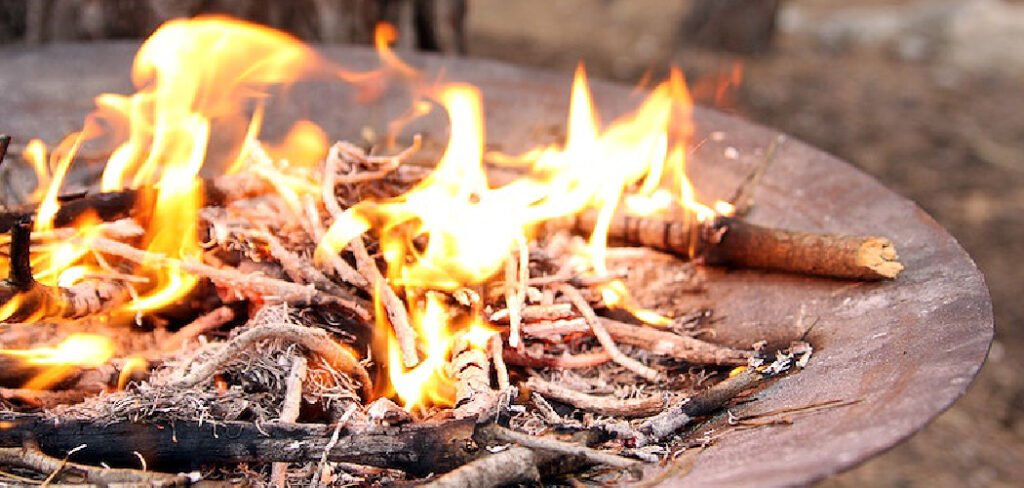
Left unchecked, it not only ruins the aesthetic appeal but can also weaken the structure, shortening the life of your investment. The good news is that preventing this corrosive creep is entirely manageable. With a bit of routine care and the right protective measures, you can ensure your fire pit remains a beautiful and functional focal point for years to come. This guide will show you exactly how to keep fire pit from rusting, outlining simple, proactive steps anyone can take.
Why Does Rust Form on Fire Pits?
Rust forms on fire pits primarily due to exposure to moisture and oxygen, which react with the metal to create iron oxide. This process is accelerated by rain, snow, and even humid environments, especially if the fire pit is left uncovered or improperly maintained. High temperatures from frequent use can also degrade protective coatings, leaving the surface more vulnerable to corrosion. Understanding the causes of rust is essential in taking effective steps to prevent it, ensuring your fire pit remains durable and visually appealing over time.
7 Step-by-Step Guide on How to Keep Fire Pit from Rusting
Step 1: Clean Out Ashes After Every Use
The single most important habit for preventing rust is to remove ashes as soon as they have completely cooled. While ashes may seem dry and harmless, they are highly absorbent and act like a sponge, trapping moisture from morning dew, humidity, and rain. This moisture then sits directly against the metal surface of your fire pit, creating a perfect breeding ground for rust. After a fire has been extinguished and at least 24 hours have passed, shovel the cold ashes into a metal bucket. Never use a plastic bucket, as hidden hot embers can melt through it. By making this simple cleanup step part of your routine, you eliminate the primary source of prolonged moisture exposure.
Step 2: Thoroughly Dry the Fire Pit
After cleaning out the ashes, or if your fire pit has been exposed to rain, it is crucial to ensure it is completely dry. Any lingering water, whether in the bowl or on the legs and frame, will initiate the oxidation process. Use an old towel or a soft, absorbent cloth to wipe down all metal surfaces, both inside and out.
Pay special attention to corners, seams, and any decorative crevices where water might pool. On a sunny day, you can let it air dry for a few hours. A dry fire pit is a happy fire pit. This step alone can dramatically extend the life of your unit by simply removing one of the two key ingredients rust needs to form.
Step 3: Use a Cover
If your fire pit lives outdoors permanently, a high-quality, waterproof cover is a non-negotiable accessory. This is your primary shield against the elements. A good cover will protect the metal not only from direct rainfall but also from ambient humidity and UV rays, which can degrade protective coatings over time.
Look for a cover made from durable, weather-resistant polyester or vinyl that fits your specific model snugly. Ensure it reaches far enough down to protect the legs and frame as well. By consistently covering your fire pit when it is not in use, you create a physical barrier that stops moisture from ever reaching the vulnerable metal surfaces in the first place.
Step 4: Season Cast Iron Models
If your fire pit is made of cast iron, you can treat it much like you would a cast iron skillet. This process, known as seasoning, creates a natural, water-repellent barrier. After cleaning and thoroughly drying the fire pit, apply a very thin layer of cooking oil (like vegetable or canola oil) to all the interior surfaces with a cloth or paper towel. Light a small fire in the pit and let it burn for about an hour. The heat will polymerize the oil, baking it into the metal’s pores to form a protective, rust-resistant coating. This seasoning process may need to be repeated periodically throughout the season for maximum effect.
Step 5: Refinish with High-Heat Paint
Even with diligent care, the original paint or coating on a fire pit can eventually chip or wear away, exposing the bare metal underneath. When you see these spots, it is time to take action. Use a wire brush or sandpaper to remove any existing rust and rough up the surface slightly. Wipe away all the dust and debris, then apply a fresh coat of high-temperature spray paint. It is critical to use a paint specifically formulated to withstand extreme heat (often labeled as grill or stove paint). Applying a few light coats will create a new, durable barrier that seals the metal from moisture and restores the fire pit’s original appearance.
Step 6: Store Indoors During the Off-Season
For the ultimate protection, move your fire pit to a dry, sheltered location during the months you will not be using it. A garage, shed, or basement is an ideal storage spot for the winter or rainy season. This completely removes the threat of snow, ice, and constant dampness. If you cannot move the entire unit, at least ensure it is impeccably clean, dry, and securely covered. Long-term exposure to harsh winter conditions is the fastest way to accelerate rusting, so bringing it indoors is the best way to guarantee it emerges in pristine condition next spring.
Step 7: Place a Sand Layer in the Bottom
Adding a layer of sand to the bottom of your fire pit bowl provides a valuable layer of protection. The sand creates a thermal barrier, helping to absorb some of the intense heat from the fire and preventing direct, prolonged contact between hot coals and the metal base. This reduces the stress on the metal and its protective coating. Furthermore, a layer of sand can help absorb any incidental moisture that might get in, wicking it away from the steel or iron surface. It also makes cleanup easier, as you can simply scoop out the top layer of sand along with the ashes.
Frequently Asked Questions (FAQ)
What Is the Best Material for a Fire Pit to Prevent Rust?
Stainless steel, corten steel (weathering steel), and copper are the most rust-resistant options.
- Stainless Steel: Contains chromium, which creates a passive, rust-proof layer. It is durable but can be expensive.
- Corten Steel: Designed to form a stable, rust-like appearance on the surface that protects the deeper layers from corrosion.
- Copper: Develops a beautiful green patina over time, which is a form of oxidation that protects the metal from further decay.
Can I Use WD-40 to Prevent Rust on My Fire Pit?
While WD-40 is a water displacer and can help prevent rust on tools, it is not recommended for fire pits. The product is flammable and will burn off quickly when the pit is heated, creating unpleasant fumes. It does not provide a durable, heat-resistant coating. For protection, it is much safer and more effective to use high-temperature paint or to season cast iron with cooking oil.
How Do I Remove Existing Rust from My Fire Pit?
For light rust, vigorous scrubbing with a wire brush or steel wool is often sufficient. For heavier rust, you can use a power drill with a wire wheel attachment. Another effective method is to apply a rust converter product, which chemically converts the rust into a stable, paintable surface. You can also soak the rusted area in white vinegar for several hours, which will dissolve the rust, and then scrub it away. Always dry the metal thoroughly and apply a protective coating after rust removal.
Is a Rusted Fire Pit Safe to Use?
Minor surface rust is primarily a cosmetic issue and does not pose an immediate safety risk. The fire pit is still safe to use. However, if the rust has become deep and is causing the metal to flake away or has created holes in the bowl or legs, the structural integrity is compromised. A fire pit with a rusted-through base or unstable legs could collapse, creating a serious fire hazard. At that point, the unit should be repaired or replaced.
Will a Fire Pit Cover Cause Rust?
A waterproof cover is meant to prevent rust, but it can contribute to it if used improperly. If you cover a fire pit while it is still damp or warm, you will trap moisture underneath the cover, creating a humid, greenhouse-like environment that accelerates rusting. Always ensure your fire pit is completely cool and bone dry before you put the cover on.
Conclusion
Protecting your fire pit from the corrosive forces of nature is a simple matter of consistent and proactive maintenance. By adopting a routine of cleaning out ashes, keeping the metal dry, and using a quality cover, you can win the battle against rust. For long-term durability, do not hesitate to refinish worn spots with high-heat paint or bring your unit indoors during the harsh off-season.
These small efforts will preserve not only the look but also the structural integrity of your backyard centerpiece, ensuring it remains a safe and welcoming gathering spot. Now that you know how to keep fire pit from rusting, you can spend less time worrying about decay and more time enjoying the warm, inviting glow with your friends and family.

About
Jovie Mathews is a backyard and outdoor expert writer with over 12 years of hands-on experience transforming neglected outdoor spaces into thriving gardens and functional retreats. Raised in a family where weekends meant digging in the soil and building raised beds from scratch, Jovie developed a genuine love for the outdoors long before it became a career.
She writes with a practical, no-fluff approach — always testing ideas in her own backyard before sharing them with readers. From composting systems and native plant selection to patio design and pest control, Jovie covers the full spectrum of backyard life with equal parts expertise and enthusiasm.
Education
B.Sc. in Horticulture Science
University of Florida (UF) · Gainesville, FL · 2014
IFAS College of Agricultural and Life Sciences
Minor in Environmental Studies
University of Florida (UF) · Gainesville, FL · 2014
College of Liberal Arts and Sciences
Areas of expertise
- Lawn & Garden Care
- Soil prep, planting, seasonal care
- Outdoor DIY Projects
- Raised beds, fencing, pathways
- Composting & Soil Health
- Organic methods, amendments
- Native Plants & Wildlife
- Pollinators, habitat gardening
When she is not writing, Jovie can be found testing new composting techniques, growing tomatoes in questionable quantities, or convincing her neighbors that clover lawns are actually a great idea. She currently gardens in the Pacific Northwest.