Welcome to your complete guide on updating your home’s exterior. Over time, porch columns can suffer from rot, insect damage, or simply become outdated, impacting both the safety and curb appeal of your home. Replacing them might seem like a major undertaking, but with the right tools and a clear plan, it’s a project many homeowners can tackle themselves.
This article provides a detailed walkthrough of how to replace porch columns, from initial inspection to the final touches. We will cover everything you need to know to ensure your new columns are secure, stable, and beautifully integrated into your home’s design, boosting its value and appearance.
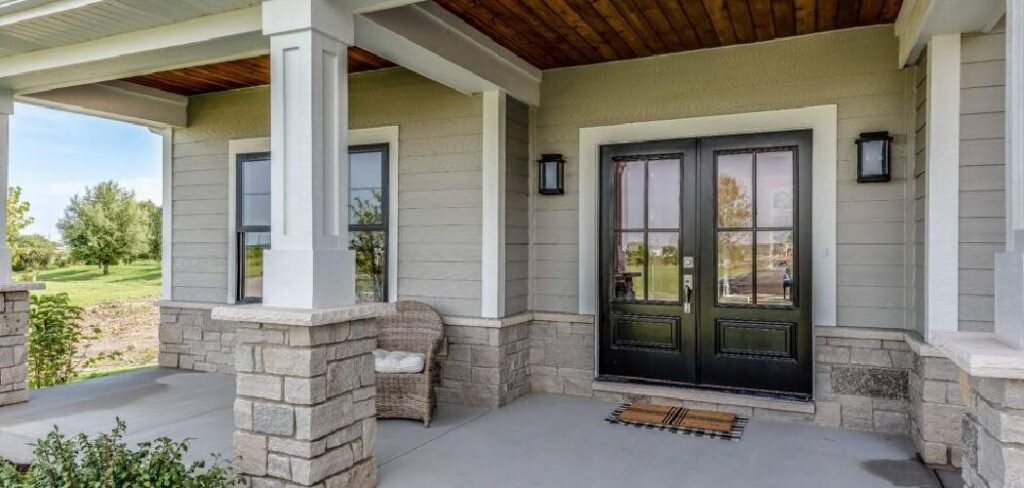
Why Replacing Your Porch Columns Matters
Porch columns are more than just decorative elements; they are crucial structural supports for your porch roof. Damaged or deteriorating columns can pose a significant safety risk, potentially leading to the collapse of the roof structure they hold up. Signs of trouble include visible cracks, wood rot, pest infestations, or a noticeable sag in the porch roof. Beyond the structural necessity, replacing old columns offers a fantastic opportunity to refresh your home’s aesthetic. You can choose a new style, material, or color that better reflects your personal taste and enhances your home’s overall curb appeal, making it a valuable home improvement project.
9 Step-by-Step Guide on How to Replace Porch Columns
Step 1: Assess and Measure Your Existing Columns
Before starting any work, you need to conduct a thorough inspection. Check the existing columns for signs of damage like rot, cracks, or insect activity. Determine whether they are load-bearing or purely decorative. Next, measure the exact height from the porch floor to the beam the column supports. Also, measure the width or diameter of the old columns to help select appropriately sized replacements. Accurate measurements are critical for purchasing the correct new columns and ensuring they will fit perfectly into the existing space.

Step 2: Choose Your New Columns
With your measurements in hand, it’s time to select your new porch columns. You have several material options, including wood, fiberglass, vinyl, and aluminum. Wood offers a classic look but requires regular maintenance. Fiberglass and composite materials are durable, low-maintenance, and resistant to rot and insects, making them a popular choice. Consider the architectural style of your home when selecting the design. Whether you prefer a simple, modern look or a more ornate, traditional style, choose columns that complement your home’s exterior for a cohesive appearance.
Step 3: Gather Your Tools and Materials
Proper preparation is key to a smooth project. You will need temporary support posts, such as adjustable steel posts or sturdy 4×4 lumber, and a hydraulic bottle jack. Essential tools include a level, tape measure, pry bar, hammer, drill, and saw. Depending on your new columns, you may also need specific hardware like mounting brackets, screws, and construction adhesive. Having everything you need organized and within reach before you begin will prevent delays and help the process go much more efficiently.
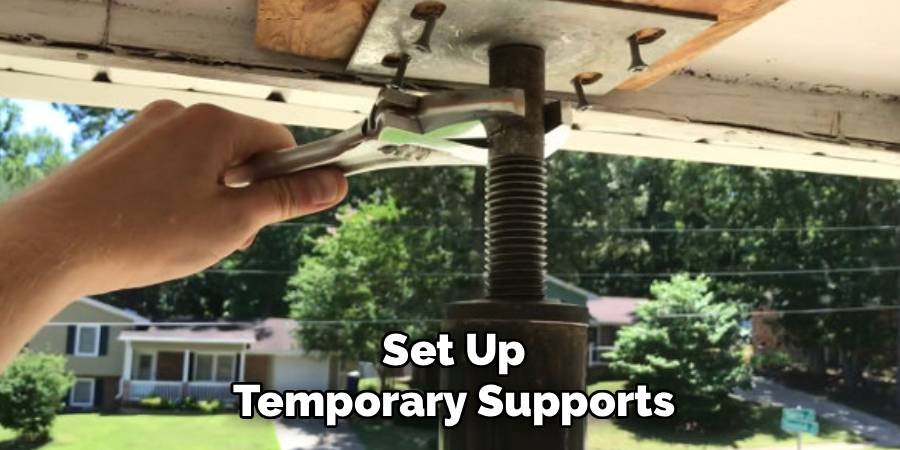
Step 4: Set Up Temporary Supports
Safety is the top priority. Before removing any existing column, you must securely support the porch roof. Place a sturdy wood block on your hydraulic jack to protect the porch surface. Position the jack and a temporary 4×4 post about two feet away from the column you intend to replace. Slowly raise the jack until the temporary post is snug against the roof beam, taking on its load. Use a level to ensure the post is perfectly vertical. The goal is to relieve pressure, not to lift the roof.
Step 5: Carefully Remove the Old Column
With the roof safely supported, you can now remove the old column. Start by using a pry bar to gently detach any trim or molding at the top and bottom. Most columns are attached with nails or screws through toe-nailing or brackets. Carefully remove these fasteners. You may need to use some force, but work slowly to avoid damaging the surrounding structure. If the column is stubborn, you can use a reciprocating saw to cut it into smaller, more manageable sections for easier removal.
Step 6: Prepare the Area for the New Column
Once the old column is out, clean the top and bottom surfaces where the new one will sit. Scrape away any old caulk, paint, or debris to ensure a flat, stable base. This is also a good time to inspect the beam and porch floor for any hidden rot or damage that was previously covered. Make any necessary repairs before proceeding. A clean and sound mounting surface is essential for the stability and longevity of your new column, so do not rush this important preparation step.
Step 7: Install the New Porch Column
Position your new column on the prepared surface. If you are learning how to replace porch columns for the first time, take your time with this step. Use a level to ensure the column is perfectly plumb (vertically straight) on all sides. Secure the column according to the manufacturer’s instructions, which typically involves using L-brackets or specially designed mounting kits at the top and bottom. Fasten it securely to both the porch floor and the overhead beam using the recommended screws or bolts for a solid installation.

Step 8: Lower the Roof and Secure Everything
With the new column securely in place, you can slowly and carefully release the pressure on the hydraulic jack, allowing the porch roof to settle onto the new support. Watch and listen for any unusual shifts or sounds. Once the full weight is transferred, remove the temporary post and jack. Give the new column a firm push to test its stability. It should not move at all. This final check confirms that your installation is secure and ready to support the roof structure for years to come.
Step 9: Add Finishing Touches
The final step is to complete the installation with finishing work. If your new columns are paintable, apply a coat of exterior-grade primer followed by at least two coats of high-quality paint to protect them from the elements. Caulk around the top and bottom of the column base and capital to seal any gaps, preventing water from seeping in and causing damage. Reinstall or add new trim or molding for a clean, professional finish that seamlessly integrates the new column with your porch.

Frequently Asked Questions (FAQ)
How Do I Know If My Porch Columns Are Load-Bearing?
To determine if a column is load-bearing, look for a continuous load path from the roof down through the column to the foundation. If the column is positioned directly under a main roof beam or header, it is likely structural. Non-load-bearing columns are often purely decorative and can be removed without temporary support. If you see any sagging in the roof above, it is a clear sign the column is carrying weight. When in doubt, it is always safest to assume a column is load-bearing and consult a professional.
What Is the Best Material for Replacement Porch Columns?
The best material depends on your budget, climate, and desired maintenance level. Fiberglass columns are an excellent all-around choice, offering durability, resistance to rot and insects, and low maintenance. They come in various styles and can be painted. Wood provides a traditional aesthetic but requires regular painting or sealing to prevent decay. PVC and vinyl are affordable and maintenance-free but may not offer the same structural strength or high-end look as other materials. Aluminum is strong and rust-proof but can be dented.
Can I Replace a Porch Column by Myself?
Replacing a porch column is a manageable DIY project for someone with intermediate construction skills and the right tools. The most critical part of the job is safely supporting the porch roof with temporary posts. If you are uncomfortable with this step or if your porch roof is particularly large or complex, it is best to hire a professional contractor. Safety should always be your primary concern. For a straightforward, single-column replacement on a standard porch, a confident DIYer can often complete the job successfully.
How Much Does It Cost to Replace a Porch Column?
The cost can vary widely based on the material of the column, its size and style, and whether you do the work yourself or hire a professional. A single fiberglass or wood column can range from $150 to $500 or more. If you hire a contractor, labor costs can add an additional $300 to $700 per column. Factors like the complexity of the installation and your geographic location will also influence the final price. Getting quotes from multiple contractors is a good way to estimate the professional installation cost in your area.
How Long Does It Take to Replace One Porch Column?
For a handy DIYer with all the necessary tools and materials ready, replacing a single porch column can typically be completed in about 4 to 6 hours. This timeframe includes setting up temporary supports, removing the old column, preparing the surface, installing the new one, and adding finishing touches like caulk and paint. If you encounter unexpected issues, such as hidden rot that needs repair, the project could take longer. A professional can often complete the job more quickly, sometimes in as little as 2 to 3 hours.
Conclusion
Replacing your porch columns is an impactful home improvement project that enhances both the safety and beauty of your home. By carefully following the steps outlined in this guide—from assessing your needs and choosing the right materials to ensuring a secure installation—you can confidently transform your porch. This project not only addresses potential structural issues but also provides a wonderful opportunity to update your home’s exterior style. Now that you understand how to replace porch columns, you are ready to take on this rewarding task and enjoy the lasting benefits of a safer, more attractive home.
About
Jovie Mathews is a backyard and outdoor expert writer with over 12 years of hands-on experience transforming neglected outdoor spaces into thriving gardens and functional retreats. Raised in a family where weekends meant digging in the soil and building raised beds from scratch, Jovie developed a genuine love for the outdoors long before it became a career.
She writes with a practical, no-fluff approach — always testing ideas in her own backyard before sharing them with readers. From composting systems and native plant selection to patio design and pest control, Jovie covers the full spectrum of backyard life with equal parts expertise and enthusiasm.
Education
B.Sc. in Horticulture Science
University of Florida (UF) · Gainesville, FL · 2014
IFAS College of Agricultural and Life Sciences
Minor in Environmental Studies
University of Florida (UF) · Gainesville, FL · 2014
College of Liberal Arts and Sciences
Areas of expertise
- Lawn & Garden Care
- Soil prep, planting, seasonal care
- Outdoor DIY Projects
- Raised beds, fencing, pathways
- Composting & Soil Health
- Organic methods, amendments
- Native Plants & Wildlife
- Pollinators, habitat gardening
When she is not writing, Jovie can be found testing new composting techniques, growing tomatoes in questionable quantities, or convincing her neighbors that clover lawns are actually a great idea. She currently gardens in the Pacific Northwest.