A porch swing offers a perfect spot for relaxation, but not every home has a porch sturdy enough to support one. This is where a standalone frame becomes essential. Building your own frame is a rewarding project that gives you the freedom to place your swing anywhere you like—in the garden, on a patio, or under a favorite tree.
This guide will walk you through the process of how to make a frame for a porch swing, providing clear, step-by-step instructions. With some basic tools and a bit of patience, you can create a beautiful and secure structure for your swing, ensuring countless hours of peaceful enjoyment.
Why Build Your Own Porch Swing Frame?
Creating your own porch swing frame is more than just a weekend project; it’s an investment in your outdoor living space. Commercial frames can be expensive and may not offer the specific dimensions or aesthetic you desire. By building it yourself, you gain complete control over the design, materials, and final look. This allows you to match the frame to your existing outdoor decor or landscape perfectly. Furthermore, a DIY frame, when built correctly, can be far sturdier and more durable than many store-bought options. This project provides a great sense of accomplishment and leaves you with a custom piece of furniture that is both functional and personal.
7 Step-by-Step Guide on How to Make a Frame for a Porch Swing
Step 1: Gather Your Materials and Tools
Before you begin, it’s crucial to gather all the necessary supplies. This project typically requires pressure-treated lumber to resist rot and insects. You will need four 4×4 posts (8 feet long) for the legs, one 4×6 beam (8-10 feet long) for the top support, and two 2×4 boards (8 feet long) for the cross braces. For hardware, you’ll need several heavy-duty galvanized carriage bolts, washers, nuts, and lag screws. You will also need two large eye bolts or swing hangers. Essential tools include a circular saw or miter saw, a power drill with various bits, a socket wrench set, a tape measure, a pencil, and a level.

Step 2: Cut the Lumber to Size
Accurate cuts are the foundation of a stable frame. Begin by cutting the four 4×4 posts. These will form the A-frame legs. A common angle for the bottom of the legs is 20 degrees to ensure they sit flat on the ground. For the top of the legs, a 70-degree angle is needed so they fit snugly against the top beam. Use your miter saw for precision. Next, cut your 4×6 top beam to the desired length; 8 feet is a standard size that accommodates most swings. Finally, cut your 2×4 boards for the side braces. These will connect the front and back legs on each side for added stability.
Step 3: Assemble the A-Frame Sides
Now it’s time to build the two A-frame structures that will support the top beam. Take two of the angled 4×4 legs and lay them on a flat surface, crossing them at the top to form an ‘A’ shape. The tops of the legs should meet with the 70-degree angled cuts flush against each other, creating a peak. Before securing them, measure the distance between the bottom of the legs to ensure they are spaced correctly—around 4-5 feet apart is typical. Once you are satisfied with the positioning, drill a pilot hole through the intersection and secure the two legs with a long carriage bolt, washer, and nut. Repeat this process for the second pair of legs.
Step 4: Attach the Top Support Beam
With both A-frames assembled, you need to connect them with the 4×6 top beam. This part of learning how to make a frame for a porch swing is best done with a helper. Stand the two A-frames upright, ensuring they are parallel and spaced appropriately to match the length of your top beam. Carefully lift the 4×6 beam and rest it in the V-shaped notches created at the peak of each A-frame. Use a level to ensure the beam is perfectly horizontal. Once it’s in position, drill pilot holes down through the top of the beam and into the tops of the A-frame legs. Secure it firmly with long lag screws.

Step 5: Install the Side Braces
The side braces are critical for preventing the frame from swaying front to back. Take one of your 2×4 boards and place it horizontally across the front and back legs on one side of the frame, about one foot up from the ground. Use your level to ensure it is straight. Once positioned correctly, attach the brace to the legs using carriage bolts. Drill through the brace and the 4×4 leg, then secure it tightly with washers and nuts. Repeat this entire process on the other side of the frame with the second 2×4 board. These braces add significant rigidity to the entire structure.
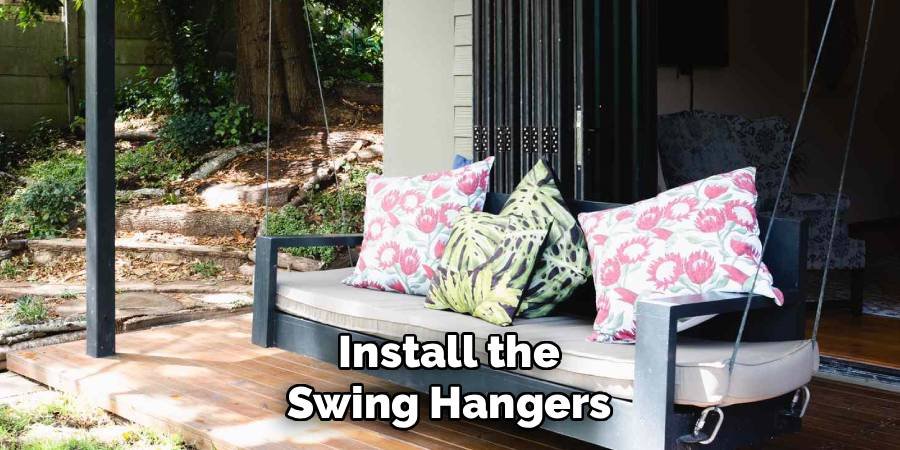
Step 6: Install the Swing Hangers
Now that the frame is assembled, you can install the hardware for hanging the swing. Measure and mark the locations for your swing hangers on the underside of the 4×6 top beam. The hangers should be positioned slightly wider than the length of your swing to ensure a smooth, straight swinging motion and prevent the chains from rubbing against the frame. A standard spacing is about 2-4 inches wider than the swing on each side. Drill pilot holes through the beam and then screw in your heavy-duty eye bolts or specialized swing hangers. Ensure they are fully seated and secure.
Step 7: How to Make a Frame for a Porch Swing Stable on Uneven Ground
Before you hang your swing, it is essential to ensure the frame is stable and level. Place the completed frame in its final desired location. Use a level on the top beam and the side braces to check its position. If the ground is uneven, you may need to dig small trenches for some of the legs or use flat paving stones or wooden blocks to create a level base. An unstable frame is a safety hazard, so take your time with this step. Adjust as needed until the frame sits securely without rocking or wobbling in any direction. This ensures a safe and pleasant swinging experience.
Sanding and Finishing the Frame
The final step is to prepare your frame for the outdoors and give it a polished look. Sand all surfaces of the wood, paying special attention to any rough spots or sharp edges to prevent splinters. Start with a medium-grit sandpaper and finish with a fine-grit for a smooth touch. Once sanding is complete, wipe away all the dust with a clean cloth. Apply a high-quality exterior-grade stain, sealant, or paint. This will protect the wood from moisture, UV rays, and temperature changes, prolonging the life of your frame and enhancing its appearance. Allow it to dry completely before hanging the swing.

Frequently Asked Questions
What Is the Best Wood for a Porch Swing Frame?
The best wood is pressure-treated pine or cedar. Pressure-treated pine is affordable and highly resistant to rot and insects, making it a durable choice for outdoor furniture. Cedar is naturally resistant to decay and pests, and it has a beautiful appearance and aroma. While more expensive, cedar is lighter than treated pine and less prone to warping. Both are excellent options that will ensure your frame lasts for many years with proper care and maintenance.
How Far Apart Should the Legs of an A-Frame Swing Be?
The distance between the legs at the base determines the frame’s stability. A good rule of thumb is to set the front and back legs of each A-frame about 4 to 5 feet apart. This wide stance provides a solid foundation and prevents tipping. The distance between the two A-frame sides should be determined by the length of your top beam, which is typically 8 feet. This spacing ensures ample room for the swing to move freely without hitting the sides.
What Is the Standard Height for a Porch Swing Frame?
A standard A-frame for a porch swing is typically about 7 to 8 feet tall. This height allows for enough clearance for the swing to move without hitting the top beam while also keeping the swing at a comfortable seating height from the ground. After hanging the swing, the seat should be approximately 17 to 19 inches off the ground, which allows most adults to sit down and stand up comfortably without straining.
How Do I Ensure the Frame Is Safe and Secure?
Safety is paramount. Use high-quality, corrosion-resistant hardware like galvanized or stainless steel bolts and screws. Always drill pilot holes before inserting bolts or lag screws to prevent the wood from splitting. Regularly check and tighten all hardware, as wood can expand and contract with weather changes. Finally, ensure the frame is on level ground. If the ground is sloped or uneven, use paving stones or dig out areas to create a stable, level base for each leg.
Can I Modify the Design of the Frame?
Absolutely! The A-frame design is a great starting point, but you can customize it to fit your needs. You could add a decorative pergola-style top, build in small side tables between the legs, or add extra bracing for a different aesthetic. Just be sure that any modifications do not compromise the structural integrity of the frame. If you change the angles or dimensions significantly, you may need to consult a more advanced woodworking plan to ensure it remains stable.
Conclusion
Building your own porch swing frame is an achievable and highly satisfying project that adds charm and function to your outdoor space. By following these steps, you can create a sturdy and beautiful structure tailored to your exact preferences. From gathering materials to applying the final coat of stain, each phase of the process brings you closer to having that perfect, peaceful retreat in your own backyard. Now that you have a clear understanding of how to make a frame for a porch swing, you are ready to start building and soon enjoy the gentle sway of your new favorite spot.
About
Jovie Mathews is a backyard and outdoor expert writer with over 12 years of hands-on experience transforming neglected outdoor spaces into thriving gardens and functional retreats. Raised in a family where weekends meant digging in the soil and building raised beds from scratch, Jovie developed a genuine love for the outdoors long before it became a career.
She writes with a practical, no-fluff approach — always testing ideas in her own backyard before sharing them with readers. From composting systems and native plant selection to patio design and pest control, Jovie covers the full spectrum of backyard life with equal parts expertise and enthusiasm.
Education
B.Sc. in Horticulture Science
University of Florida (UF) · Gainesville, FL · 2014
IFAS College of Agricultural and Life Sciences
Minor in Environmental Studies
University of Florida (UF) · Gainesville, FL · 2014
College of Liberal Arts and Sciences
Areas of expertise
- Lawn & Garden Care
- Soil prep, planting, seasonal care
- Outdoor DIY Projects
- Raised beds, fencing, pathways
- Composting & Soil Health
- Organic methods, amendments
- Native Plants & Wildlife
- Pollinators, habitat gardening
When she is not writing, Jovie can be found testing new composting techniques, growing tomatoes in questionable quantities, or convincing her neighbors that clover lawns are actually a great idea. She currently gardens in the Pacific Northwest.