A worn or damaged porch railing can be an eyesore and a safety hazard. Tackling this home improvement project yourself might seem daunting, but with the right guidance, it’s a manageable task for most homeowners.

This guide will walk you through the process, covering everything from removing the old structure to installing the new one securely. Learning how to replace porch railing not only boosts your home’s curb appeal but also ensures your outdoor space is safe for family and friends. Let’s get started on transforming your porch.
Why Replace Your Porch Railing?
Porch railings serve a dual purpose: they are a critical safety feature and a key element of your home’s exterior design. Over time, exposure to the elements can cause wood to rot, metal to rust, and connections to loosen. A failing railing poses a serious risk of injury from falls, making its replacement a priority for safety.
Beyond safety, a new railing can dramatically update your home’s appearance. Replacing-an-old, dated design with a modern style can significantly boost your curb appeal and, in turn, your property value. Whether you’re preparing to sell or simply want to enjoy your outdoor space more, a fresh railing provides a high-impact upgrade. It’s an investment in both the security and aesthetic of your home.
8 Step Methods Guide on How to Replace Porch Railing
Step 1: Measure and Plan Your Project
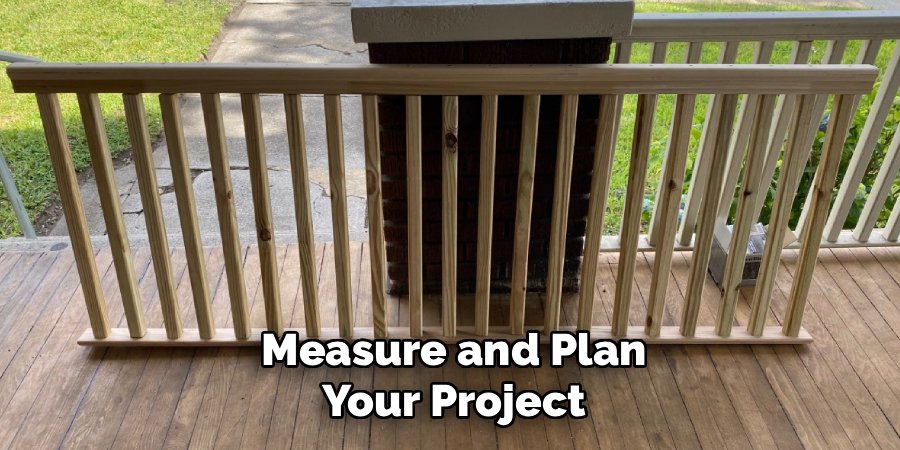
Before you remove anything, careful planning is essential. Measure the length and height of your existing railing sections. Take note of the distance between posts and the overall layout. Use these measurements to determine how much new material you’ll need, whether you’re buying a pre-made railing kit or building one from scratch. Sketching out a simple diagram of your porch can help visualize the project and prevent costly mistakes. This is also the time to choose your new railing material, such as wood, vinyl, or metal, and ensure it complies with local building codes for height and spindle spacing.
Step 2: Gather Your Tools and Materials
Once your plan is set, it’s time to gather everything you need. This will save you multiple trips to the hardware store. Essential tools typically include a tape measure, a level, a drill with various bits, a circular or miter saw, and a pry bar. You’ll also need safety gear like gloves and safety glasses. Based on your measurements from the previous step, purchase your railing system, posts, fasteners, and any finishing materials like paint or stain. Laying out all your tools and materials before you begin ensures a smoother, more efficient workflow from start to finish.
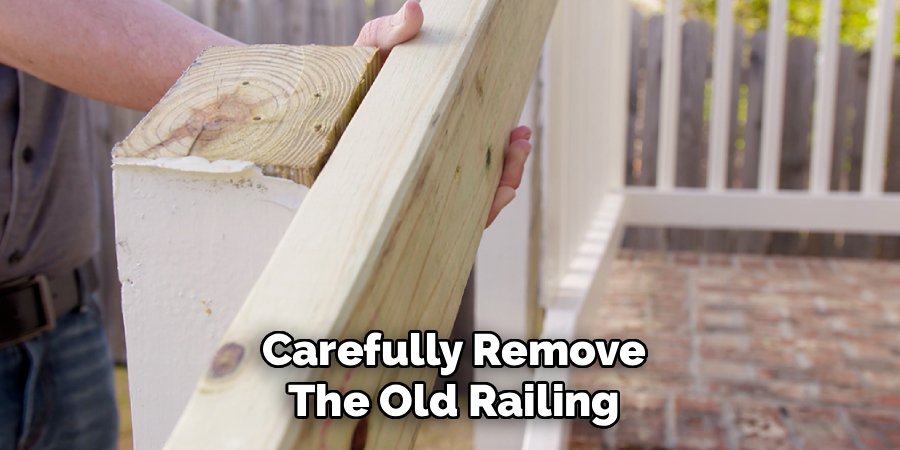
Step 3: Carefully Remove the Old Railing
With your new materials ready, you can begin removing the old railing. Start by detaching the balusters (the vertical spindles) from the top and bottom rails. A pry bar or the back of a hammer can be useful here. Once the balusters are gone, focus on removing the top and bottom rails from the support posts. These are often attached with screws or nails. Work carefully to avoid damaging the main posts if you plan to reuse them. If the posts are also being replaced, you can be more forceful with the removal process.
Step 4: Inspect and Repair the Porch and Posts
After the old railing is gone, take the opportunity to inspect the porch structure. Check the main support posts, the porch floor, and the rim joist for any signs of rot, insect damage, or structural weakness. This is a critical step for long-term safety. If you find any soft spots or decay, you must repair or replace the damaged wood before proceeding. A solid foundation is crucial for a secure new railing. If you are reusing old posts, ensure they are still plumb (perfectly vertical) and securely anchored to the porch frame.
Step 5: Install New Support Posts (If Needed)
If your old posts were damaged or you’re changing the railing layout, now is the time to install new ones. New posts must be securely anchored to the porch framing. Typically, this involves using galvanized bolts or specialized structural screws to attach the post to the joists below the decking. Use a level on two adjacent sides of each post to ensure it is perfectly plumb before permanently fastening it. Proper post installation is fundamental to the stability of the entire railing system, so take your time to get it right.
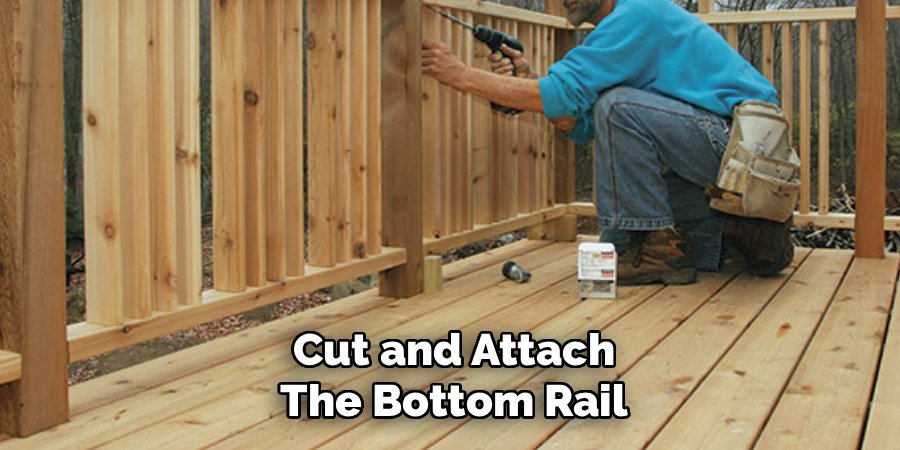
Step 6: Cut and Attach the Bottom Rail
With the posts in place, you can begin installing the new railing. Start with the bottom rail. Measure the distance between your posts and cut the bottom rail to fit snugly. Depending on your railing system, you may attach it directly to the posts with screws or use mounting brackets. Position the bottom rail at the height required by your local building code, typically a few inches off the porch surface to allow for cleaning. Use a level to ensure it is perfectly horizontal before securing it on both ends.
Step 7: Install the Balusters or Spindles
Next, you will attach the balusters. First, determine the correct spacing. Most building codes require that a 4-inch sphere cannot pass through the balusters at any point. Measure and mark the locations for each baluster on the bottom rail. Attach the balusters to the bottom rail using the screws or connectors provided with your railing kit. Ensure each baluster is plumb before you secure it. This process requires patience and precision, as evenly spaced and vertical balusters are key to a professional-looking and safe railing. This is a key part of how to replace porch railing correctly.
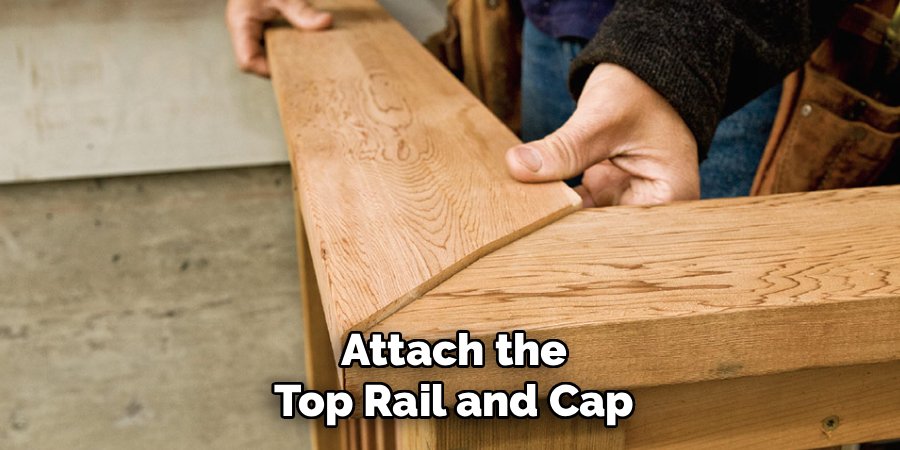
Step 8: Attach the Top Rail and Cap
Once all balusters are installed, it’s time to add the top rail. Measure and cut the top rail to fit between the posts, just like you did with the bottom rail. Carefully lower it onto the balusters, ensuring each one fits into its designated slot. Secure the top rail to the balusters and then to the support posts using screws or brackets. For a finished look, add a post cap to the top of each support post. This not only enhances the appearance but also protects the top of the wood post from water damage.
Finish and Seal Your New Railing
The final step is to protect your new railing from the elements. If you used pressure-treated wood, you might need to wait a few weeks for it to dry before applying a finish. For other wood types, you can proceed immediately. Sand down any rough spots for a smooth surface. Apply a high-quality exterior paint, stain, or sealer. This finish will not only give your railing the desired color but will also protect it from moisture, UV rays, and rot, ensuring it looks great and remains durable for years to come.
Frequently Asked Questions
What Is the Average Cost to Replace a Porch Railing?
The cost varies widely based on material, porch size, and whether you DIY or hire a pro. DIY projects using wood can cost between $15–$30 per linear foot. Vinyl or composite materials are more expensive, ranging from $30–$60 per foot. Hiring a professional installer will add significant labor costs, often doubling the total price.
How Do I Know if My Porch Railing Needs to Be Replaced?
Look for clear signs of deterioration. This includes:
- Widespread wood rot or soft spots.
- Significant rust on metal railings.
- Loose or wobbly posts and balusters.
- Cracked or splintered wood.
If the railing feels unstable when you push on it, it’s a major safety hazard and should be replaced immediately.
What Is the Best Material for a Porch Railing?
The best material depends on your budget, climate, and desired maintenance level. Wood is classic and affordable but requires regular staining or painting. Vinyl and composite are low-maintenance and durable but have a higher upfront cost. Metal, like aluminum or steel, offers excellent strength and a modern look but can be expensive and may require protective coatings.
Do I Need a Permit to Replace My Porch Railing?
This depends on your local municipality. In many areas, replacing a railing with a similar one does not require a permit. However, if you are altering the structure, changing the material, or building a new porch, a permit is often necessary. Always check with your local building department before starting work to avoid fines and ensure your project is compliant.
How High Does a Porch Railing Need to Be?
Standard building codes typically require porch railings to be at least 36 inches high for residential properties. If the porch surface is more than 30 inches above the ground, a railing is usually mandatory. Baluster spacing is also regulated, commonly requiring that a 4-inch sphere cannot pass through. Always confirm your local code requirements, as they can vary.
Conclusion
Replacing a porch railing is a rewarding project that enhances your home’s safety and style. By following these steps—from careful planning and demolition to the precise installation of new posts and rails—you can achieve a professional-quality result. Remember to prioritize safety by inspecting your porch structure and adhering to local building codes. With your new railing installed and finished, you can feel a sense of accomplishment and enjoy your beautiful, secure outdoor space. Now that you understand how to replace porch railing, you’re ready to transform your home’s exterior.
About
Jovie Mathews is a backyard and outdoor expert writer with over 12 years of hands-on experience transforming neglected outdoor spaces into thriving gardens and functional retreats. Raised in a family where weekends meant digging in the soil and building raised beds from scratch, Jovie developed a genuine love for the outdoors long before it became a career.
She writes with a practical, no-fluff approach — always testing ideas in her own backyard before sharing them with readers. From composting systems and native plant selection to patio design and pest control, Jovie covers the full spectrum of backyard life with equal parts expertise and enthusiasm.
Education
B.Sc. in Horticulture Science
University of Florida (UF) · Gainesville, FL · 2014
IFAS College of Agricultural and Life Sciences
Minor in Environmental Studies
University of Florida (UF) · Gainesville, FL · 2014
College of Liberal Arts and Sciences
Areas of expertise
- Lawn & Garden Care
- Soil prep, planting, seasonal care
- Outdoor DIY Projects
- Raised beds, fencing, pathways
- Composting & Soil Health
- Organic methods, amendments
- Native Plants & Wildlife
- Pollinators, habitat gardening
When she is not writing, Jovie can be found testing new composting techniques, growing tomatoes in questionable quantities, or convincing her neighbors that clover lawns are actually a great idea. She currently gardens in the Pacific Northwest.