As the sunny days fade and the leaves begin to turn, it is time to think about packing away your summer gear. Knowing how to store inflatable pool equipment correctly is essential for ensuring your family’s favorite backyard accessory survives the winter intact. Many beginners make the mistake of simply deflating the pool and tossing it into the garage, only to find mold, mildew, or tears when they open it the following season.
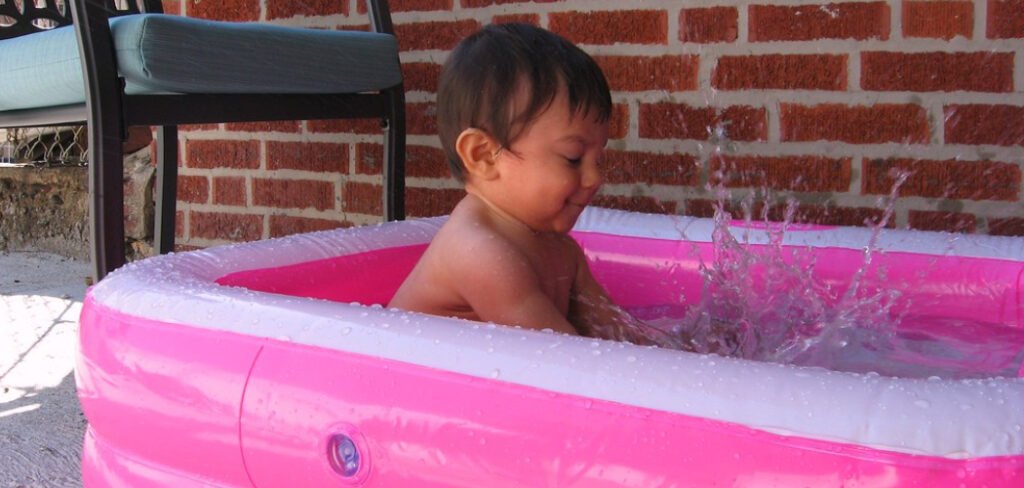
Proper storage saves you money and frustration, keeping your investment safe from pests and temperature fluctuations. This guide walks you through a simple, effective process to clean, dry, and protect your pool so it is ready for action as soon as the warm weather returns. Let’s protect your summer investment with some easy-to-follow steps.
Why Proper Inflatable Pool Storage Matters
Taking the time to put your pool away correctly is about more than just tidiness; it is about extending the lifespan of the materials. Inflatable pools are typically made from vinyl or PVC, materials that are durable against water but sensitive to environmental factors when not in use. If moisture is trapped inside the folds during storage, it creates a perfect breeding ground for mold and mildew. These fungi not only cause unpleasant odors and unsightly stains but can also weaken the vinyl material over time, leading to unexpected leaks.
7 Step-by-Step Guide on How to Store Inflatable Pool
Step 1: Drain the Water Completely and Safely
The very first step in the process is removing every drop of water from the pool. You should locate the drainage plug usually found at the bottom of the structure and open it to let the water flow out. Ideally, you want to direct this water to a safe area of your lawn or garden where it won’t cause flooding or damage to plants, especially if you have used chemicals.
If your pool does not have a drain plug, you will need to carefully deflate the top ring or walls slightly to let the water spill over the edge. Be patient during this process because rushing can leave small puddles at the bottom. Tipping the pool upside down once it is mostly empty ensures that residual water trapped in the corners or seams drains out completely.
Step 2: Thoroughly Clean the Interior and Exterior Surfaces
Once the pool is drained, it is crucial to scrub away the summer grime. Over the season, sunscreen oils, dead bugs, grass clippings, and algae can accumulate on the vinyl surface. Mix a solution of warm water and mild dish soap in a bucket, or use a specialized vinyl cleaner if you prefer.
Using a soft sponge or a non-abrasive cloth, wipe down every inch of the pool, paying special attention to the waterline where scum tends to build up. Avoid using harsh chemicals or bleach, as these can degrade the material and cause it to become sticky or brittle over time. Cleaning the exterior is just as important as the interior, as dirt and mud from the ground can transfer to the inside when you fold it up later.
Step 3: Rinse Off All Soap Residue
After scrubbing the entire surface, you must rinse off the cleaning solution entirely. Soap residue left on the vinyl can attract dirt or cause the layers to stick together during storage, which might rip the material when you try to unfold it next year. Use a garden hose with a gentle spray nozzle to wash away the suds.
Make sure you get into the crevices, seams, and around the inflation valves where soap can easily hide. It is helpful to rinse the pool while it is still slightly inflated so the water runs off the sides easily. If you have deflated it to clean, you might need to hang it over a smooth fence or clothesline to ensure you can rinse both sides effectively without trapping soapy water in the folds.
Step 4: Dry the Pool Completely to Prevent Mold
Drying is arguably the most critical step when learning how to store inflatable pool equipment. Any moisture left on the surface will almost certainly result in mold and mildew growth during the dark winter months. Use old, absorbent towels to wipe down the entire pool, absorbing as much water as possible.
After towel drying, leave the pool out in the sun for a few hours to air dry completely. However, be careful not to leave it in intense direct sunlight for too long, as UV rays can damage the vinyl. If the weather is not cooperating, you can move the pool into a garage or covered patio to finish drying. Ensure that every seam, corner, and valve is bone dry before you even think about folding it up.
Step 5: Deflate the Pool Chambers Carefully
Now that the pool is clean and dry, it is time to let the air out. Open all the air valves and squeeze out the air gently. Some pools have large quick-release valves that make this easier, while others require pinching the valve stem. You can use an electric air pump with a deflate setting to suck the air out completely, which makes the pool much flatter and easier to fold.
If you are doing it manually, roll the pool slowly from the side opposite the valves toward the valves to push the air out. Avoid jumping on the pool to force the air out, as this can put unnecessary stress on the seams and potentially cause them to burst. Take your time to get it as flat as possible.
Step 6: Apply Talcum Powder or Cornstarch
This creates a protective barrier for the vinyl. Before you start folding, sprinkle a generous amount of talcum powder or cornstarch over the surface of the deflated pool. This powder prevents the vinyl from sticking to itself, a common problem that can result in tears when you try to unfold the pool after months of storage in changing temperatures.
The powder absorbs any tiny bits of residual moisture you might have missed and acts as a lubricant for the plastic. It is a simple trick that experienced pool owners swear by. Make sure the powder is distributed evenly across the surface, essentially dusting the pool like a giant pastry. This small step makes a massive difference in the longevity of your inflatable.
Step 7: Fold the Pool Loosely and Neatly
Folding the pool correctly prevents sharp creases that can turn into cracks. Start by folding the sides in towards the center to create a long rectangle. Then, fold the rectangle over on itself, working your way towards a compact square or rectangle shape. Avoid folding it too tightly or creating hard, pressed edges.
A loose fold is better for the material because it reduces stress on the vinyl. If the pool is very large, you might need a helper to manage the bulk. Try to fold it in a way that protects the valves, tucking them inside so they don’t snag on anything. Think of it like folding a heavy blanket or a tent; you want it compact enough to store but loose enough to breathe.
Store in an Airtight Container or Bag
Once folded, place the pool into a breathable storage bag or a sturdy plastic tote. The original box is often too small once the pool has been inflated and unfolded, so don’t force it back in if it doesn’t fit easily. A plastic tote with a latching lid provides excellent protection against rodents, which love to chew on vinyl.
If you use a tote, ensure it is clean and dry inside. If you prefer a bag, make sure it is made of durable material. Label the container clearly so you don’t lose it among your other storage items. Keeping the pool in a dedicated container also protects it from sharp objects that might be in your storage area, like garden tools or nails.
FAQ
How Do I Prevent Mold While Storing My Pool?
The absolute best way to prevent mold is ensuring the pool is 100% dry before packing it away. Moisture is the main culprit. After washing, towel dry the surface and let it air dry in the sun. Additionally, sprinkling talcum powder or cornstarch over the vinyl before folding helps absorb any lingering humidity and keeps the layers separated.
Can I Leave My Inflatable Pool Out During Winter?
Leaving an inflatable pool out during winter is highly discouraged. Freezing temperatures cause the vinyl material to become extremely brittle, leading to cracks and tears. Snow and ice accumulation can also weigh down the structure, causing it to collapse or stretch permanently. It is always better to drain, clean, and store it indoors to ensure it lasts for another season.
Is It Okay to Use Bleach to Clean My Pool?
Using bleach is generally not recommended for inflatable pools. Harsh chemicals like bleach can degrade the PVC or vinyl material, causing it to weaken, discolor, or become sticky over time. Instead, use a solution of warm water and mild dish soap. If you need deeper cleaning, look for products specifically designed for vinyl pool liners to ensure safety.
What Should I Do If I Lost the Original Box?
If the original box is gone or too damaged, a heavy-duty plastic storage tote is an excellent alternative. Totes offer better protection against pests like mice than cardboard boxes do. Alternatively, you can use a large, durable canvas duffel bag. Just ensure whatever container you choose is clean, dry, and large enough to hold the folded pool without forcing it.
How Do I Repair a Hole Before Storing?
If you find a hole, repair it before storage to save time next summer. Clean the area around the puncture thoroughly and let it dry. Apply a vinyl repair patch—usually included with the pool or available at hardware stores—following the instructions carefully. repair glues need time to cure, so fixing it before long-term storage ensures a strong bond.
Conclusion
Properly putting away your summer equipment is a simple task that pays huge dividends. By taking the time to clean, dry, and fold your inflatable pool, you are protecting your investment and ensuring that next summer starts with fun rather than frustration. No one wants to drag out a moldy, cracked pool on the first hot day of the year. Following these steps regarding how to store inflatable pool accessories guarantees that your gear remains in top condition, ready for years of splashing and relaxation. So, grab your mild soap, find a dry towel, and get your pool packed away safely—your future self will thank you for the effort.
<meta_title>How to Store Inflatable Pool: The Ultimate Guide for Beginners</meta_title>
<meta_description>Learn exactly how to store inflatable pool equipment for winter. This beginner-friendly guide covers cleaning, drying, and preventing mold effectively.</meta_description>

About
Jovie Mathews is a backyard and outdoor expert writer with over 12 years of hands-on experience transforming neglected outdoor spaces into thriving gardens and functional retreats. Raised in a family where weekends meant digging in the soil and building raised beds from scratch, Jovie developed a genuine love for the outdoors long before it became a career.
She writes with a practical, no-fluff approach — always testing ideas in her own backyard before sharing them with readers. From composting systems and native plant selection to patio design and pest control, Jovie covers the full spectrum of backyard life with equal parts expertise and enthusiasm.
Education
B.Sc. in Horticulture Science
University of Florida (UF) · Gainesville, FL · 2014
IFAS College of Agricultural and Life Sciences
Minor in Environmental Studies
University of Florida (UF) · Gainesville, FL · 2014
College of Liberal Arts and Sciences
Areas of expertise
- Lawn & Garden Care
- Soil prep, planting, seasonal care
- Outdoor DIY Projects
- Raised beds, fencing, pathways
- Composting & Soil Health
- Organic methods, amendments
- Native Plants & Wildlife
- Pollinators, habitat gardening
When she is not writing, Jovie can be found testing new composting techniques, growing tomatoes in questionable quantities, or convincing her neighbors that clover lawns are actually a great idea. She currently gardens in the Pacific Northwest.