Raising backyard poultry is a rewarding journey, but keeping your feathered friends hydrated is critical for their health and egg production. Fresh, clean water is non-negotiable, yet store-bought dispensers can be expensive and difficult to clean. Fortunately, creating your own solution is simpler than you might think. By building a custom hydration system, you gain control over the water quality and volume, ensuring your birds always have access to what they need.
This guide is designed for complete beginners and home gardeners looking for a practical weekend project. We will walk you through the entire process, from gathering materials to the final installation. You don’t need advanced carpentry skills or expensive tools to succeed here. Let’s dive into exactly how to make a waterer for chickens that is efficient, budget-friendly, and durable enough to withstand the elements of your coop.
Why Building Your Own Chicken Waterer Matters
Creating your own poultry hydration system offers several distinct advantages over purchasing standard commercial models. First and foremost, customization allows you to tailor the capacity to your specific flock size. A standard one-gallon fount might work for chicks, but a dozen laying hens will drain it in hours. When you build your own, you can easily scale up to five-gallon buckets or even larger barrels, reducing the frequency of refills and ensuring your birds are never left thirsty during hot summer days.
7 Step-by-Step Guide on How to Make a Waterer for Chickens
Step 1: Gather The Necessary Tools And Materials
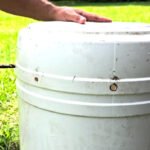
Before you begin construction, it is essential to have all your supplies ready to avoid interruptions. For this project, the primary component is a food-grade plastic container. A standard five-gallon bucket with a tight-fitting lid is the most popular choice because it holds a substantial amount of liquid and is easy to source. You will also need poultry nipples, which are small metal or plastic valves that release water when pecked. These are crucial for keeping the water clean.
In terms of tools, you will need a power drill and a drill bit that matches the size of your poultry nipples, usually an 11/32 inch bit, but check the package instructions to be sure. A measuring tape or ruler will help you space the holes evenly. Having some thread seal tape or clear silicone sealant on hand is also a smart move to prevent leaks around the threads. Organizing these items beforehand ensures a smooth and frustration-free assembly process.
Step 2: Prepare And Clean The Bucket Thoroughly
Hygiene is paramount when dealing with livestock, so starting with a sterile container is non-negotiable. If you are recycling a used bucket, ensure it previously held food-safe materials like pickles or bakery icing, rather than chemicals or paint. Scrub the interior and exterior vigorously with warm, soapy water to remove any residue or potential contaminants. Rinse it multiple times until no soap suds remain.
Once the bucket is clean, dry it completely before marking your drill spots. This preparation phase is often overlooked, but it is critical for the longevity of your waterer and the health of your flock. Inspect the plastic for any cracks or weak spots that could turn into leaks later. Ensuring the structural integrity of your container now saves you the headache of coming out to a flooded coop floor in the future. A clean, sturdy base is the foundation of a successful DIY project.
Step 3: Mark The Drilling Spots For The Nipples
Precision is key when deciding where to place the watering nipples on the bucket. Flip the bucket upside down or lay it on its side to access the bottom surface. You want to install the nipples on the bottom of the bucket rather than the sides, as this allows gravity to do the work efficiently. Using a permanent marker, indicate three to four spots arranged in a circle or square pattern.
Leave ample space between each mark so multiple birds can drink simultaneously without crowding or pecking at each other. A good rule of thumb is to space them at least three or four inches apart. Avoid placing any holes too close to the outer rim or the center reinforcement point of the bucket, as the plastic might be too thick or curved for a good seal. Taking a moment to measure and mark ensures that the final product functions correctly and accommodates your flock’s natural behaviors.
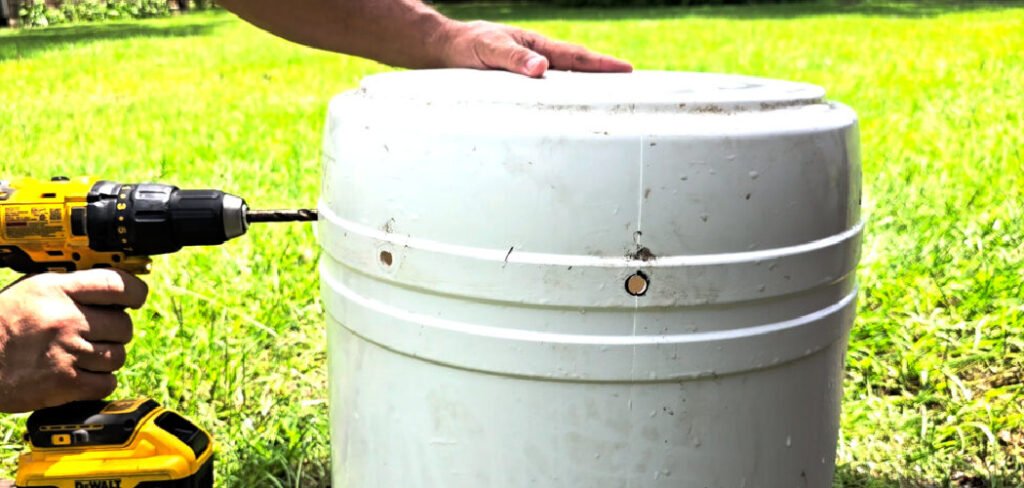
Step 4: Drill The Holes For The Watering Nipples
Now that your spots are clearly marked, it is time to drill the holes. Secure the bucket so it does not spin or wobble while you work; placing it between your feet or clamping it to a workbench is helpful. Equip your drill with the correct size bit for your specific poultry nipples. Drill straight down into the plastic with steady, moderate pressure to create a clean hole.
Drilling at an angle can result in an oval-shaped hole, which will almost certainly leak later on. Take your time and let the drill do the work rather than forcing it through the plastic. Once the holes are drilled, inspect the edges for any plastic burrs or rough fragments. Gently remove these loose pieces with sandpaper or a utility knife. A smooth, clean hole is essential for the threaded nipples to seat properly and create a watertight seal that keeps the bedding dry.
Step 5: Install And Seal The Poultry Nipples
With clean holes ready, you can now insert the poultry nipples. Wrap a small amount of thread seal tape around the threads of each nipple before installation. This extra step acts as a gasket, filling any microscopic gaps between the metal and the plastic to prevent annoying drips. Screw the nipples into the holes by hand first to ensure they are not cross-threaded.
Once they are hand-tight, use a wrench or pliers to tighten them further, but be careful not to over-tighten. Plastic threads can strip easily if too much force is applied. If you want extra security against leaks, you can apply a small bead of food-safe silicone sealant around the base of the nipple on the exterior of the bucket. Allow the sealant to cure according to the manufacturer’s instructions. This creates a durable barrier that ensures the water stays inside the bucket until your chickens decide to take a drink.
Step 6: Create A Vent Hole In The Lid
A vacuum lock is a common issue in gravity-fed systems, preventing water from flowing down to the nipples. To solve this, you must create a small vent hole near the top of the bucket. Locate a spot on the bucket rim or the lid itself, far above the maximum water line. Using a very small drill bit, perhaps 1/16 or 1/8 inch, drill a single tiny hole.
This small opening allows air to enter the container as water is dispensed, equalizing the pressure inside. Without this vent, the flow of water would eventually stop, leaving your chickens thirsty even if the bucket is full. It is a tiny detail that makes a massive difference in functionality. Ensure the hole is small enough to prevent debris or insects from entering, but large enough to facilitate airflow. This simple physics trick ensures your DIY waterer works reliably day after day without constant monitoring.
Step 7: Decide On A Hanging Or Mounting Location
Since the nipples are located on the bottom of the bucket, the waterer cannot simply sit on the ground. It must be suspended or placed on a stand. Hanging is usually the preferred method as it prevents rodents from easily accessing the water and keeps the area underneath clear. Find a sturdy beam or rafter in your coop or run that can support the weight of five gallons of water, which is roughly 40 pounds.
Install a heavy-duty hook or use a strong chain and carabiner to hang the bucket by its handle. The height is critical; the nipples should be at the chickens’ eye level so they have to reach up slightly to drink. This forces them to stretch their necks, which helps the water flow down their throats naturally and minimizes spillage. If you have birds of different sizes, aim for a height accessible to the smallest bird, or provide a step block for them.
Frequently Asked Questions
What Are The Best Materials For A Chicken Waterer?
The best materials are food-grade plastics, specifically HDPE (High-Density Polyethylene) buckets, because they do not leach chemicals into the water. PVC pipe is another excellent option for larger, tube-style systems. Avoid containers that previously held toxic substances like paint or oil. Stainless steel components for the nipples are superior to plastic ones because they resist rust and are more durable against constant pecking. Transparency is also helpful; semi-transparent plastic allows you to check water levels at a glance without opening the lid.
How High Should I Hang The Waterer?
The ideal height for hanging your hydration system depends on the size of your birds. generally, the nipples should be positioned at the height of the chickens’ backs or slightly higher, around eye level when they are standing normally. This forces them to reach up to peck the valve, which mimics their natural swallowing motion and prevents water from dripping onto the floor. For mixed flocks with different sizes, hang it low enough for the smallest bird or provide a sturdy step, like a brick.
How Do I Keep The Water From Freezing In Winter?
Preventing frozen water is a major challenge in colder climates. The most effective method is to use a submersible aquarium heater or a specialized de-icer designed for livestock tanks. Alternatively, there are heated bases available that you can place the bucket on, provided the nipples are not blocked. Insulating the bucket with bubble wrap or foam can also delay freezing but won’t stop it entirely in severe cold. Placing the waterer inside the coop where it is slightly warmer than the run also helps maintain liquid form.
How Often Should I Clean The Waterer?
You should scrub and sanitize the container at least once a week to prevent algae growth and bacterial buildup. Even though nipple systems are cleaner than open troughs, biofilm can still accumulate on the interior walls. Use a long-handled brush and a mixture of white vinegar and water for a safe, non-toxic clean. During the hot summer months, you may need to clean it more frequently, perhaps every three to four days, as heat accelerates algae and bacteria production. Always rinse thoroughly before refilling.
Can Chicks Use Nipple Waterers?
Yes, chicks can use nipple systems, and starting them early is actually beneficial. However, they may not have the strength to activate standard high-flow nipples immediately. There are specific “horizontal” nipples or low-pressure vertical nipples designed for younger birds. If you introduce them to this system in the brooder, they will adapt quickly. Always tap the nipple to show them the water droplet. Ensure the height is adjusted frequently as they grow rapidly, keeping it just above their heads to encourage proper drinking posture.
Conclusion
Taking control of your flock’s health starts with the basics, and nothing is more fundamental than clean water. By following this guide, you have not only saved money but also upgraded your coop with a system that promotes hygiene and reduces daily chores. A DIY approach allows you to customize the setup to fit your specific space and flock size perfectly. You no longer have to worry about dirty troughs or constant refills interrupting your day.
We hope this project empowers you to tackle more DIY improvements in your garden and coop. Watching your hens drink from a system you built yourself is a small but satisfying victory in the journey of self-reliance. If you found this guide helpful, why not share your success with fellow gardeners? Now that you understand how to make a waterer for chickens, grab a bucket and a drill, and give your flock the upgrade they deserve this weekend.

About
Jovie Mathews is a backyard and outdoor expert writer with over 12 years of hands-on experience transforming neglected outdoor spaces into thriving gardens and functional retreats. Raised in a family where weekends meant digging in the soil and building raised beds from scratch, Jovie developed a genuine love for the outdoors long before it became a career.
She writes with a practical, no-fluff approach — always testing ideas in her own backyard before sharing them with readers. From composting systems and native plant selection to patio design and pest control, Jovie covers the full spectrum of backyard life with equal parts expertise and enthusiasm.
Education
B.Sc. in Horticulture Science
University of Florida (UF) · Gainesville, FL · 2014
IFAS College of Agricultural and Life Sciences
Minor in Environmental Studies
University of Florida (UF) · Gainesville, FL · 2014
College of Liberal Arts and Sciences
Areas of expertise
- Lawn & Garden Care
- Soil prep, planting, seasonal care
- Outdoor DIY Projects
- Raised beds, fencing, pathways
- Composting & Soil Health
- Organic methods, amendments
- Native Plants & Wildlife
- Pollinators, habitat gardening
When she is not writing, Jovie can be found testing new composting techniques, growing tomatoes in questionable quantities, or convincing her neighbors that clover lawns are actually a great idea. She currently gardens in the Pacific Northwest.