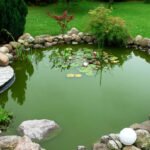
The serene beauty of colorful koi swimming lazily beneath lily pads is a dream for many homeowners, but the price tag of a professionally installed water feature can be a rude awakening. Estimates for custom ponds often run into thousands of dollars, causing many enthusiasts to abandon their project before breaking ground. However, creating a tranquil backyard oasis does not require a luxury budget.
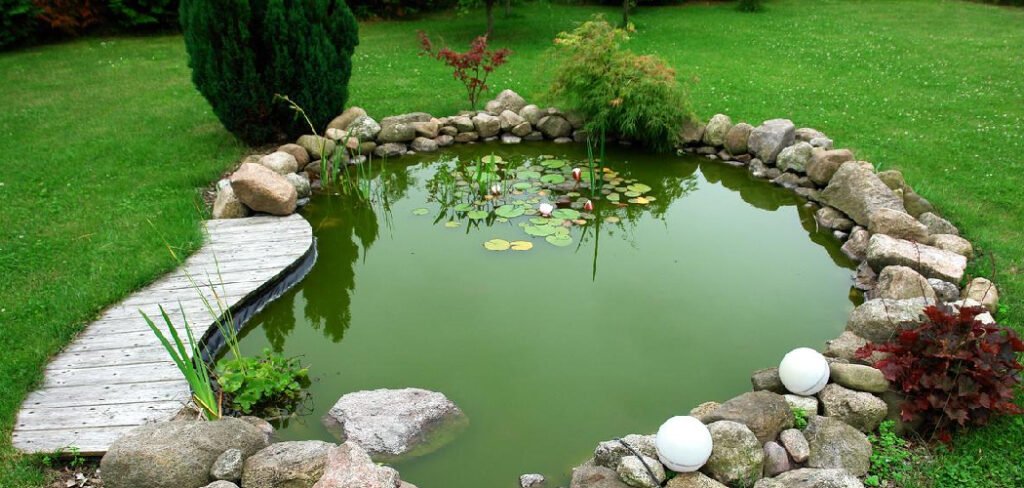
With a bit of sweat equity, smart material choices, and a do-it-yourself attitude, you can achieve stunning results for a fraction of the cost. The secret lies in simplicity and resourcefulness, prioritizing function and health over expensive bells and whistles. This guide is dedicated to showing you exactly how to make a koi pond cheap, proving that you can transform your outdoor space into a peaceful retreat without draining your savings account.
7 Step-by-Step Guide on How to Make a Koi Pond Cheap
Step 1: Choose the Perfect Location
Selecting the right spot is the single most important decision you will make, and it costs absolutely nothing. You need to find a location that balances sunlight and visibility while avoiding potential hazards. A spot that receives partial shade is ideal because it limits algae growth and keeps the water cool during summer, reducing the need for expensive cooling equipment or chemical treatments.
Avoid placing your pond directly under large deciduous trees, as falling leaves will decompose and degrade water quality, forcing you to buy costly skimmers or spend hours cleaning. Place the pond near a patio or window where you can enjoy it daily, maximizing the value of your investment.
Step 2: Source Affordable Liner Materials
The liner is typically the most expensive component of any pond build, but there are ways to cut costs significantly without sacrificing durability. While EPDM rubber liners are the gold standard, they can be pricey. You can often find high-quality surplus liners from landscaping companies or online marketplaces for a discount.
Alternatively, heavy-duty agricultural polyethylene liners or billboard tarps are often used by budget-conscious builders as a cost-effective substitute. If you choose an alternative material, ensure it is fish-safe and UV-resistant. Another trick is to carefully measure your hole before buying to avoid purchasing excess material, as wasted liner is wasted money.
Step 3: Dig It Yourself
Labor is the biggest expense in professional pond installation, often accounting for half the total budget. By picking up a shovel and doing the excavation yourself, you immediately save a massive amount of money. Plan your digging over a weekend or two to avoid burnout.
Create a shelved design with plant ledges rather than straight vertical walls; this requires less structural reinforcement and uses less liner material. Use the excavated soil to create a waterfall berm or raised garden beds elsewhere in your yard, eliminating the cost of hauling dirt away. This physical effort is the cornerstone of keeping your project affordable.
Step 4: Install a DIY Underlayment
Protecting your liner from punctures is crucial, but you do not need to buy expensive commercial geotextile underlayment. Your home and local thrift stores are treasure troves for free or cheap alternatives. Old carpet is widely considered the best budget-friendly underlayment available.
Ask local carpet installers for scraps they plan to throw away, or check online classifieds for people giving away old rugs. Simply remove any staples or sharp tacks, and lay the carpet fuzzy-side up in the hole before placing your liner. Even thick layers of damp newspaper or sand can provide a sufficient cushion against rocks and roots, ensuring your liner lasts for years without a leak.
Step 5: Build a Simple, Homemade Bio-Filter
Filtration is non-negotiable for koi health, but commercial filtration systems can cost hundreds of dollars. Fortunately, building your own effective bio-filter is incredibly cheap and simple. You can construct a highly efficient filter using a sturdy plastic storage tote or a trash can. Fill the container with budget-friendly biological media like plastic pot scrubbies, lava rocks, or even cut-up pieces of drinking straws.
Feed water into the container using a simple pump and PVC pipe, allowing it to flow through the media and back into the pond. This DIY approach mimics expensive systems perfectly, keeping your water clear and your fish healthy for a fraction of the retail price.
Step 6: Use Local Rocks and Natural Edging
Professional pond edging using imported stone is visually striking but astronomically expensive. To keep your project low-cost, look for free or cheap sources of rock in your local area. Farmers often have piles of fieldstones they are happy to have removed from their land.
Construction sites or neighbors doing landscaping renovations may also have excess dirt or stone available for free. When placing the rocks, vary the sizes to create a natural look, and use smaller gravel to hide the black liner completely. By sourcing native stone, your pond will blend seamlessly with the surrounding landscape, looking established and expensive rather than like a cheap addition.
Step 7: Propagate Your Own Plants
Aquatic plants are essential for oxygenating the water and providing shelter for your fish, but nurseries charge a premium for mature specimens. Instead of buying full-grown plants, ask friends or neighbors with ponds for cuttings or divisions. Water lilies, iris, and many marginal plants grow vigorously and often need thinning out, meaning fellow hobbyists are usually eager to share.
You can also start many aquatic plants from seeds, which is incredibly inexpensive. Use standard plastic nursery pots with heavy garden soil topped with gravel instead of expensive aquatic planting baskets. This patience saves you money initially and allows your pond to grow in naturally over time.
Start with Small, Domestic Koi
Stocking your pond is the exciting finale, but imported Japanese koi can cost hundreds or even thousands of dollars each. To stay within budget, buy young, domestic koi or “pond grade” fish from a local breeder or pet store. These fish are often just 3 to 4 inches long and cost very little compared to mature adults.
Koi grow rapidly when given adequate space and food, so a small, inexpensive fish can become a stunning, large specimen in just a few years. Starting small allows you to enjoy watching them grow and develop their colors, and it puts less biological load on your new filter system while it establishes.
Frequently Asked Questions (FAQ)
Do I Need a Bottom Drain for a Cheap Pond?
While bottom drains are standard in high-end koi ponds, they are not strictly necessary for a budget build. You can maintain water quality effectively without one by using a submersible pump placed on the bottom of the pond (or in a skimmer box if you build one).
- Regularly vacuuming the bottom with a shop vac or pond vacuum helps remove sludge.
- Using a net to catch leaves before they sink reduces the need for bottom drainage.
- Good water circulation prevents dead spots where debris accumulates.
Can I Use a Swimming Pool Liner for a Koi Pond?
It is generally not recommended to use standard swimming pool liners for koi ponds. Many pool liners are treated with fungicides and algaecides to keep pool water clear, and these chemicals can be toxic to fish. Furthermore, pool liners are often not UV-stabilized in the same way as pond liners, meaning they may become brittle and crack when exposed to sunlight at the water line. Stick to EPDM or fish-safe polyethylene.
How Deep Should a Budget Koi Pond Be?
To keep koi healthy and safe from predators, your pond needs to be at least 2 to 3 feet deep.
- Protection: Depth provides a retreat from raccoons and herons.
- Temperature: Deeper water stays cooler in summer and warmer in winter, stabilizing the temperature.
- Volume: More water volume makes it easier to maintain stable water chemistry, which is vital for fish health.
What Is the Cheapest Way to Keep Pond Water Clear?
The cheapest way to clear water is through biological balance rather than chemicals.
- Plants: Add plenty of floating plants like water hyacinth or lettuce (where legal) to shade the water and absorb excess nutrients.
- Aeration: Keep water moving with a simple DIY waterfall or fountain to boost oxygen levels.
- Don’t Overfeed: Excess fish food is the number one cause of cloudy water and algae blooms.
How Much Does a DIY Koi Pond Cost?
The cost varies wildly based on size, but a modest DIY koi pond (around 500-1000 gallons) can be built for under $500 if you are resourceful.
- Liner & Underlayment: $150–$200
- Pump: $80–$120
- Filter Materials: $50 (DIY tote filter)
- Plumbing/PVC: $30
- Rocks/Plants: Free or low cost if sourced locally.
Conclusion
Building a beautiful water feature does not have to remain a fantasy reserved for the wealthy. By taking on the labor yourself, scavenging for materials like carpet underlayment and fieldstones, and getting creative with filtration, you can achieve professional-looking results on a shoestring budget. The satisfaction of sitting by water you impounded yourself, watching fish you raised from fingerlings, is far greater than writing a check to a contractor.
Remember that a pond is a living ecosystem that evolves over time; you can always upgrade components later as your budget allows. Now that you understand how to make a koi pond cheap, you have the roadmap to break ground this weekend and bring the tranquility of flowing water to your own backyard.

About
Jovie Mathews is a backyard and outdoor expert writer with over 12 years of hands-on experience transforming neglected outdoor spaces into thriving gardens and functional retreats. Raised in a family where weekends meant digging in the soil and building raised beds from scratch, Jovie developed a genuine love for the outdoors long before it became a career.
She writes with a practical, no-fluff approach — always testing ideas in her own backyard before sharing them with readers. From composting systems and native plant selection to patio design and pest control, Jovie covers the full spectrum of backyard life with equal parts expertise and enthusiasm.
Education
B.Sc. in Horticulture Science
University of Florida (UF) · Gainesville, FL · 2014
IFAS College of Agricultural and Life Sciences
Minor in Environmental Studies
University of Florida (UF) · Gainesville, FL · 2014
College of Liberal Arts and Sciences
Areas of expertise
- Lawn & Garden Care
- Soil prep, planting, seasonal care
- Outdoor DIY Projects
- Raised beds, fencing, pathways
- Composting & Soil Health
- Organic methods, amendments
- Native Plants & Wildlife
- Pollinators, habitat gardening
When she is not writing, Jovie can be found testing new composting techniques, growing tomatoes in questionable quantities, or convincing her neighbors that clover lawns are actually a great idea. She currently gardens in the Pacific Northwest.