Enjoying a chilly evening on your deck is one of the joys of outdoor living, but safety should always come first. A freestanding heater provides wonderful warmth, yet it can pose a significant hazard if the wind picks up or if it gets bumped. Understanding how to keep patio heater from tipping over is essential for protecting your property and ensuring everyone stays safe.
This guide is designed for beginners and home gardeners who want peace of mind while relaxing outside. By taking a few simple precautions and securing your unit properly, you can prevent accidents before they happen. We will walk you through easy, practical methods to stabilize your heat source so you can focus on the comfort of your outdoor space rather than worrying about the wind.
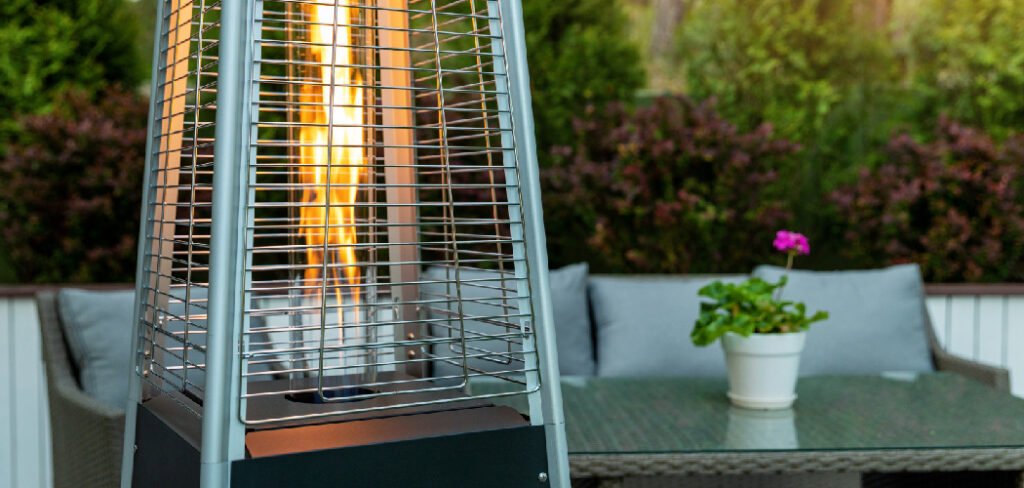
Why Securing Your Outdoor Heater Matters
Outdoor heaters are often top-heavy by design. Most models feature a heavy base to counteract the weight of the reflector hood and heating element at the top, but this isn’t always enough to combat strong gusts of wind or accidental bumps. If a heater falls, the consequences can be severe. There is an immediate risk of fire if the heating element contacts flammable materials like wooden decks, dry leaves, or patio furniture cushions. Additionally, the glass components and gas lines can shatter or rupture, leading to expensive repairs or total replacement.
7 Step Methods Guide on How to Keep Patio Heater From Tipping Over
Step 1: Choose the Safest Location for Stability
The first line of defense against accidents is selecting the right spot for your unit. You should place your heater on a flat, solid surface like concrete or paving stones rather than uneven grass or loose gravel. Uneven ground makes the unit unstable from the start, increasing the likelihood of it falling. Look for a location that is naturally shielded from strong winds, such as near a wall or a sturdy fence, but ensure you maintain the manufacturer’s recommended clearance distances from combustible materials. By positioning the heater in a wind-protected area, you significantly reduce the force exerted on it, making it much easier to keep upright.
Step 2: Utilize Built-in Weighted Bases
Many modern heaters come with a hollow base designed to be filled with sand or water. This is the simplest method to add mass to the bottom of the unit, lowering its center of gravity. If your model has this feature, do not skip this step. Water is convenient, but sand is generally better because it is denser and will not freeze or leak out as easily. Carefully fill the compartment to its maximum capacity. If your heater does not have a fillable base, do not worry; there are external solutions available. The goal here is to make the bottom of the unit significantly heavier than the top, which acts as a natural anchor against tipping forces.
Step 3: Install High-Quality Ground Spikes
For those placing their heater on softer ground like a lawn or packed dirt, ground spikes are an excellent stabilization tool. These accessories usually attach to the base of the heater and are driven deep into the soil. You will need to check if your specific model has pre-drilled holes in the base for this purpose. If it does, align the spikes and hammer them securely into the earth until the base sits flush against the ground. This method effectively locks the heater in place, preventing it from rocking or shifting. It is particularly useful for garden settings where you might not have a solid patio surface available.
Step 4: Use Sandbags for Additional Weight
If filling the internal base isn’t an option or doesn’t provide enough stability, external sandbags are a versatile solution. You can purchase specialized weight bags designed specifically for patio heaters, often shaped like a donut to fit around the pole, or use standard sandbags. Place these weights neatly on top of the base. This adds significant poundage exactly where it is needed most. For aesthetic purposes, you can find decorative covers for these weights so they blend in with your outdoor decor. This is a non-permanent solution, making it perfect for renters or those who move their heater frequently depending on the wind direction or seating arrangement.
Step 5: Anchor to a Wooden Deck or Concrete
For a more permanent fix, anchoring the unit directly to your flooring provides the highest level of security. If you are wondering how to keep patio heater from tipping over during serious storms, this is often the best answer. On a wooden deck, you can use screws and brackets to fasten the base to the planks. For concrete patios, you will need a masonry drill bit and expansion bolts. This step requires some DIY skills and tools, but the result is a heater that is physically attached to the ground. Ensure you measure twice before drilling to avoid mistakes. This method eliminates the worry of tipping almost entirely, provided the fasteners are checked periodically for tightness.
Step 6: Employ Bungee Cords or Straps
When high winds are forecasted and you cannot move the heater indoors, securing it to a sturdy structure is a smart temporary measure. You can use heavy-duty bungee cords or ratchet straps to tether the heater’s pole to a railing, heavy post, or fence. Wrap the strap around the vertical pole of the heater—avoiding the hot top section—and secure it tightly to the anchor point. This prevents the unit from swaying excessively. While it might not look the most elegant, it is highly effective for storm preparation. Just remember to remove the straps before turning the heater on again to prevent any fire hazards from the straps melting or catching fire.
Step 7: Install an Anti-Tilt Switch Mechanism
While this step doesn’t physically stop the heater from falling, it is a crucial safety backup if stabilization fails. Most modern heaters have a built-in anti-tilt switch that automatically shuts off the gas supply if the unit tilts past a certain angle. Check your owner’s manual to ensure your model has this feature and test it regularly. If your heater is older and lacks this switch, consider upgrading to a newer model or consulting a professional about retrofitting one. This mechanism ensures that if the wind does manage to knock the unit over despite your best efforts, the heating element will cut out immediately, drastically reducing the risk of fire damage to your patio.
Store Away During Severe Weather
Sometimes the best prevention is avoidance. If a severe storm or hurricane-force winds are predicted, the safest course of action is to dismantle the heater or move it into a sheltered area like a garage or shed. Even the best anchors can fail under extreme conditions. If moving the entire unit is too difficult due to weight, try to at least remove the top reflector hood. This hood acts like a sail in the wind, catching gusts and creating leverage that tips the unit. By removing the “sail,” you make the heater much more aerodynamic and less likely to be blown over. This simple step can save your heater from destruction.
Frequently Asked Questions
Can I Use Bricks to Weigh Down My Heater?
Yes, you can use bricks or paving stones to weigh down the base of your heater.
- Pros: They are inexpensive, readily available, and provide substantial weight.
- Cons: They can look unsightly and create a tripping hazard if not arranged neatly.
- Tip: Try to arrange them symmetrically around the base for even weight distribution and consider painting them to match your heater.
What Is the Best Material to Fill the Base With?
Sand is generally considered the superior material for filling hollow heater bases.
- Density: Sand is denser than water, providing more weight per volume.
- Durability: Unlike water, sand will not freeze and crack the plastic base in winter, nor will it leak out if a small crack develops.
- Alternative: If you must use water, add antifreeze if you live in a cold climate.
How Much Wind Can a Patio Heater Withstand?
Most freestanding patio heaters are only designed to withstand wind speeds of up to 10–12 miles per hour without additional support.
- Risk: Anything above 15 mph creates a significant tipping hazard.
- Solution: If gusts exceed this, you must anchor the unit or move it to a sheltered location.
- Warning: Never operate the heater in high winds, as the flame can blow out or flare up unpredictably.
Are There Heaters That Don’t Tip Over?
While no vertical object is completely immune to tipping, some designs are much more stable than others.
- Pyramid Heaters: These have a wider base and a lower center of gravity compared to mushroom-style heaters.
- Wall-Mounted Units: These are bolted to a structure and eliminate tipping risks entirely.
- Tabletop Models: These are smaller and less prone to catching wind, though they still need a stable surface.
Do Anti-Tilt Switches Fail?
Anti-tilt switches are mechanical or electrical devices that can fail over time due to corrosion or wear.
- Testing: You should test the switch annually by carefully tilting the heater (while lit, in a safe area) to see if the flame extinguishes.
- Maintenance: Keep the internal components clean and free of spider webs or debris.
- Replacement: If the switch fails the test, replace the part immediately before using the heater again.
Conclusion
Securing your outdoor heating source is a vital part of maintaining a safe and enjoyable garden environment. By following the steps outlined above, you can confidently relax outdoors knowing that your equipment is stable and secure. Whether you choose to anchor it permanently to your deck, use sandbags for flexibility, or simply pick a sheltered spot, every measure helps reduce the risk of accidents. Remember, the goal is to enjoy the warmth without the worry. Take the time today to assess your setup and implement these safety strategies on how to keep patio heater from tipping over, ensuring many cozy, accident-free evenings under the stars.
<meta_data>
Meta Title: How to Keep Patio Heater From Tipping Over: 8 Easy Safety Steps
Meta Description: Worried about wind knocking over your heater? Learn how to keep patio heater from tipping over with our easy, step-by-step guide for a safer garden.
</meta_data>

About
Jovie Mathews is a backyard and outdoor expert writer with over 12 years of hands-on experience transforming neglected outdoor spaces into thriving gardens and functional retreats. Raised in a family where weekends meant digging in the soil and building raised beds from scratch, Jovie developed a genuine love for the outdoors long before it became a career.
She writes with a practical, no-fluff approach — always testing ideas in her own backyard before sharing them with readers. From composting systems and native plant selection to patio design and pest control, Jovie covers the full spectrum of backyard life with equal parts expertise and enthusiasm.
Education
B.Sc. in Horticulture Science
University of Florida (UF) · Gainesville, FL · 2014
IFAS College of Agricultural and Life Sciences
Minor in Environmental Studies
University of Florida (UF) · Gainesville, FL · 2014
College of Liberal Arts and Sciences
Areas of expertise
- Lawn & Garden Care
- Soil prep, planting, seasonal care
- Outdoor DIY Projects
- Raised beds, fencing, pathways
- Composting & Soil Health
- Organic methods, amendments
- Native Plants & Wildlife
- Pollinators, habitat gardening
When she is not writing, Jovie can be found testing new composting techniques, growing tomatoes in questionable quantities, or convincing her neighbors that clover lawns are actually a great idea. She currently gardens in the Pacific Northwest.