There are few things more annoying than settling into your patio chair with a cold drink, only to have the sun blast you right in the face because your umbrella won’t stay tilted. A functioning tilt mechanism is crucial for chasing the shade throughout the day as the sun moves across the sky.
Unfortunately, because these mechanisms contain small moving parts and are constantly exposed to the elements, they are often the first component to fail. Many homeowners assume a broken tilt means the entire umbrella needs to be tossed in the trash, but this is rarely the case.
Most issues are simple mechanical failures that can be repaired with basic tools and a little patience. Whether you have a push-button style or a crank-and-tilt model, restoring its function is a satisfying DIY project.
This guide will teach you how to fix patio umbrella tilt issues effectively, saving you the cost of a replacement and ensuring your backyard oasis stays cool and comfortable all summer long.
Why Fix Your Patio Umbrella?
Fixing your patio umbrella instead of replacing it has several advantages. Firstly, it’s cost-effective—purchasing a new umbrella can be expensive, especially for high-quality models. Repairing it yourself can save a significant amount of money.
Secondly, it’s environmentally friendly, as repairing reduces waste and promotes sustainability by extending the life of the product. Lastly, tackling this simple DIY project gives you a sense of accomplishment and ensures your outdoor space remains functional and inviting without unnecessary delays.
How to Fix Patio Umbrella Tilt: 7 Step-by-Step Guide
Step 1: Identify Your Specific Tilt Mechanism Type
Before you pick up a screwdriver, you need to understand exactly what kind of beast you are dealing with. Patio umbrellas generally fall into three categories: push-button tilt, crank tilt, or collar tilt.

A push-button mechanism uses a spring-loaded metal pin that locks into holes to hold the angle. A crank tilt utilizes an internal cord system that engages when you continue turning the handle after the canopy is open.
A collar tilt involves twisting a ring on the pole itself. Knowing which system you have is critical because the internal components and repair strategies are vastly different for each. Spend a few minutes closely examining the joint where the pole bends to determine the mechanics involved.
Step 2: Inspect the Joint for Debris and Rust
Outdoor furniture lives a hard life, constantly battled by rain, wind, pollen, and dust. Often, the reason a tilt mechanism fails isn’t because something is broken, but because it is jammed with years of accumulated gunk. If you have a push-button tilt that feels stuck or won’t pop back out, or a crank that feels gritty and resistant, start with a deep clean.
Spray the joint mechanism liberally with a penetrating oil like WD-40 or a silicone lubricant. Let it sit for several minutes to dissolve rust and loosen debris. Use a stiff brush or an old toothbrush to scrub around the button or the collar. Sometimes, simply flushing out the dirt and lubricating the moving parts is all that is needed to restore smooth operation.
Step 3: Accessing the Mechanism for How to Fix Patio Umbrella Tilt
If cleaning didn’t solve the problem, you will need to open up the housing to see what is broken inside. For a push-button model, there are usually screws or rivets holding the metal or plastic housing together at the tilt joint. Carefully remove these screws and set them aside in a safe place.
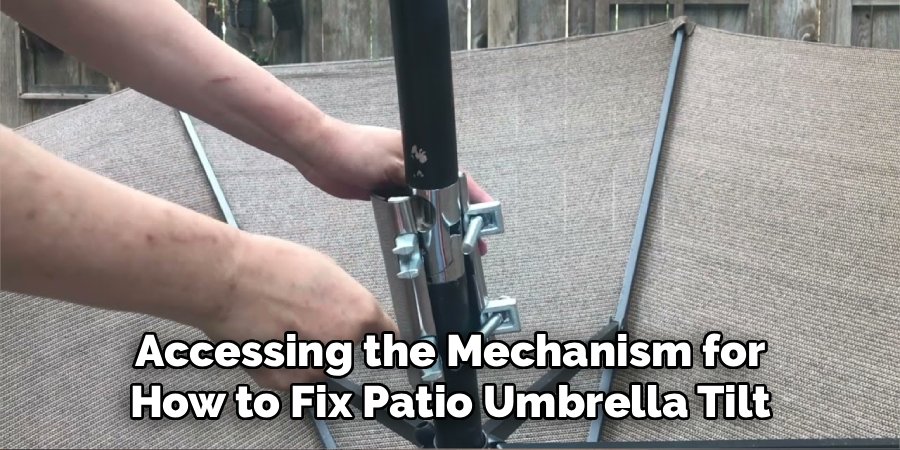
If your model uses rivets, you may need to drill them out carefully, which requires a steady hand. For crank umbrellas, the mechanism is often housed inside the crank case near the handle. You will likely need to separate the upper pole from the lower pole to access the internal workings. Be extremely gentle as you separate the housing halves to avoid having internal springs or pins fly out and get lost in the grass.
Step 4: Evaluate the Internal Cord and Pin Condition
Once you have exposed the inner workings, look for the most common points of failure. In a crank-style umbrella, the culprit is almost always a frayed, snapped, or tangled nylon cord. This cord is responsible for pulling the canopy into a tilted position. If it is broken, the mechanism will spin uselessly without engaging the tilt. For push-button models, inspect the metal locking pin and the spring behind it.
The spring may have rusted through and snapped, or the pin itself might be bent or sheared off. Take clear photos of the internal assembly before you touch anything further. This visual reference will be invaluable when you are trying to remember exactly how the small washers and springs fit back together during reassembly.
Step 5: Replace Broken Cords or Stuck Springs
This is the core repair phase where you swap out the damaged components. If you are dealing with a broken cord in a crank umbrella, you will need to purchase a heavy-duty nylon replacement cord, preferably one designed for marine or outdoor use. Thread the new cord through the pulley system exactly as the old one was routed, using your reference photos as a guide.
If you are fixing a push-button tilt, you might need to head to the hardware store to find a spring of similar tension and size. If the locking pin is bent, you might be able to hammer it straight, but if it is snapped, you will need to find a metal rod or bolt of the same diameter to fashion a replacement pin.
Step 6: Lubricate and Reassemble the Housing
With the new parts installed, it is time to put everything back together, but do not rush this step. Before closing up the housing, apply a generous amount of waterproof grease (like white lithium grease) to all moving parts, including the new cord, the gears, the spring, and the pin.
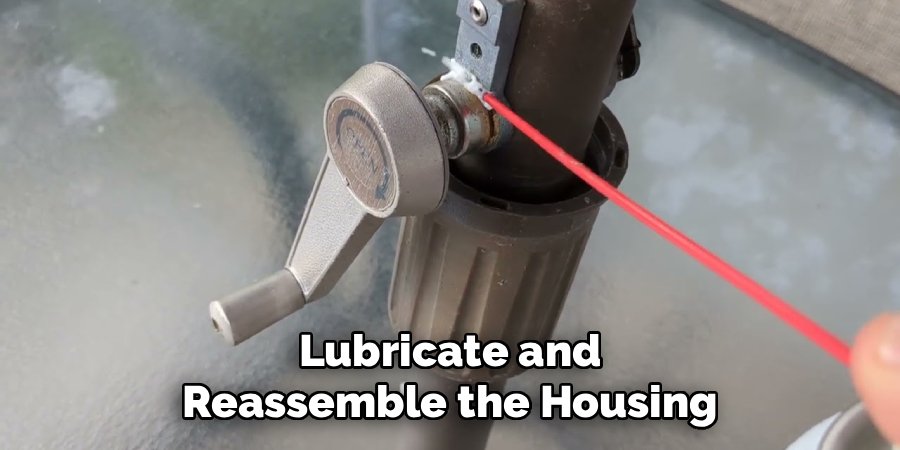
This lubrication will ensure smooth operation and protect the internal metal from future rust. Carefully align the housing halves, ensuring that no cords are pinched and that the button or crank handle is seated correctly. Reinsert the screws and tighten them down firmly, but be careful not to overtighten and crack the plastic housing. If you had to drill out rivets, you will need to install new rivets or replace them with small bolts and locking nuts.
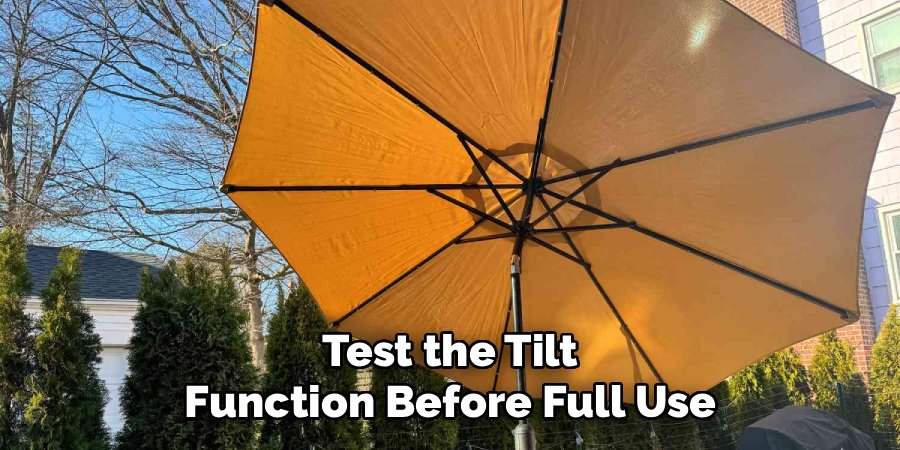
Step 7: Test the Tilt Function Before Full Use
The final step in learning how to fix patio umbrella tilt is the moment of truth. Reattach the canopy structure if you removed it and stand the umbrella upright in its base. Slowly and gently attempt to engage the tilt mechanism. If it is a push-button, press it in; it should move smoothly and snap back out with a satisfying click when the umbrella is angled.
If it is a crank tilt, turn the handle until the canopy is fully open and continue turning to see if the tilt engages seamlessly. If you feel resistance or hear grinding noises, stop immediately. Force could damage your new repair. Disassemble and check your work. If it moves smoothly, congratulations—you have successfully extended the life of your patio umbrella.
Frequently Asked Questions (FAQ)
Can I Replace Just the Tilt Mechanism?
In many cases, yes, you can replace the entire mechanism rather than repairing the individual parts.
- Availability: Many manufacturers sell replacement tilt joints or housing kits specifically for their models. Check the brand’s website or contact their customer service.
- Universal Parts: There are also universal tilt mechanisms available online, but you must be extremely precise with measuring the pole diameter to ensure a proper fit.
- Installation: Installing a whole new joint is often easier than restringing a cord, provided you can find the correct part.
What Type of Cord Should I Use for a Crank Umbrella?
You cannot use just any string or twine for this repair; it needs to be durable and weather-resistant.
- Material: Look for braided nylon cord or paracord. It is strong, flexible, and resistant to rot and mildew.
- Thickness: The most common thickness for umbrella cords is around 2.5mm to 3mm. If the cord is too thick, it won’t fit through the pulleys; if it’s too thin, it might snap under the weight of the canopy.
- Source: You can find suitable cords at hardware stores, marine supply shops, or online retailers selling umbrella repair kits.
Why Is My Push-Button Stuck and Won’t Press In?
A stuck push-button is almost always caused by corrosion or misalignment.
- Rust: Moisture can get inside the joint and rust the spring or the pin, seizing them in place. Penetrating oil is the best fix for this.
- Bent Pin: If the umbrella fell over in the wind, the impact could have bent the internal pin, preventing it from sliding through the hole.
- Debris: Dirt, sand, or even insect nests can jam the mechanism. A good cleaning usually resolves this.
How Do I Prevent the Tilt from Breaking Again?
Prevention is all about reducing stress on the mechanism.
- Close it up: Never leave your umbrella tilted when it is windy. The wind catches the canopy like a sail and puts immense torque on the tilt joint, leading to breakage.
- Reset before closing: Always return the umbrella to the upright, vertical position before cranking it down to close it. Closing it while tilted can snap the internal cords or bend the ribs.
- Storage: Store the umbrella indoors or cover it during the winter to prevent rust.
Is It Worth Fixing a Cheap Umbrella?
This depends on the extent of the damage and the cost of the umbrella.
- The Math: If the umbrella cost $50 and the repair parts cost $20 plus two hours of your time, it might be better to buy a new one.
- Quality: However, if the canopy fabric is high quality and not faded, fixing the frame is worth it.
- Waste: repairing is always the more eco-friendly option. A simple cord replacement costs pennies and keeps a large metal object out of the landfill.
Conclusion
Repairing your patio umbrella is a practical and rewarding project that proves you don’t need to replace expensive outdoor furniture every time a small component fails. By identifying the type of mechanism you have and following a logical disassembly and repair process, you can solve the frustration of a stuck or broken tilt in an afternoon. Remember that maintenance is key; keeping the joints lubricated and closing the umbrella during high winds will protect your repair work for seasons to come.
You have now mastered the skills needed for how to fix patio umbrella tilt, giving you the power to control your shade and reclaim your relaxation time. So, grab your toolbox, fix that tilt, and get back to enjoying your backyard sanctuary exactly the way it was meant to be enjoyed.

About
Jovie Mathews is a backyard and outdoor expert writer with over 12 years of hands-on experience transforming neglected outdoor spaces into thriving gardens and functional retreats. Raised in a family where weekends meant digging in the soil and building raised beds from scratch, Jovie developed a genuine love for the outdoors long before it became a career.
She writes with a practical, no-fluff approach — always testing ideas in her own backyard before sharing them with readers. From composting systems and native plant selection to patio design and pest control, Jovie covers the full spectrum of backyard life with equal parts expertise and enthusiasm.
Education
B.Sc. in Horticulture Science
University of Florida (UF) · Gainesville, FL · 2014
IFAS College of Agricultural and Life Sciences
Minor in Environmental Studies
University of Florida (UF) · Gainesville, FL · 2014
College of Liberal Arts and Sciences
Areas of expertise
- Lawn & Garden Care
- Soil prep, planting, seasonal care
- Outdoor DIY Projects
- Raised beds, fencing, pathways
- Composting & Soil Health
- Organic methods, amendments
- Native Plants & Wildlife
- Pollinators, habitat gardening
When she is not writing, Jovie can be found testing new composting techniques, growing tomatoes in questionable quantities, or convincing her neighbors that clover lawns are actually a great idea. She currently gardens in the Pacific Northwest.