Is your outdoor furniture looking a bit tired and faded? Over time, the sun and rain can take a toll on patio fabrics, turning vibrant prints into dull, worn-out eyesores. Instead of spending a fortune on brand-new furniture, there is a much more rewarding and cost-effective solution: refreshing your existing pieces with custom covers. Taking on a DIY sewing project allows you to choose high-quality, weather-resistant fabrics that perfectly match your style and durability needs.
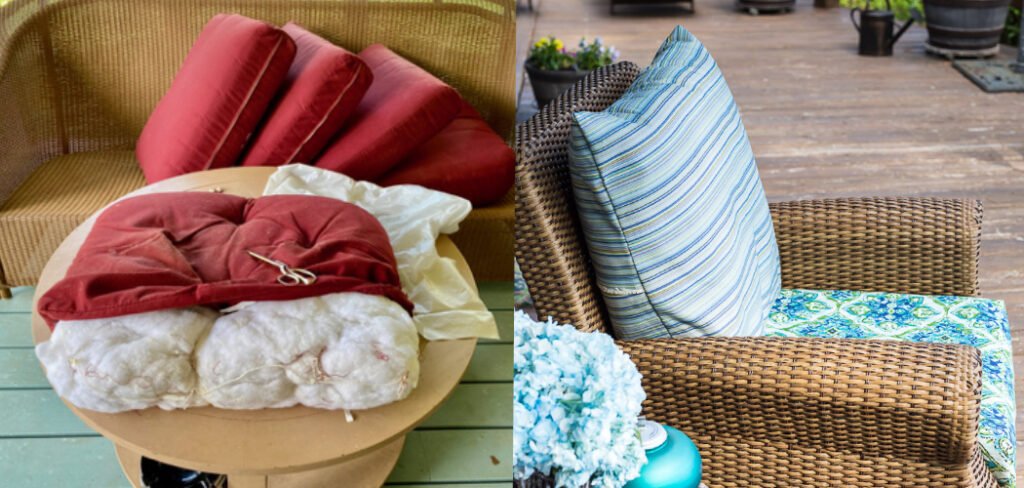
Whether you are a sewing novice or have some experience behind the machine, creating a fresh look for your outdoor oasis is surprisingly achievable. This project empowers you to customize your space with unique colors and patterns that you simply cannot find in big-box stores. In this guide, we will walk you through exactly how to make a patio cushion cover, providing clear instructions to help you transform your backyard into a stylish and inviting retreat ready for relaxation and entertaining.
Why Make Your Own Patio Cushion Cover?
Creating your own patio cushion cover offers numerous benefits beyond just aesthetics. Firstly, it allows you to choose high-quality, durable fabrics that can withstand outdoor conditions, ensuring your cushions last through changing seasons. Secondly, it provides a level of personalization that store-bought options simply cannot match, enabling you to reflect your unique style and preferences. Additionally, making your own cushion covers is often more cost-effective, especially if you already have leftover materials or fabric scraps from previous projects. Not to mention, the satisfaction of completing a DIY project adds a personal sense of accomplishment and pride to your outdoor space.
7 Step-by-Step Guide on How to Make a Patio Cushion Cover
Step 1: Cushion Dimensions Accurately
The foundation of any successful sewing project is precise measurement. Before you buy any fabric or make a single cut, you need to know exactly how big your existing cushion form is. Using a flexible measuring tape, measure the length, width, and depth (thickness) of the foam insert. Do not simply measure the old cover, as fabric can stretch or shrink over time; measuring the actual foam ensures a snug, professional fit. Write down these numbers clearly. For the length and width, you will need to add seam allowances—typically half an inch on each side—to your final measurements. Taking your time during this initial phase prevents wasted fabric and frustration later on.
Step 2: Choose the Right Outdoor Fabric
Selecting the correct material is crucial for longevity in an outdoor environment. You need a fabric specifically designed to withstand the elements, often labeled as “outdoor fabric” or solution-dyed acrylic. These textiles are treated to resist fading from UV rays, repel water, and prevent mildew growth, which standard indoor cottons simply cannot handle. When browsing for materials for your project on how to make a patio cushion cover, look for durability ratings and cleaning codes. While these fabrics might be slightly stiffer to work with than quilting cotton, they are essential for ensuring your hard work lasts through multiple seasons of sun and rain without deteriorating or losing color.
Step 3: Cut Your Fabric Panels to Size
Once you have your measurements and your fabric, it is time to cut the pieces. For a simple box-style cushion, you will need a top panel, a bottom panel, and a long strip for the side boxing (the strip that goes around the perimeter) and potentially a zipper panel if you are including one.
Lay your fabric flat on a large table or the floor. Use a piece of tailor’s chalk or a fabric marker to draw your cutting lines directly onto the wrong side of the fabric based on your measurements including seam allowances. Use sharp fabric shears or a rotary cutter and a straight edge to ensure your lines are perfectly straight and your corners are crisp.
Step 4: Create the Zipper Panel for Easy Removal
Installing a zipper might seem intimidating, but it is a practical addition that allows you to remove the covers for washing. To create a zipper panel, cut a strip of fabric slightly longer than your zipper length and wide enough to match your cushion’s depth plus seam allowance. Cut this strip in half lengthwise.
Pin the zipper tape face down onto the right side of one fabric strip and sew it in place using a zipper foot on your machine. Repeat on the other side. This creates a neat, professional closure that sits on the back edge of your cushion. This is a key skill when learning how to make a patio cushion cover properly.
Step 5: Sew the Boxing Strip Together
Next, you need to construct the continuous strip of fabric that will form the sides of your cushion, known as the boxing. If your cushion is large, you may need to sew multiple shorter strips together to create one long loop that equals the perimeter of the cushion.
Sew the ends of your boxing strip (and your zipper panel if you made one) together to form a continuous loop that matches the circumference of your cushion. Make sure to double-check this loop against your foam insert to ensure it fits snugly but not too tightly. Press your seams open with an iron to ensure they lie flat and create a smooth finish on the outside.
Step 6: Attach the Boxing to the Top Panel
With your boxing loop ready, pin it to the top fabric panel with right sides facing together. Start by matching the corners of the top panel with the marks you made on the boxing strip indicating where the corners should fall. This ensures the cover doesn’t twist. Pin generously around the entire perimeter.
When you reach the corners, you will need to pivot your sewing machine needle to create a sharp, defined corner. Sew around the entire edge with your standard seam allowance. This step transforms your flat pieces of fabric into a three-dimensional shape that is starting to look like a real cushion cover.
Step 7: Attach the Bottom Panel to Complete the Cover
Now repeat the process with the bottom panel. Pin the unsewn edge of the boxing strip to the bottom panel, again with right sides facing together. Ensure that the corners align perfectly with the corners of the top panel so the cushion does not end up skewed.
If you installed a zipper, make sure it is partially unzipped before you sew this final seam; otherwise, you will not be able to turn the cover right side out once you are finished. Sew all the way around the perimeter, securing the structure completely. Reinforce your stitches at the corners for extra durability, as these areas experience the most stress.
Frequently Asked Questions (FAQ)
What Is the Best Fabric for Outdoor Cushions?
The gold standard for outdoor cushions is solution-dyed acrylic fabric, such as Sunbrella. This material is colorfast, meaning the color goes all the way through the fiber, making it highly resistant to fading from UV exposure. It is also resistant to mold, mildew, and water. Other good options include spun polyester with a UV-resistant coating, which is often more affordable but may not last quite as long in harsh sunlight.
Do I Need a Special Sewing Machine?
Generally, no. Most standard home sewing machines can handle outdoor fabric without issue. However, because outdoor fabric is thicker and stiffer than apparel fabric, you should use a heavy-duty needle, such as a size 90/14 or 100/16 “Jeans” or “Heavy Duty” needle. Using a high-quality polyester thread designed for outdoor use is also recommended, as cotton thread can rot over time when exposed to the elements.
How Much Fabric Do I Need?
To calculate yardage, sketch out your pattern pieces on paper first. A standard outdoor cushion usually requires a top plate, a bottom plate, and side boxing strips.
- Measure length × width for top and bottom.
- Measure perimeter × depth for boxing.
- Allow for seam allowances and pattern matching.
Typically, for a standard chair cushion, you will need between 1 to 1.5 yards of 54-inch wide fabric. Always buy a little extra to be safe.
Can I Make a Cushion Cover Without a Zipper?
Yes, you can use an “envelope closure” method if you want to avoid zippers. This involves overlapping two fabric panels on the back of the cushion, similar to a standard pillow sham. While easier to sew, envelope closures can gap open if the cushion is overstuffed and may not provide as tight or weather-resistant a fit as a zippered cover. Velcro is another alternative for a simpler closure.
How Do I Waterproof My New Cushion Covers?
While outdoor fabrics are water-resistant, they are rarely 100% waterproof. To increase protection, you can spray your finished covers with a fabric guard spray like Scotchgard Outdoor Water Shield. Additionally, wrapping your foam insert in batting and a layer of silk film or a waterproof liner before putting it inside the cover can prevent the foam itself from absorbing water like a sponge during heavy rainstorms.
Conclusion
Taking the time to sew your own outdoor cushion covers is a project that pays dividends in both savings and satisfaction. By following these steps, you have not only saved money compared to buying high-end custom cushions, but you have also gained the freedom to design a space that truly reflects your personality. No longer limited to generic beige or stripes, your patio can now showcase vibrant patterns and durable materials chosen specifically by you.
With proper care and the right materials, these covers will serve you well for many summers to come. Now that you have mastered how to make a patio cushion cover, you can confidently tackle other outdoor sewing projects, from throw pillows to shade sails, completing your perfect backyard sanctuary.

About
Jovie Mathews is a backyard and outdoor expert writer with over 12 years of hands-on experience transforming neglected outdoor spaces into thriving gardens and functional retreats. Raised in a family where weekends meant digging in the soil and building raised beds from scratch, Jovie developed a genuine love for the outdoors long before it became a career.
She writes with a practical, no-fluff approach — always testing ideas in her own backyard before sharing them with readers. From composting systems and native plant selection to patio design and pest control, Jovie covers the full spectrum of backyard life with equal parts expertise and enthusiasm.
Education
B.Sc. in Horticulture Science
University of Florida (UF) · Gainesville, FL · 2014
IFAS College of Agricultural and Life Sciences
Minor in Environmental Studies
University of Florida (UF) · Gainesville, FL · 2014
College of Liberal Arts and Sciences
Areas of expertise
- Lawn & Garden Care
- Soil prep, planting, seasonal care
- Outdoor DIY Projects
- Raised beds, fencing, pathways
- Composting & Soil Health
- Organic methods, amendments
- Native Plants & Wildlife
- Pollinators, habitat gardening
When she is not writing, Jovie can be found testing new composting techniques, growing tomatoes in questionable quantities, or convincing her neighbors that clover lawns are actually a great idea. She currently gardens in the Pacific Northwest.