

A propane fire pit brings instant warmth and ambiance to any backyard, but it comes with a familiar chore: the dreaded propane tank swap. Just as the evening gets good, the flame sputters and dies, sending someone on a trip to the hardware store. What if you could have an endless supply of fuel piped directly to your fire feature? That is the convenience of natural gas.
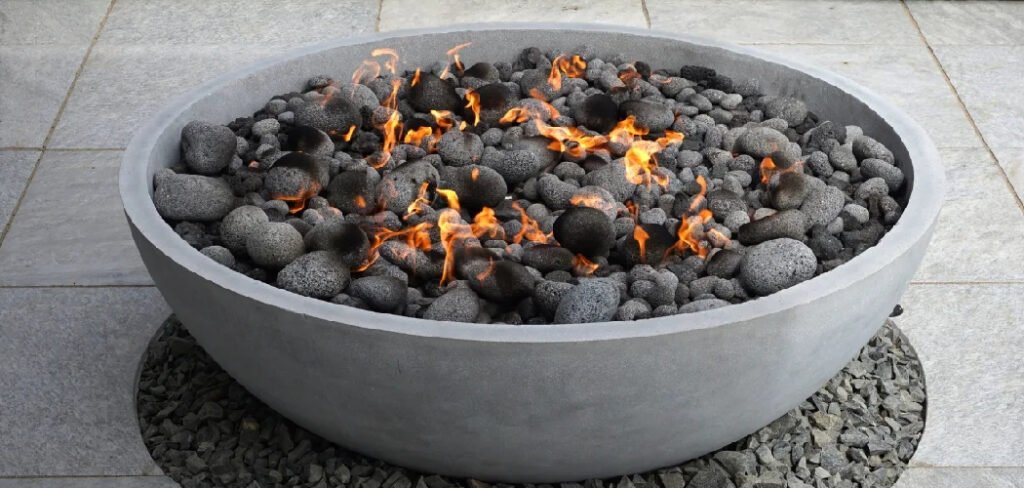
It is often cheaper, more environmentally friendly, and eliminates the need to store or transport heavy tanks. While the project might sound complex, many propane fire pits are designed to be convertible. This guide will walk you through the essential steps and safety precautions, showing you exactly how to convert propane fire pit to natural gas and unlock a new level of convenience for your outdoor living space.
Converting your propane fire pit to natural gas can be a game-changer for your outdoor space. It offers a reliable, constant fuel source and eliminates the hassle of refilling propane tanks. With the right tools and guidance, the process is straightforward and ensures your fire feature is both cost-efficient and environmentally friendly. Before getting started, it’s important to understand the steps involved and the safety measures necessary to complete the conversion properly.
7 Step-by-Step Guide on how to Convert Propane Fire Pit to Natural Gas
Step 1: Verify Fire Pit Compatibility and Local Codes
Before you buy a single part, your first step is crucial research. You must confirm that your fire pit is “dual fuel” or “natural gas convertible.” Check the owner’s manual or look for a label on the appliance itself. If it is not designed for conversion, do not attempt to modify it, as this is extremely dangerous. Next, contact your local building department or a licensed gas fitter to inquire about local codes. Some municipalities require a permit for running a new gas line, and most mandate that the final connection be performed by a certified professional. Understanding these regulations and the capabilities of your equipment from the outset is the most important step for a safe and successful project.
Step 2: Acquire the Correct Natural Gas Conversion Kit
Once you have confirmed your fire pit is convertible, you need to purchase the correct natural gas conversion kit. These kits are not universal; you must use the one specifically designed for your fire pit’s make and model to ensure proper function and safety. The kit typically includes a new gas orifice, a natural gas hose, and sometimes a new air mixer shutter.
The orifice is the most critical part; natural gas requires a larger opening than propane to deliver the same amount of heat (BTUs) because it is under lower pressure. Using the wrong size orifice can result in a dangerously large or small flame. You can usually purchase the correct kit directly from the fire pit manufacturer or a certified dealer.
Step 3: Shut Off and Disconnect the Propane Supply
Safety is paramount when working with gas. Before you begin any disassembly, ensure the propane tank is completely shut off by turning the valve clockwise until it is tight. Disconnect the propane hose and regulator assembly from the tank. Next, disconnect the other end of the hose from the fire pit’s burner inlet.
This is a good time to let any residual propane gas in the lines dissipate for a few minutes in a well-ventilated outdoor area. Make sure there are no open flames, lit cigarettes, or other sources of ignition anywhere nearby during this process. Remove the empty propane tank and store it in a safe, upright position away from your work area.
Step 4: Replace the Orifice
This step is the heart of the conversion. You must replace the small brass propane orifice with the new, larger natural gas orifice from your kit. The orifice is a small fitting located at the point where the gas line connects to the burner assembly. You will likely need to remove the burner pan or fire ring to access it.
Using a wrench, carefully unscrew the existing propane orifice. It is often small, so be careful not to drop or lose it. Then, screw in the new natural gas orifice, ensuring it is snug but not overtightened, which could damage the threads. Some fire pits may also require you to adjust or replace the air mixer shutter—a small plate with holes that controls airflow—so follow your kit’s instructions carefully.
Step 5: Connect the New Natural Gas Hose
With the new orifice installed, you can now attach the components that will connect to your home’s gas supply. Connect the new natural gas hose included in your conversion kit to the fire pit’s gas inlet. Use two wrenches—one to hold the fire pit fitting steady and one to tighten the hose connection—to prevent putting stress on the internal plumbing.
It is highly recommended to apply a pipe sealant or gas-rated PTFE tape to the male threads before connecting to ensure a leak-proof seal. Do not connect the other end of the hose to your natural gas supply line yet; that is the final step and often one best left to a professional.
Step 6: Connect the Gas Line
Unless you are a licensed and experienced gas fitter, this is where you must call in a professional. A certified plumber or gas technician will run a dedicated gas line from your home’s main supply to the location of your fire pit. They will install a manual shut-off valve at the connection point, which is a critical safety feature.
The professional will then make the final connection between this new gas line and the conversion hose you just installed on your fire pit. This is not a DIY task; improper gas line installation can lead to dangerous leaks, posing a severe risk of fire or explosion. This professional step is a core part of learning how to convert propane fire pit to natural gas safely.
Step 7: Perform a Thorough Leak Test
After the professional has made the final connection, you must test every joint for leaks before the first use. Create a solution of dish soap and water in a spray bottle, making it bubbly. With the main gas supply turned on, spray this soapy water generously on every connection point: where the hose connects to the shut-off valve, where the hose connects to the fire pit, and at the orifice connection.
Look closely for any growing bubbles, which indicate a gas leak. If you see bubbles, immediately turn off the gas at the shut-off valve and tighten the leaking connection. Retest until no bubbles appear. Only after you are certain there are no leaks should you attempt to light your newly converted fire pit.
Frequently Asked Questions (FAQ)
Can Any Propane Fire Pit Be Converted to Natural Gas?
No, not all of them. Only fire pits that are specifically labeled as “natural gas convertible” or “dual fuel” by the manufacturer should be converted. These models have been tested for safety with both fuel types.
Attempting to modify a propane-only unit is extremely dangerous, as the burner, valves, and other components are not designed for the different pressure and volume of natural gas, which can lead to unpredictable flames or gas leaks. Always check your owner’s manual first.
Is It Cheaper to Run a Fire Pit on Natural Gas?
Yes, in almost all cases. While the upfront cost of running a gas line can be significant, the long-term fuel cost is much lower. Natural gas is typically priced per cubic foot or therm and is considerably cheaper than buying or refilling 20-pound propane tanks. Over the lifespan of the fire pit, you will likely save a substantial amount of money, especially if you use it frequently. Plus, you gain the convenience of never running out of fuel.
What Is the Difference Between a Propane and Natural Gas Orifice?
The orifice is a small brass fitting with a precisely drilled hole that controls how much gas flows to the burner.
- Propane (LP): It is a high-pressure gas, so it needs a very small orifice hole to deliver the correct amount of fuel.
- Natural Gas (NG): It is a low-pressure gas, so it needs a significantly larger orifice hole to allow more volume to flow through to achieve the same BTU output and flame height.
Why Do I Need a Professional to Install the Gas Line?
Working with gas lines is inherently dangerous and is heavily regulated for good reason. A licensed professional understands local building codes, knows how to properly size the pipe for adequate flow, and has the tools to ensure every connection is perfectly sealed and leak-free.
A small mistake in a DIY gas line installation can lead to a slow, undetected leak, creating a serious fire or explosion hazard for your home and family. It is a job where professional expertise is non-negotiable.
My Flame Is Too Low After Converting. What’s Wrong?
A low or weak flame after conversion is usually caused by one of two issues. First, double-check that you installed the correct, larger natural gas orifice that came with the kit. If the smaller propane orifice is still in place, it will not allow enough gas through.
Second, the gas line itself may be too narrow or too long, causing a drop in pressure by the time the gas reaches the fire pit. A professional installer can calculate the correct pipe diameter needed based on the distance and your fire pit’s BTU rating.
Conclusion
Switching your fire pit from cumbersome propane tanks to a continuous natural gas supply is a fantastic upgrade that adds value and convenience to your home. The process, while detailed, is straightforward when you prioritize safety above all else.
By ensuring your unit is compatible, using the manufacturer-specified conversion kit, and leaving the gas line installation to a certified professional, you eliminate the risks and guarantee a reliable result. The satisfaction of turning a valve and enjoying an endless, beautiful flame is well worth the effort..

About
Jovie Mathews is a backyard and outdoor expert writer with over 12 years of hands-on experience transforming neglected outdoor spaces into thriving gardens and functional retreats. Raised in a family where weekends meant digging in the soil and building raised beds from scratch, Jovie developed a genuine love for the outdoors long before it became a career.
She writes with a practical, no-fluff approach — always testing ideas in her own backyard before sharing them with readers. From composting systems and native plant selection to patio design and pest control, Jovie covers the full spectrum of backyard life with equal parts expertise and enthusiasm.
Education
B.Sc. in Horticulture Science
University of Florida (UF) · Gainesville, FL · 2014
IFAS College of Agricultural and Life Sciences
Minor in Environmental Studies
University of Florida (UF) · Gainesville, FL · 2014
College of Liberal Arts and Sciences
Areas of expertise
- Lawn & Garden Care
- Soil prep, planting, seasonal care
- Outdoor DIY Projects
- Raised beds, fencing, pathways
- Composting & Soil Health
- Organic methods, amendments
- Native Plants & Wildlife
- Pollinators, habitat gardening
When she is not writing, Jovie can be found testing new composting techniques, growing tomatoes in questionable quantities, or convincing her neighbors that clover lawns are actually a great idea. She currently gardens in the Pacific Northwest.




