There is nothing quite like gathering around a crackling fire on a cool evening, but discovering a rusted-out hole in the bottom of your beloved fire pit can instantly dampen the mood. Metal fire bowls are constantly exposed to extreme heat fluctuations and moisture, making them prime candidates for oxidation and corrosion over time. Many homeowners assume that once the bottom burns through, the entire unit is trash. Fortunately, this is rarely the case.
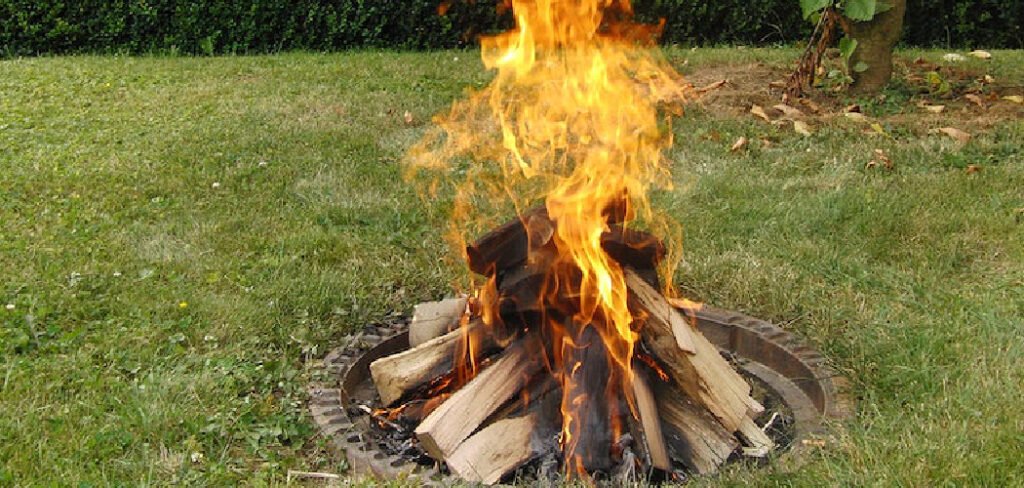
With a few simple tools and materials available at any hardware store, you can patch that breach and extend the life of your unit by years. This guide is designed to save you the cost of a replacement and the hassle of disposal. We will walk you through exactly how to fix hole in bottom of fire pit structures safely and effectively. Whether you are dealing with a small puncture or a larger gap, these beginner-friendly steps will help you restore structural integrity so you can get back to roasting marshmallows and enjoying your outdoor sanctuary.
A fire pit is more than just a functional outdoor feature – it’s a gathering place where memories are made, stories are shared, and warmth is provided on chilly evenings. However, even the sturdiest fire pits can develop wear and tear over time, especially at the bottom where constant exposure to heat and moisture takes its toll. Addressing these issues promptly can prevent further damage and ensure your fire pit remains a centerpiece of outdoor enjoyment for years to come.
7 Step-by-Step Guide on How to Fix Hole in Bottom of Fire Pit
Step 1: Clean and Prepare the Damaged Surface
Before you can apply any patches or fillers, you must create a clean surface for the repair materials to adhere to. Start by removing all ash, unburnt wood, and debris from the bowl. Once empty, use a stiff wire brush or a coarse sandpaper block to vigorously scrub the area surrounding the hole.
You need to remove all loose rust, flaking paint, and soot until you see bare metal. This preparation is crucial because adhesives and welding compounds cannot bond to oxidation. If the rust is severe, you might need to use a rust remover chemical or vinegar solution to ensure the corrosion is halted. Wipe the area down with acetone or rubbing alcohol to remove any remaining dust or oils, leaving a pristine surface ready for the next stage of the repair process.
Step 2: Measure the Gap and Select Material
Once the damage is exposed and cleaned, you need to determine the size of the breach to choose the right repair method. For small pinholes or cracks, a simple high-heat epoxy putty might be sufficient. However, for larger gaps, you will likely need a metal patch.
Measure the diameter of the hole and cut a piece of sheet metal or steel mesh that is at least one inch larger than the hole on all sides. Galvanized steel is often available, but be cautious as it releases fumes when heated; stainless steel or plain steel is safer for high-heat applications. Having a patch that overlaps the healthy metal ensures that the weight of the fuel will be supported properly, preventing the repair from failing under the stress of a heavy log fire.
Step 3: Apply Automotive Body Filler
For a quick and surprisingly durable fix on smaller to medium holes, automotive body filler (often known by the brand name Bondo) can be an effective solution, provided you choose a high-heat variant or reinforce it. Mix the filler with its hardener according to the package instructions. You must work relatively quickly before it sets.
Apply a layer of the mixture around the edges of the hole. Then, place your metal mesh patch over the gap and press it firmly into the wet filler. Apply another layer of the compound over the top of the mesh, feathering the edges out onto the surrounding metal. This creates a “sandwich” that seals the breach. This technique is central to learning how to fix hole in bottom of fire pit units without needing expensive welding equipment.
Step 4: Secure a Metal Sheet with Hardware
If you prefer a mechanical fix over chemical adhesives, bolting a metal plate is a robust alternative. Take your pre-cut metal sheet (steel is best) and drill holes around its perimeter. Place the plate over the hole in the fire pit bottom and mark the corresponding spots on the fire pit itself. Drill through the fire pit metal at these marks.
Use stainless steel bolts, washers, and nuts to secure the plate tightly against the bottom. Stainless steel hardware is essential because standard zinc-plated hardware can corrode quickly or release toxins when exposed to fire temperatures. Tighten the bolts securely to ensure there are no gaps where ash can fall through. This “frankens-patch” look adds a rugged industrial charm and offers immense structural support.
Step 5: Seal the Edges with High-Heat Cement
Regardless of whether you used bolts or a mesh patch, sealing the seams is vital to prevent air drafts that could stoke the fire too aggressively or allow fine ash to leak out. Purchase a tube of furnace cement or fireplace mortar, which can withstand temperatures upwards of 2000°F.
Squeeze a generous bead of this sealant along the edges of your metal patch or around the bolt heads. Use a putty knife or a gloved finger dipped in water to smooth the cement, ensuring it fills every crevice. This step creates a hermetic seal and further protects the underlying metal from direct flame contact. Allow this cement to cure fully according to the manufacturer’s timeline, which usually involves a period of air drying followed by a slow heat cure.
Step 6: Add a Heat-Resistant Paint Coat
Once your structural repairs are complete and the sealants have cured, the aesthetic restoration begins. The repair area will likely look patchy and mismatched compared to the rest of the bowl. To fix this and provide an extra layer of protection against future rust, spray the entire interior and exterior of the bowl with high-heat enamel paint. Look for paint specifically rated for grills or automotive engines. Apply several thin coats rather than one thick coat to prevent dripping and ensure even coverage. This not only makes your fire pit look brand new but also seals the microscopic pores of the metal repair, shielding it from moisture and extending the longevity of your handiwork.
Step 7: Create a False Bottom with Sand
The final step in the restoration process is preventative. To ensure you don’t have to repeat this repair next season, create a thermal barrier at the bottom of the bowl. Pour a layer of lava rocks or specialized silica sand about one to two inches thick across the entire bottom of the fire pit.
This layer acts as an insulator, preventing the intense heat of the burning logs from coming into direct contact with the metal bottom and your new patch. It also aids in drainage and airflow. By sacrificing this replaceable layer of sand to the heat instead of the metal, you drastically reduce the thermal stress on the bowl. This simple addition is the secret to making your DIY repair last for many years to come.
Frequently Asked Questions (FAQ)
Can I Use Regular JB Weld for a Fire Pit?
You should not use the standard JB Weld formula, as it is only rated for temperatures up to 500°F, which a wood fire can easily exceed. However, the brand makes a specific product called “JB Weld ExtremeHeat” intended for mufflers and tailpipes. This version can withstand temperatures up to 2400°F. Always verify the temperature rating on the package before purchasing any epoxy or adhesive for this project.
Is Galvanized Steel Safe to Use for a Patch?
It is generally recommended to avoid galvanized steel for the direct burn area. Galvanized metal is coated with zinc to prevent rust. When zinc is heated to high temperatures, it vaporizes and releases zinc oxide fumes, which can cause “metal fume fever,” a temporary but unpleasant flu-like illness. If you must use it, burn a very hot fire in the pit while staying far away to burn off the coating before using it for social gatherings, but uncoated steel is much safer.
Why Did My Fire Pit Rust Through So Quickly?
The combination of heat and water is destructive. When wood burns, it releases moisture and acidic compounds that settle at the bottom of the bowl. If ashes are left in the pit, they absorb rainwater and turn into a wet, caustic paste that eats through metal rapidly. To prevent this in the future, always clean out cold ashes after use and invest in a waterproof cover to keep the bowl dry when not in use.
Can I Use Concrete to Patch the Hole?
Using standard concrete is dangerous because trapped moisture inside the mix can expand rapidly when heated, causing the concrete to explode or crack violently. However, you can use “refractory cement” or “castable refractory,” which is designed for kilns and forges. This material handles thermal shock well and can be troweled over the bottom to create a smooth, stone-like new surface inside the metal bowl.
How Long Will a DIY Patch Last?
The longevity of your repair depends heavily on maintenance. If you leave the fire pit uncovered and full of wet ash, a patch might only last one season. However, if you keep the pit dry, use a sand layer for insulation, and touch up the high-heat paint annually, a well-executed patch using steel and furnace cement can easily extend the life of your fire pit for three to five years or more.
Conclusion
Repairing a hole in your fire pit is a rewarding DIY project that saves money and reduces waste. By taking the time to properly clean the surface, choose the right heat-resistant materials, and seal the repair effectively, you transform a piece of scrap metal back into a functional centerpiece for your backyard.
The key to long-term success lies not just in the patch itself, but in the preventative measures you take afterward, such as using a sand base and keeping the unit covered. Do not let a little rust end your outdoor entertaining season early. Now that you have mastered how to fix hole in bottom of fire pit units, you can enjoy the warmth and ambiance of your restored fire feature with the satisfaction of a job well done.

About
Jovie Mathews is a backyard and outdoor expert writer with over 12 years of hands-on experience transforming neglected outdoor spaces into thriving gardens and functional retreats. Raised in a family where weekends meant digging in the soil and building raised beds from scratch, Jovie developed a genuine love for the outdoors long before it became a career.
She writes with a practical, no-fluff approach — always testing ideas in her own backyard before sharing them with readers. From composting systems and native plant selection to patio design and pest control, Jovie covers the full spectrum of backyard life with equal parts expertise and enthusiasm.
Education
B.Sc. in Horticulture Science
University of Florida (UF) · Gainesville, FL · 2014
IFAS College of Agricultural and Life Sciences
Minor in Environmental Studies
University of Florida (UF) · Gainesville, FL · 2014
College of Liberal Arts and Sciences
Areas of expertise
- Lawn & Garden Care
- Soil prep, planting, seasonal care
- Outdoor DIY Projects
- Raised beds, fencing, pathways
- Composting & Soil Health
- Organic methods, amendments
- Native Plants & Wildlife
- Pollinators, habitat gardening
When she is not writing, Jovie can be found testing new composting techniques, growing tomatoes in questionable quantities, or convincing her neighbors that clover lawns are actually a great idea. She currently gardens in the Pacific Northwest.