A concrete patio should be a source of enjoyment, a perfect spot for morning coffee or weekend barbecues. However, its appeal can be quickly diminished by persistent puddles that appear after every rainfall. This standing water, known as ponding, is more than just an annoyance.
It can create a slippery safety hazard, attract mosquitoes, and, over time, lead to staining, mold growth, and even structural damage to the concrete itself. This issue typically arises from improper slope, surface cracks, or soil settlement beneath the slab. The good news is you do not have to live with these miniature lakes in your backyard. With the right tools and a little DIY spirit, you can solve the problem for good. This guide will show you exactly how to fix water ponding on concrete patio, restoring its function and beauty for years to come.
Why Fixing Water Ponding on a Concrete Patio Matters
Addressing water ponding on your concrete patio is important for several reasons. First, standing water can accelerate wear and tear on the surface, leading to cracks, erosion, and potential structural problems. Over time, this damage may require costly repairs or even complete replacement of the concrete.
Additionally, water ponding creates a slipping hazard, posing safety risks for you, your family, and guests. It can also attract pests and promote the growth of mold, algae, or mildew, which can make the area unsightly and unhygienic. By fixing this issue, you can protect your investment, enhance the patio’s usability, and ensure a safer, more pleasant outdoor space.
7 Steps Guide on How to Fix Water Ponding on Concrete Patio
Step 1: Identify and Mark the Low Spots
Before you can apply any fix, you must first pinpoint the exact locations and extent of the problem areas. The best time to do this is right after a rain shower when the puddles are clearly visible. If it is a dry day, you can simulate rain by using a garden hose to flood the patio surface. Watch where the water settles and fails to drain away.
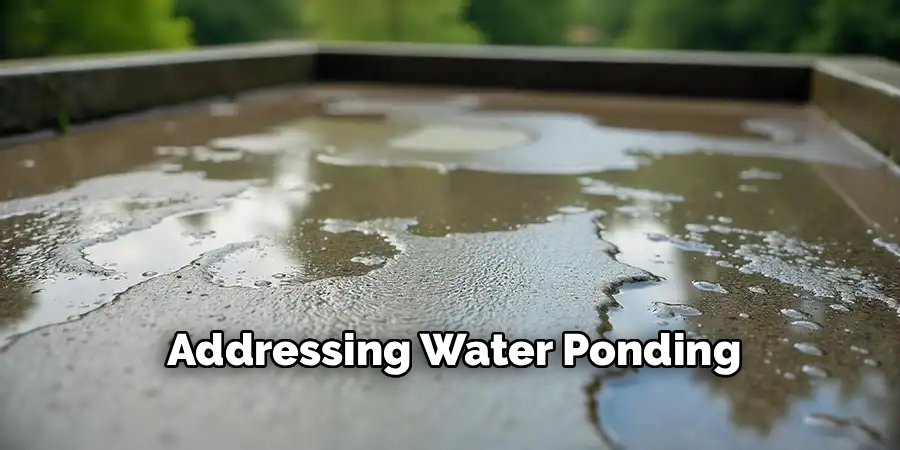
Use a piece of chalk or a contractor’s pencil to draw a circle around the perimeter of each puddle. This visual map is crucial for ensuring you treat the entire affected area and do not miss any smaller depressions. Accurately identifying these low spots is the foundational step for a successful repair.
Step 2: Thoroughly Clean and Prep the Area
With your low spots clearly marked, the next step is to prepare the concrete surface for the patching compound. A clean surface is essential for proper adhesion; any dirt, grease, or loose debris will cause your patch to fail. Start by sweeping the entire patio to remove leaves and dirt.
Then, use a pressure washer or a stiff-bristled brush with a concrete degreaser to scrub the chalked-off areas vigorously. Pay special attention to removing any algae or mildew. Rinse the area thoroughly with clean water and allow it to dry completely. The concrete must be bone-dry before you proceed, as any moisture will compromise the bonding of the leveling compound.
Step 3: Mix the Concrete Leveling Compound
Now it is time to prepare your repair material. You will need a cement-based self-leveling compound or a concrete patch product designed for exterior use. These products are specifically formulated to bond with existing concrete and withstand outdoor elements. Following the manufacturer’s instructions printed on the bag is critical. Typically, you will mix the dry powder with a specific amount of water in a bucket.
Use a power drill with a paddle mixing attachment to ensure a smooth, lump-free consistency. Mix only as much compound as you can use within about 15-20 minutes, as it begins to set quickly. A proper mix is key to the success of learning how to fix water ponding on concrete patio.
Step 4: Apply a Concrete Bonding Agent
To create the strongest possible bond between the old concrete and the new patching material, you should apply a liquid bonding agent. This product acts like a primer, improving adhesion and preventing the new layer from peeling or flaking away over time. Using a small paintbrush or roller, apply a thin, even coat of the bonding agent to the entire dry, cleaned surface inside your chalk marks.
Some bonding agents require you to apply the patching compound while the agent is still tacky, while others need to dry completely. Always follow the specific directions for the product you are using. This simple step dramatically increases the durability and longevity of your repair.
Step 5: Feather the Compound
With the bonding agent applied, pour the mixed leveling compound into the center of the low spot. Use a steel trowel to spread the material from the center outwards, filling the depression. The goal is to make the surface of the patch level with the surrounding high points of the patio.
The most important technique here is “feathering” the edges. This means using your trowel to create a very thin, seamless transition between the patch and the existing concrete. A hard, thick edge will look unprofessional and can create a tripping hazard. A smooth, feathered edge ensures proper drainage and a clean visual finish.
Step 6: Check for Proper Slope and Smooth the Surface
As you work, you must ensure you are not just creating a flat surface but one that encourages water to drain away. Use a long, straight board or a level to check that the patch slopes slightly away from your home’s foundation and towards the edge of the patio.
The standard recommendation for proper drainage is a slope of about one-quarter inch per foot. Make minor adjustments with your trowel as needed to achieve this gentle grade. Once you are satisfied with the slope, give the entire patch a final pass with the trowel to create a smooth, consistent surface.
Step 7: Cure and Seal the Repaired Area
The final step is to allow the patch to cure properly. Concrete does not just dry; it undergoes a chemical hardening process that requires time. Cover the patch with a plastic sheet for 24 to 48 hours to slow down evaporation, which helps prevent cracking and results in a stronger repair.
After the curing time specified by the manufacturer, your patch is complete. To provide maximum protection against future water damage and to create a uniform appearance, it is highly recommended to apply a quality concrete sealer over the entire patio, not just the patched area. This final coat protects your work and the rest of your patio from moisture and stains.
Drainage Solutions
Proper drainage solutions are essential to prevent water from accumulating on your patio and causing damage over time. Poor drainage can lead to pooling water, which may weaken the concrete and promote the growth of mold or algae. To address this issue, consider installing a French drain or channel drain along the edges of the patio to direct water away from the surface.
Additionally, sloping the patio slightly away from your home ensures that water naturally flows outward, reducing the risk of moisture seeping into the foundation. For existing patios, permeable pavers or concrete overlays with drainage capabilities can be excellent retrofitting options.
Regularly cleaning and maintaining gutters and downspouts is also vital, as they prevent excess water from spilling onto the patio during heavy rains. By implementing effective drainage solutions, you can prolong the life of your patio while maintaining a safe and functional outdoor space.
Frequently Asked Questions (FAQ)
What Causes Water to Pond on a Concrete Patio?
Water ponding is almost always caused by an improper slope or low spots in the slab. This can happen for a few reasons:
- Improper Installation: The patio was not graded correctly with a slight slope away from the house when it was poured.
- Soil Settlement: The ground underneath the concrete slab has settled unevenly over time, causing sections of the patio to sink.
- Surface Damage: The concrete surface has worn down or developed depressions from use or freeze-thaw cycles.
Can I Just Drill a Hole for the Water to Drain?
Drilling a “weep hole” is a temporary, inadvisable fix. While it might drain the surface puddle, it directs all that water into the soil directly beneath your patio slab. This can saturate the ground, leading to further soil erosion and settlement. Over time, this can worsen the sinking problem and potentially compromise the structural integrity of your entire patio. It is always better to fix the surface grade.
What Is the Best Product to Use for Leveling?
For DIY repairs, a cement-based, self-leveling underlayment or a polymer-modified concrete patching compound is best. Look for a product specifically rated for exterior use, as interior-grade levelers will not withstand outdoor weather conditions. These products are designed to have strong adhesion, good workability for feathering edges, and the durability to handle foot traffic and freeze-thaw cycles.
How Much Slope Does a Concrete Patio Need?
For proper water drainage, a concrete patio should have a minimum slope of 1/4 inch per foot (a 2% grade). This means that for every foot you move away from your house’s foundation, the patio’s surface should drop by a quarter of an inch. This slope is subtle enough to be unnoticeable when walking or placing furniture but effective enough to guide rainwater away from your home and off the slab.
When Should I Hire a Professional Instead?
You should call a professional concrete contractor if you notice:
- Large, Deep Cracks: Cracks wider than 1/4 inch, especially if one side is higher than the other, indicate a significant structural problem.
- Widespread Sinking: If large sections of the patio have sunk more than an inch, you may need professional slab-jacking or mud-jacking.
- Foundation Issues: If the ponding water is near your home’s foundation and you see cracks in your foundation walls.
Conclusion
Reclaiming your patio from persistent puddles is a manageable and highly rewarding DIY project. It addresses a frustrating problem and protects your long-term investment in your outdoor living space. By carefully identifying the low spots, meticulously preparing the surface, and correctly applying a leveling compound, you can restore the proper slope needed for effective drainage.
The key is to be patient during the prep and curing stages to ensure a durable, long-lasting repair. There is no need to cede your backyard to mosquitoes and slippery hazards. Now that you have a clear plan for how to fix water ponding on concrete patio, you can take on this project with confidence and look forward to enjoying a dry, functional, and beautiful outdoor space once again.

About
Jovie Mathews is a backyard and outdoor expert writer with over 12 years of hands-on experience transforming neglected outdoor spaces into thriving gardens and functional retreats. Raised in a family where weekends meant digging in the soil and building raised beds from scratch, Jovie developed a genuine love for the outdoors long before it became a career.
She writes with a practical, no-fluff approach — always testing ideas in her own backyard before sharing them with readers. From composting systems and native plant selection to patio design and pest control, Jovie covers the full spectrum of backyard life with equal parts expertise and enthusiasm.
Education
B.Sc. in Horticulture Science
University of Florida (UF) · Gainesville, FL · 2014
IFAS College of Agricultural and Life Sciences
Minor in Environmental Studies
University of Florida (UF) · Gainesville, FL · 2014
College of Liberal Arts and Sciences
Areas of expertise
- Lawn & Garden Care
- Soil prep, planting, seasonal care
- Outdoor DIY Projects
- Raised beds, fencing, pathways
- Composting & Soil Health
- Organic methods, amendments
- Native Plants & Wildlife
- Pollinators, habitat gardening
When she is not writing, Jovie can be found testing new composting techniques, growing tomatoes in questionable quantities, or convincing her neighbors that clover lawns are actually a great idea. She currently gardens in the Pacific Northwest.