A stamped concrete patio is a stunning addition to any home, mimicking the high-end look of stone, brick, or slate at a fraction of the cost. However, unlike natural stone, concrete is porous and susceptible to damage from UV rays, freezing temperatures, and oil spills.
Without proper protection, that vibrant color can fade, and the surface can start to pit or crack. Sealing your patio is not just about aesthetics; it is a critical maintenance step that extends the life of your outdoor living space significantly.

Think of sealant as sunscreen for your hardscape—it blocks harmful elements while enhancing the natural beauty underneath. Many homeowners assume this is a job strictly for professionals, but with the right preparation and materials, it is a very manageable weekend project.
This guide will teach you exactly how to seal a stamped concrete patio, ensuring your backyard oasis remains durable, colorful, and ready for entertaining season after season.
Step-by-Step Guide: How to Seal a Stamped Concrete Patio
Step 1: Clean the Concrete Surface Thoroughly
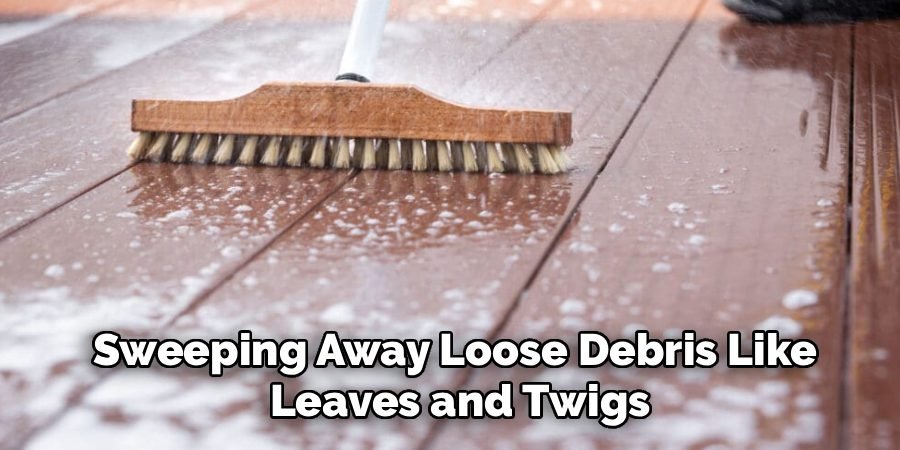
Before you even open a can of sealer, the surface must be immaculately clean. Any dirt, oil, moss, or old flaking sealer left on the concrete will be trapped under the new layer, preventing proper adhesion and ruining the final finish. Start by sweeping away loose debris like leaves and twigs.
Then, use a pressure washer to deep clean the pores of the textured surface. If you have stubborn grease stains from a barbecue grill, apply a specialized concrete degreaser and scrub with a stiff-bristled brush.
Rinse the entire area meticulously to ensure no cleaning residue remains. This preparation phase is the most critical part of learning how to seal a stamped concrete patio correctly because a dirty surface guarantees a failed seal.
Step 2: Allow the Patio to Dry Completely
Moisture is the enemy of a successful sealing job. After you have pressure washed the area, you must let the concrete dry completely. This usually takes at least 24 hours of warm, dry weather, but waiting 48 hours is even safer.
If you apply sealer over damp concrete, the moisture trapped inside will try to escape as vapor, causing the sealer to turn hazy, white, or bubble up. This phenomenon, often called “blushing,” is difficult to fix and usually requires stripping the sealer off entirely.
Check for dryness by taping a clear plastic sheet over a small section; if condensation forms underneath after a few hours, the slab is still too wet to proceed. Patience here prevents costly mistakes later.
Step 3: Choose the Right Sealer for Stamped Concrete
Selecting the correct product is essential for the longevity of your project. For stamped concrete, an acrylic sealer is typically the best choice as it provides a protective film that enhances the color and adds a subtle sheen. You will need to decide between water-based and solvent-based acrylics.
Solvent-based sealers generally offer a glossier finish and deeper color enhancement, often called the “wet look,” which makes the stamping texture pop. Water-based options have less odor and are more environmentally friendly but usually result in a matte or satin finish.
Ensure the product you buy is specifically breathable, allowing moisture vapor from the ground to escape without delaminating the coating. Read the manufacturer’s label carefully to ensure compatibility with any existing sealers if you are resealing.
Step 4: Add an Anti-Slip Additive to the Mixture
Stamped concrete can become incredibly slippery when wet, especially if you use a high-gloss sealer. The texture that looks like smooth stone can turn into an ice rink after a rainstorm or near a swimming pool. To mitigate this safety hazard, you should mix a non-slip additive into your sealer before application.
These additives are usually fine polymer grits, often resembling white sand or powder, that are suspended in the sealer to provide traction without changing the appearance of the finish.
Pour the additive into the sealer bucket and stir it thoroughly. As you work, remember to stir the mixture frequently, as the grit tends to settle at the bottom of the pail. This simple step ensures your beautiful patio remains safe for family and guests to walk on.
Step 5: Apply the First Coat
Now you are ready to apply the sealer. The best method for applying acrylic sealer to stamped concrete is using a solvent-resistant pump sprayer. This ensures an even coat that gets into all the deep textures and grout lines without pooling. Fill your sprayer and work in small, manageable sections, moving in a circular motion to ensure full coverage.

Immediately after spraying, have a helper use a short-nap roller (about 3/8 inch nap) to back-roll the sealer. Back-rolling helps to even out the layer, pushing the product into the concrete pores and smoothing out any puddles.
Keep a wet edge at all times to avoid visible lap lines where the new sealer meets dry sealer. Do not apply the product too heavily; a thin, even coat is far superior to a thick, gloppy one.
Step 6: Let the First Coat Dry and Cure
Once the first coat is down, you need to let it dry before adding a second layer. The drying time depends heavily on the temperature and humidity, but most solvent-based sealers are ready for a recoat in two to four hours. The surface should be tack-free, meaning it is not sticky to the touch.
Do not wait too long—ideally, the second coat should be applied within 24 hours to ensure the layers bond chemically to each other. During this waiting period, ensure that no leaves, bugs, or pets wander onto the sticky surface.
If debris does fall on the wet sealer, pick it out carefully immediately. Proper drying time ensures the hardness and durability of the protective shell you are building over your concrete investment.
Step 7: Apply the Second Coat for Maximum Protection
A single coat of sealer is often not enough to provide uniform protection, especially on porous stamped concrete. Applying a second coat ensures that you have covered any pinholes or missed spots from the first pass. Apply this second layer perpendicular to the direction of the first coat if possible to ensure cross-coverage.

Just like the first step, keep the application thin. Two thin coats are much stronger and more durable than one thick coat, which is prone to bubbling and peeling. Once the final coat is applied, block off the area with caution tape or chairs.
Allow foot traffic only after 24 hours and keep heavy furniture or vehicles off the surface for at least 72 hours to allow the sealer to cure fully and harden against abrasion.
Frequently Asked Questions (FAQ)
How Often Should I Seal My Stamped Concrete Patio?
The frequency depends on the weather conditions and the amount of foot traffic the patio endures.
- General Rule: Most professionals recommend resealing every 2 to 3 years.
- Visual Signs: If the color looks dull or water stops beading up on the surface, it is time to reseal.
- High Traffic: Areas around pools or driveways may need maintenance every year or 18 months due to chemical exposure and wear.
Can I Apply New Sealer Over Old Sealer?
Yes, but only if the chemical composition is compatible.
- Same Type: You can generally apply a solvent-based sealer over an existing solvent-based layer. The new solvents will re-emulsify the old layer, bonding them together.
- Switching Types: You cannot put a solvent-based sealer over a water-based one without stripping the old layer first.
- Test Area: Always perform a small test patch in an inconspicuous corner to check for bubbling or hazing before doing the whole patio.
Why Did My Sealer Turn White or Hazy?
A white or hazy appearance is almost always caused by moisture.
- Trapped Moisture: Applying sealer on damp concrete traps water vapor, which pushes against the sealer as it tries to escape, causing a cloudy look.
- Over-Application: Applying the sealer too thickly can also cause entrapment of solvents or air bubbles.
- Fixing It: You can sometimes fix this by applying a light coat of xylene (for solvent-based sealers) to re-melt the surface and let the moisture escape.
Is It Better to Spray or Roll the Sealer?
For stamped concrete, a combination of both is usually best.
- Spraying: A sprayer is excellent for getting the liquid into the deep texture and grout lines that a roller might bridge over.
- Rolling: Back-rolling after spraying is crucial to even out the coating and prevent pooling in the low spots.
- Roller Only: If you only use a roller, you risk applying it too thick or missing crevices. If you only spray, you might get uneven coverage.
What Is the Best Temperature for Sealing Concrete?
Temperature plays a huge role in the success of your project.
- Ideal Range: The best temperature range is typically between 50°F and 80°F (10°C to 27°C).
- Too Hot: If the concrete is too hot, the solvent evaporates too quickly, causing bubbles or “spider webbing.” Avoid sealing in direct midday sun during summer.
- Too Cold: If it is too cold, the sealer will not form a proper film and may fail to adhere or cure correctly.
Conclusion
Taking the time to properly maintain your outdoor hardscape is one of the smartest investments you can make as a homeowner. It preserves the vibrant colors and detailed textures that made you fall in love with stamped concrete in the first place.
By meticulously cleaning the surface, choosing the right products, and applying thin, even coats, you prevent costly damage from weather and wear. This process not only revitalizes the look of your backyard but also protects the concrete from cracking and spalling for years to come.
While it requires patience and attention to detail, the result is a professional-grade finish that you can be proud of. Now that you have mastered the essential steps of how to seal a stamped concrete patio, you are ready to tackle this project and enjoy a beautiful, resilient outdoor space for your next barbecue or family gathering.
About
Jovie Mathews is a backyard and outdoor expert writer with over 12 years of hands-on experience transforming neglected outdoor spaces into thriving gardens and functional retreats. Raised in a family where weekends meant digging in the soil and building raised beds from scratch, Jovie developed a genuine love for the outdoors long before it became a career.
She writes with a practical, no-fluff approach — always testing ideas in her own backyard before sharing them with readers. From composting systems and native plant selection to patio design and pest control, Jovie covers the full spectrum of backyard life with equal parts expertise and enthusiasm.
Education
B.Sc. in Horticulture Science
University of Florida (UF) · Gainesville, FL · 2014
IFAS College of Agricultural and Life Sciences
Minor in Environmental Studies
University of Florida (UF) · Gainesville, FL · 2014
College of Liberal Arts and Sciences
Areas of expertise
- Lawn & Garden Care
- Soil prep, planting, seasonal care
- Outdoor DIY Projects
- Raised beds, fencing, pathways
- Composting & Soil Health
- Organic methods, amendments
- Native Plants & Wildlife
- Pollinators, habitat gardening
When she is not writing, Jovie can be found testing new composting techniques, growing tomatoes in questionable quantities, or convincing her neighbors that clover lawns are actually a great idea. She currently gardens in the Pacific Northwest.