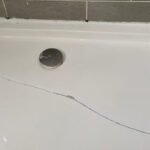
Discovering a crack in your relaxing oasis can be stressful, but it doesn’t necessarily mean you need to buy a brand-new spa. Many surface damages are cosmetic or minor structural issues that you can repair yourself with the right materials and patience. Learning how to fix crack in hot tub surfaces can save you thousands of dollars in replacement costs and professional repair fees.

This guide is designed for beginners, walking you through the process of patching acrylic or fiberglass shells. Whether it’s a small hairline fracture or a slightly larger gouge, addressing it promptly prevents water leakage and further structural damage, ensuring your spa remains a source of comfort for years to come.
Ignoring a small crack in your hot tub shell is a gamble that rarely pays off. What starts as a minor cosmetic blemish can quickly escalate into a major structural failure due to the immense pressure of the water and the constant fluctuations in temperature. Water has a way of seeping into even the tiniest fissures, which can eventually reach the fiberglass backing or the foam insulation.
Once water penetrates these layers, it can cause delamination, where the acrylic surface separates from its support structure, leading to blistering and extensive damage that is far more difficult to repair.
Tools and Materials
Properly repairing a compromised surface requires a specific set of tools and materials to ensure a durable and effective fix. Here is a list of essential items:
Tools
- Rotary tool or sander for smoothing damaged areas
- Utility knife or razor blade for precise cuts
- Putty knife for applying repair materials evenly
- Drill with sanding attachments
- Tack cloth or microfiber cloth for cleaning debris
- Safety equipment such as gloves, goggles, and a dust mask
Materials
- Epoxy or fiberglass repair kit
- Acrylic repair paste or resin
- Sandpaper (various grits, typically from 120 to 600)
- Gel coat for sealing and finishing
- Masking tape to define the repair zone
- Solvent or cleaner to prepare the surface
Using these tools and materials correctly is critical for achieving a seamless repair and extending the life of the damaged surface.
Step-by-Step Guide on how to fix crack in hot tub
Repairing a hot tub shell requires precision and the right materials. This section breaks down the process into manageable actions. Follow these steps carefully to ensure a durable and watertight seal. This guide focuses on using an acrylic repair kit, which is the standard solution for most modern spas.
Step 1: Drain and Dry the Area
Before you can begin any repair work, you must create a dry environment. You do not necessarily need to drain the entire hot tub if the crack is near the top, but the water level must be significantly below the damaged area. If the crack is at the bottom or on a seat, you will need to drain the tub completely.
Once the water is removed, use a clean towel to dry the area thoroughly. Let it air dry for several hours or use a hair dryer on a low heat setting to ensure all moisture has evaporated from the crack itself. Any trapped moisture will prevent the repair material from bonding correctly.
Step 2: Stop the Crack from Spreading
Cracks in acrylic and fiberglass have a tendency to grow over time due to stress and thermal expansion. To prevent this, you need to terminate the crack. Take a small drill bit (about 1/16th of an inch) and carefully drill a small hole at each end of the crack. This technique, often used in windshield repair and metalworking, relieves the stress concentration at the tip of the crack, stopping it from traveling further.

Be gentle and drill only through the acrylic layer; try not to go deep into the fiberglass reinforcement underneath if possible. This small step is crucial for a long-lasting repair.
Step 3: Grind Out the Crack
To ensure the repair material has enough surface area to bond to, you need to widen the crack slightly. Use a rotary tool (like a Dremel) with a grinding bit or coarse sandpaper to sand the edges of the crack into a “V” shape. This creates a valley for the patch material to sit in, rather than just sitting on top of the surface.
Remove any loose chips or flaky material. The goal is to create a rough, clean surface that the adhesive can grip. Grind away the shiny acrylic surface for about half an inch surrounding the crack as well to feather the repair outwards.
Step 4: Clean and Prep the Surface
After grinding and sanding, the area will be covered in fine dust. This dust is the enemy of a good bond. Vacuum up the bulk of the debris first. Then, clean the entire repair area thoroughly with acetone or rubbing alcohol. This removes residual dust, oils, body lotions, and other contaminants that could interfere with the adhesion. Do not use standard household cleaners, as they often leave a residue. Wipe the area with a clean, lint-free cloth and allow the solvent to evaporate completely. The surface should now be dull, clean, and dry, ready for the patch material.
Step 5: Mix and Apply the Repair Material
Most hot tub repair kits come with a two-part epoxy or acrylic filler—a resin and a hardener. Follow the instructions on your specific kit carefully regarding mixing ratios. Mix the components on a disposable surface using a plastic spreader or putty knife until the color is uniform. Once mixed, apply the filler to the prepared crack.
Press it firmly into the “V” groove you created and the drill holes to ensure no air bubbles are trapped. Overfill the area slightly, as the material may shrink a tiny amount as it cures, and you will sand it flush later.
Step 6: Sand the Patch Smooth
Allow the repair material to cure for the time specified by the manufacturer. This usually takes anywhere from a few hours to 24 hours depending on the product and temperature. Once it is fully hardened, it’s time to blend it in. Start with medium-grit sandpaper (around 120-220 grit) to sand the patch down until it is level with the surrounding surface.
Be careful not to scratch the surrounding undamaged acrylic. Switch to progressively finer grits (400, 600, then 800 or higher) to smooth out the scratches and achieve a finish that matches the texture of your hot tub shell.
Step 7: Buff and Polish the Finish
The final step is to restore the shine so the repair blends seamlessly with the rest of the tub. After wet-sanding with your finest grit paper, the area will look smooth but dull. Apply a high-quality acrylic polish or a rubbing compound designed for fiberglass.
Use a soft cloth or a buffing pad on a rotary tool to buff the area in a circular motion. Continue buffing until the patch matches the gloss of the surrounding shell. Wipe away any residue, refill your hot tub, and enjoy your handiwork. You have successfully completed the project on how to fix crack in hot tub surfaces.
Common Mistakes to Avoid
One of the most frequent errors beginners make is rushing the preparation phase. If you do not clean and dry the crack thoroughly, the repair patch will likely peel off within a few weeks. Moisture or oils prevent the epoxy from bonding chemically with the acrylic. Another common mistake is skipping the “stop-drill” step. Without drilling holes at the ends of the crack, the stress that caused the initial damage will continue to act on the shell, causing the crack to extend right past your new patch.
Many people also fail to use the correct color match. Acrylic shells come in various shades of white, silver, and marble. If you don’t take the time to blend the color pigments included in many kits, the repair will stand out like a sore thumb. Finally, avoid refilling the tub too soon. Even if the surface feels dry to the touch, the chemical curing process might need more time to reach full strength and water resistance. Always adhere strictly to the cure times listed on your repair kit’s packaging.
Frequently Asked Questions
Can I Use Regular Super Glue To Fix A Crack?
No, regular super glue is not suitable for repairing hot tub cracks. It is brittle when dry and cannot withstand the constant expansion and contraction caused by the hot water. Furthermore, it does not fill the gap effectively and will likely leak. You must use a specialized acrylic or fiberglass repair kit designed for spas.
How Long Does A DIY Hot Tub Repair Last?
A properly executed DIY repair using high-quality materials can last for many years. If you prepare the surface correctly, stop-drill the crack, and allow for proper curing, the patch often becomes as strong as the original shell. However, if the crack was caused by a major structural defect in the frame, the repair may eventually fail if the underlying support issue isn’t fixed.
Is It Safe To Use The Tub With A Crack?
It is generally not recommended to use a hot tub with a crack, even a small one. The weight of the water and the occupants can cause the crack to spread rapidly. Additionally, water leaking into the internal cabinet can damage expensive electrical components, pumps, and insulation, turning a cheap repair into a costly restoration project.
How Do I Know If The Crack Is Structural Or Cosmetic?
Cosmetic cracks are usually shallow, affecting only the top acrylic layer, and do not leak water. Structural cracks are deeper, often penetrating through the fiberglass reinforcement, and typically result in water loss. If you push on the area near the crack and it feels spongy or flexes significantly, it is likely a structural issue requiring reinforcement.
What If The Crack Is On A Curved Surface?
Repairing a crack on a curve follows the same basic steps but requires more patience during sanding. When applying the filler, use a flexible spreader to contour the material to the shape of the curve. When sanding, use a soft sanding block or sponge to avoid flattening out the curve, ensuring the repair maintains the original profile of the seat or wall.
Conclusion
Taking the time to repair a crack in your hot tub is a rewarding project that protects your investment and restores your peace of mind. By following the preparation and application steps carefully, you can achieve a professional-looking result that stands up to the rigors of hot water and daily use.
Remember that patience is key—rushing the drying or curing times often leads to failure. With the right tools and this guide, you now possess the knowledge for how to fix crack in hot tub shells effectively. Don’t let a small blemish ruin your relaxation; tackle the repair today and get back to soaking in comfort.

About
Jovie Mathews is a backyard and outdoor expert writer with over 12 years of hands-on experience transforming neglected outdoor spaces into thriving gardens and functional retreats. Raised in a family where weekends meant digging in the soil and building raised beds from scratch, Jovie developed a genuine love for the outdoors long before it became a career.
She writes with a practical, no-fluff approach — always testing ideas in her own backyard before sharing them with readers. From composting systems and native plant selection to patio design and pest control, Jovie covers the full spectrum of backyard life with equal parts expertise and enthusiasm.
Education
B.Sc. in Horticulture Science
University of Florida (UF) · Gainesville, FL · 2014
IFAS College of Agricultural and Life Sciences
Minor in Environmental Studies
University of Florida (UF) · Gainesville, FL · 2014
College of Liberal Arts and Sciences
Areas of expertise
- Lawn & Garden Care
- Soil prep, planting, seasonal care
- Outdoor DIY Projects
- Raised beds, fencing, pathways
- Composting & Soil Health
- Organic methods, amendments
- Native Plants & Wildlife
- Pollinators, habitat gardening
When she is not writing, Jovie can be found testing new composting techniques, growing tomatoes in questionable quantities, or convincing her neighbors that clover lawns are actually a great idea. She currently gardens in the Pacific Northwest.