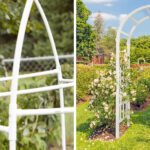
A garden arch turns an ordinary path into a focal point. It frames a walkway, supports climbing plants, and adds height to a flat yard — all without the cost of metal or wood. The best part? You can build one yourself in an afternoon.

Learning how to make a garden arch with pvc pipe is one of the friendliest backyard DIY projects for beginners, because PVC is light, flexible, and forgiving when you make mistakes. You don’t need power tools or carpentry skills, just a few inexpensive supplies and a little patience. This guide walks you through every step, from choosing the right pipe to anchoring your finished arch so it stands firm through wind and weather.
Why a PVC Pipe Arch Is a Smart First Project
A PVC pipe arch is one of the easiest outdoor structures you can build, and that makes it ideal for first-timers. PVC bends into a smooth curve without heat or special tools, so you skip the tricky woodworking and welding that other arches demand.
The cost is low, too. A full project often runs under $40, which means a mistake won’t break your budget. You can experiment freely, learn as you go, and rebuild if something looks off.
There’s a practical payoff as well. Once your arch is up, it gives climbing plants like roses, clematis, and beans a sturdy place to grow. You get a vertical garden feature, more usable space, and a confidence boost that carries into your next backyard project.
Tools and Materials You’ll Need
Gather everything before you start so you can work without interruptions. Most of these items are available at any hardware store, and many you may already own.
- PVC pipe: Two 10-foot lengths of ¾-inch or 1-inch schedule 40 PVC for the arch.
- PVC connectors: Tees, elbows, and couplings to join sections.
- Rebar stakes: Four 2- to 3-foot steel rebar pieces to anchor the legs.
- Hacksaw or PVC cutter: For cutting pipe to length.
- Tape measure and marker: For accurate measurements.
- Rubber mallet: To drive rebar into the ground.
- Sandpaper: To smooth cut edges.
- PVC primer and cement (optional): For permanent, weatherproof joints if you want extra strength.
A helper makes the bending step easier, but you can manage solo with a little planning.
8 Step-by-Step Guide on How to Make a Garden Arch With PVC Pipe
Follow these steps in order. Each one builds on the last, so take your time and double-check your measurements before you commit to any cut.
Step 1 – Plan Your Arch Size and Shape
Start by deciding how tall and wide you want the arch. A standard garden arch stands about 7 feet tall and 4 feet wide, leaving comfortable headroom for walking through.

Measure the spot where the arch will go. Mark the two points where each leg will sit, keeping them parallel and level. Sketch the shape on paper if it helps you picture the final curve.
This is the moment to think about your plants. Climbing roses need wider spacing than sweet peas, so plan accordingly. A clear plan now saves you from cutting pipe twice. When you know how to make a garden arch with pvc pipe that fits your space, the rest of the build goes smoothly.
Step 2 – Cut the Pvc Pipe to Length
Lay your pipe on a flat surface and mark your cut points with a marker. For a basic arch, you’ll cut two leg sections and join them with a curved top, or use two long pieces that bend into a single arc.
Cut slowly with a hacksaw or a dedicated PVC cutter. PVC cuts cleanly, but a rushed stroke can leave a jagged edge that won’t seat properly in a connector.
Run sandpaper around each cut edge to smooth the burrs. You’ll feel the rough plastic give way to a clean surface. Smooth edges slide into fittings easily and create a tighter, more reliable joint.
Step 3 – Drive the Rebar Anchors
Choose the exact spots for your legs and push a rebar stake into the ground at each one. Use a rubber mallet to drive each stake down, leaving about 12 to 18 inches above the soil.
Aim for firm, vertical stakes. Tap gently and check often with a level, because a leaning stake throws off the whole arch.
The rebar acts as a hidden backbone. Your PVC legs will slide right over these stakes, which keeps the arch grounded against wind without any concrete. You’ll hear a satisfying scrape as the pipe settles over the steel and locks into place.
Step 4 – Slide the Legs Onto the Rebar
Take your two leg pipes and slide them down over the exposed rebar. The pipe should swallow the stake snugly, with the metal hidden inside the plastic.
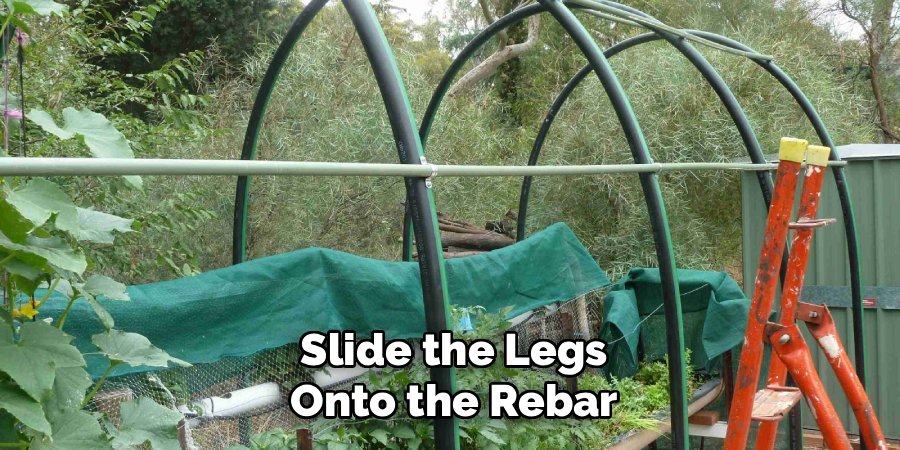
Push each leg firmly until it nearly touches the ground. Give it a wiggle to confirm it sits tight. A loose fit means the arch will sway, so add a wrap of tape around the rebar if there’s any play.
Stand back and check that both legs rise straight and even. This is your first real glimpse of the arch taking shape, and it’s a good moment to correct any lean before you add the top.
Step 5 – Bend and Connect the Top Curve
Now comes the satisfying part. Gently pull the tops of both legs toward each other until they meet in a smooth arc. PVC flexes easily, but move steadily so you don’t kink the pipe.
If you’re using two separate pieces, join them at the peak with a coupling or tee connector. You’ll feel the pipe resist slightly, then settle into a graceful curve.
Have a helper hold the shape while you connect the joint. Knowing how to make a garden arch with pvc pipe really comes together here, as the two straight legs transform into one continuous, eye-catching curve over your path.
Step 6 – Secure the Joints
With the arch shaped, lock every connection in place. For a temporary arch, press the fittings together firmly and add a self-tapping screw at each joint for grip.
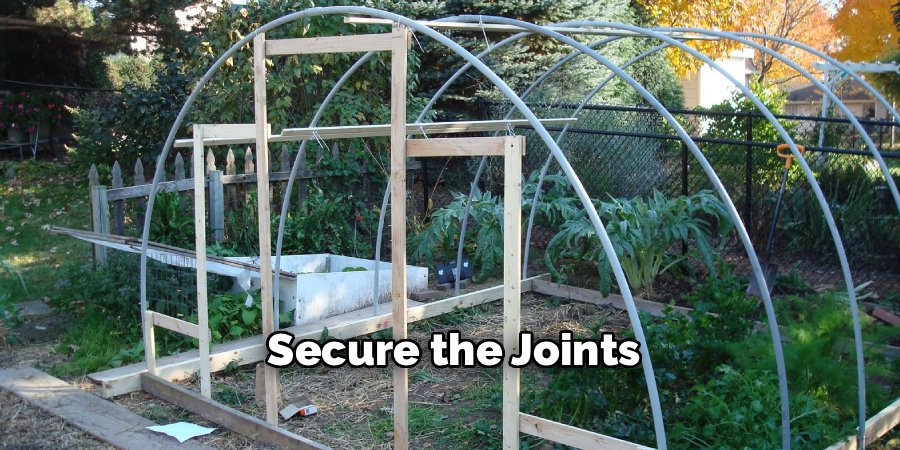
For a permanent structure, apply PVC primer to both surfaces, then brush on PVC cement and push the pieces together with a quarter-turn twist. The cement sets within seconds, so work quickly and hold each joint steady for a moment.
You’ll notice the sharp smell of the solvent — work in a breezy spot and the odor fades fast. Once cured, these joints won’t budge, giving you an arch that handles wind, rain, and the weight of growing vines for years.
Step 7 – Add Support and Stability
A tall arch can twist in strong wind, so reinforce it. Add a horizontal crossbar near the top using a short pipe and two tee fittings, which braces the two sides against each other.
For wider arches, run a second crossbar lower down. This creates a ladder-like grid that climbing plants love to grab onto.
Check the whole frame by giving it a firm shake. It should flex slightly but spring back without wobbling at the base. If it feels loose, drive the rebar deeper or tighten your joints. A stable frame now means less maintenance and a longer-lasting outdoor structure later.
Step 8 – Finish and Decorate
Your arch is built — now make it yours. Wrap the frame with garden twine or attach lightweight trellis netting to give vines an easy grip.
If you want a more natural look, paint the PVC with a spray paint made for plastic. Choose green or brown to help the pipe blend into your garden. Let it dry fully before planting.
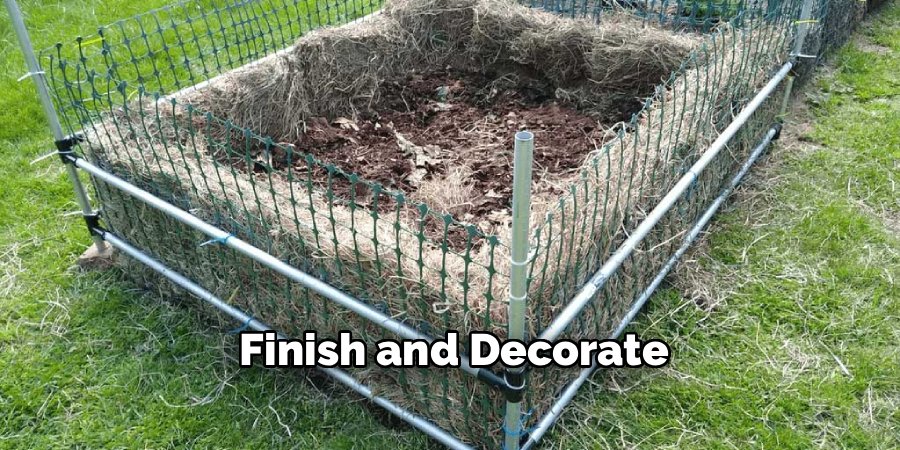
Plant your climbers at the base of each leg and gently guide the first shoots toward the frame. Within a season, leaves and flowers will hide the pipe completely. Step back and admire your work — you’ve turned a few dollars of plastic into a lasting garden feature.
Common Mistakes to Avoid When Building a PVC Garden Arch
Even a simple project has a few traps, and knowing them ahead of time saves you frustration.
Skipping the rebar anchors is the most common error. Many beginners push PVC legs straight into the soil and wonder why the arch topples in the first gust. The rebar gives your structure a hidden steel core that keeps it planted firmly, so never leave it out.
Choosing pipe that’s too thin causes another headache. Half-inch PVC bends nicely but sags under the weight of mature vines or heavy rain. For an arch that holds its shape, stick with ¾-inch or 1-inch schedule 40 pipe, which offers a better balance of flexibility and strength.
Cutting before measuring twice wastes both pipe and patience. PVC is cheap, but uneven legs leave you with a lopsided arch that never looks right. Mark every cut, then double-check it against your plan before the saw touches the plastic.
Gluing joints too soon traps beginners who haven’t dry-fit the whole arch first. Assemble everything loosely, confirm the shape looks good, and only then apply cement. Once that solvent sets, there’s no taking it apart.
Expert Tips
A few small choices make a big difference in how your arch looks and lasts.
Dry-fit everything first. Assemble the whole arch without glue, stand back, and adjust the shape before you commit to permanent joints. This single habit prevents most rebuilds.
Protect against UV damage. Sunlight slowly makes bare PVC brittle. A coat of plastic-safe paint shields the pipe and improves the look at the same time.
Match pipe size to your plants. Lightweight annuals are fine on thinner pipe, but heavy perennials like climbing roses need 1-inch pipe and extra crossbars for support.
Keep spare connectors on hand. Fittings are inexpensive, and having a few extras means you won’t stall mid-project over a cracked elbow or a missing tee.
Frequently Asked Questions
How Long Does a Pvc Garden Arch Last?
A well-built PVC arch can last five to ten years or more. The biggest threat is sun exposure, which slowly makes bare plastic brittle. Painting the pipe with a plastic-safe paint blocks UV rays and extends its life considerably. Solid rebar anchors and glued joints also help, since they keep the frame stable through wind, rain, and the weight of climbing plants.
What Size Pvc Pipe Is Best for a Garden Arch?
For most arches, ¾-inch or 1-inch schedule 40 PVC works best. These sizes bend into a smooth curve while staying strong enough to hold mature vines. Half-inch pipe is too flimsy and tends to sag, while larger pipe is harder to bend by hand. If you plan to grow heavy climbers like roses, choose the 1-inch option for extra support.
Do I Need to Glue the Pvc Joints?
Gluing is optional but recommended for a permanent arch. PVC cement creates a waterproof, weatherproof bond that won’t loosen in wind or rain. If you want a temporary or movable arch, skip the glue and secure joints with self-tapping screws instead. This lets you take the arch apart for storage while still keeping it sturdy during the growing season.
Can a Pvc Arch Hold Heavy Climbing Plants?
Yes, with the right setup. Use 1-inch pipe, drive the rebar deep, and add one or two crossbars to brace the frame. These steps spread the weight and stop the arch from twisting. Most climbers, including roses, clematis, and beans, grow well on a properly reinforced PVC arch. Just check the joints each season and tighten anything that feels loose.
How Do I Keep My Pvc Arch From Blowing Over?
Anchoring is the key. Drive rebar stakes 18 inches into the ground and slide the PVC legs over them for a hidden steel backbone. Add a crossbar near the top to brace both sides, and make sure every joint fits snugly. In very windy areas, deeper rebar and a second crossbar give you extra holding power against strong gusts.
Conclusion
Building a garden arch is a project that rewards you long after the work is done. With a few lengths of pipe, some connectors, and a handful of rebar stakes, you can create a structure that frames your path and gives climbing plants room to flourish. Now that you know how to make a garden arch with pvc pipe, the whole process feels approachable rather than intimidating — measure carefully, anchor firmly, and reinforce the frame, and your arch will stand strong for years.
Remember the essentials: choose ¾-inch or 1-inch pipe, dry-fit before you glue, and never skip the rebar anchors. These small habits separate a wobbly arch from one that weathers every season with ease.
The best way to learn is to start. Pick a sunny weekend, gather your supplies, and build the arch you’ve been picturing. Within a season, vines will cover the frame and your backyard will have a feature you made with your own hands. That’s a satisfaction worth the afternoon it takes.
Read More :
- How to Use a Garden Hoe
- How to Use Epsom Salt for Gardening
- How to Make a Garden Gate
- How to Start a Backyard Garden