There is something undeniably welcoming about a porch. Even a modest platform can completely transform the look of your home, providing a transition between the outdoors and your front door while boosting curb appeal. For many homeowners, the idea of constructing an addition feels overwhelming, reserved only for professional contractors with heavy machinery. However, a small entryway deck is actually one of the most accessible structural projects for a motivated DIY enthusiast.
It requires standard lumber, basic tools, and a solid plan, but the principles of construction are straightforward. By breaking the project down into manageable phases, you can create a sturdy, beautiful space to greet guests or enjoy a morning coffee. This guide is designed to demystify the process and show you exactly how to build a small porch, ensuring your project is safe, code-compliant, and built to last for years to come.
Why Build a Small Porch?
Building a small porch adds both practicality and charm to your home. It creates a welcoming entryway that enhances curb appeal, making your house stand out while also providing a functional space. A porch can act as a transition area, shielding your entryway from harsh weather and reducing dirt tracked indoors. Additionally, it serves as a cozy spot to relax, sip a hot beverage, or enjoy fresh air. From improving your home’s value to offering a personal retreat, a small porch is a worthwhile investment that seamlessly combines style and utility.
8 Step-by-Step Guide on How to Build a Small Porch
Step 1: Design Your Porch
Before you purchase a single piece of lumber, the most critical work happens on paper. You must begin by visualizing the size and shape of your porch relative to your home’s architecture. Draw a detailed scale plan that includes dimensions, footing locations, and the height of the floor relative to your threshold.

Once you have a plan, take it to your local building department. Building codes vary significantly by region, specifically regarding footing depth and railing requirements. Securing a permit ensures your project is legal and safe. This is also the time to call 811 to have underground utility lines marked, ensuring you do not dig into dangerous pipes or cables.
Step 2: Layout the Site and Install Batter Boards
Transfer your paper plans to the actual ground using string lines and batter boards. This step is about precision, as it determines the squareness of your entire structure. Set up temporary wooden frames (batter boards) just outside the corners of your future porch. Run mason’s line from the house to these boards to outline the perimeter. Use the 3-4-5 method to ensure your corners are perfectly square; measure 3 feet along one line, 4 feet along the other, and the diagonal between them should be exactly 5 feet. Adjust your strings until the measurements are precise, as a square foundation makes every subsequent step significantly easier to execute.
Step 3: Install the Ledger Board Securely
The ledger board is the piece of lumber that attaches the porch physically to your house, and its installation is critical for structural integrity. You must remove the siding on your house where the ledger will sit to ensure a tight connection against the rim joist. Apply waterproof flashing behind the ledger area to prevent water from rotting your home’s framing over time. Bolt the pressure-treated ledger board to the house frame using galvanized lag screws or structural bolts, following the fastening pattern required by your local code. This board sets the height for your entire porch, so ensure it is perfectly level before tightening the bolts completely.
Step 4: Framing Considerations
With the ledger set and your footings poured and cured, you can begin framing the floor structure. Install galvanized metal post bases onto your concrete footings and set your pressure-treated 4×4 or 6×6 posts into them. Cut the posts to the correct height and install the rim joists and side joists to create the outer “box” of the porch frame.
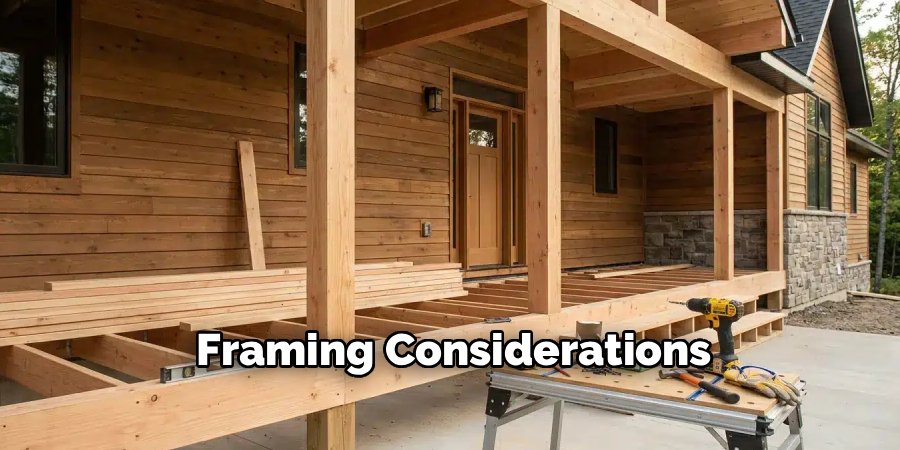
Use metal joist hangers to install the interior joists, typically spaced 16 inches on center. When selecting your joist lumber, look down the edge of the board to find the “crown,” or the slight upward bow, and always install the board with the crown facing up so the weight of the deck will settle it flat over time.
Step 5: Install the Decking Boards
Once the skeleton of your porch is complete, you can begin laying the decking, which will serve as the floor. Start from the outside edge of the porch and work your way toward the house. If you are using wood decking, you can butt the boards tight together, as they will shrink slightly as they dry, creating natural drainage gaps. If you are using composite materials, you must use spacers to ensure consistent gaps for water runoff. Fasten the boards using corrosion-resistant deck screws, putting two screws into every joist. Check your progress frequently to ensure the boards are running parallel to the house wall, adjusting slightly if necessary to keep the lines straight.
Step 6: Finishing the Job
Unless your porch is flush with the ground, you will likely need to build a set of stairs. This requires cutting stair stringers, the saw-toothed support boards that hold the treads. Calculate the total rise (height from ground to deck) and divide it by the standard riser height (usually around 7 inches) to determine the number of steps. Trace your pattern onto a 2×12 pressure-treated board and cut it out carefully with a circular saw. Attach the stringers to the porch frame using metal hangers. Install your stair treads and risers, ensuring they are level and secure. This step requires careful math, so measure twice before cutting your expensive lumber.
Step 7: Install Railings and Balusters
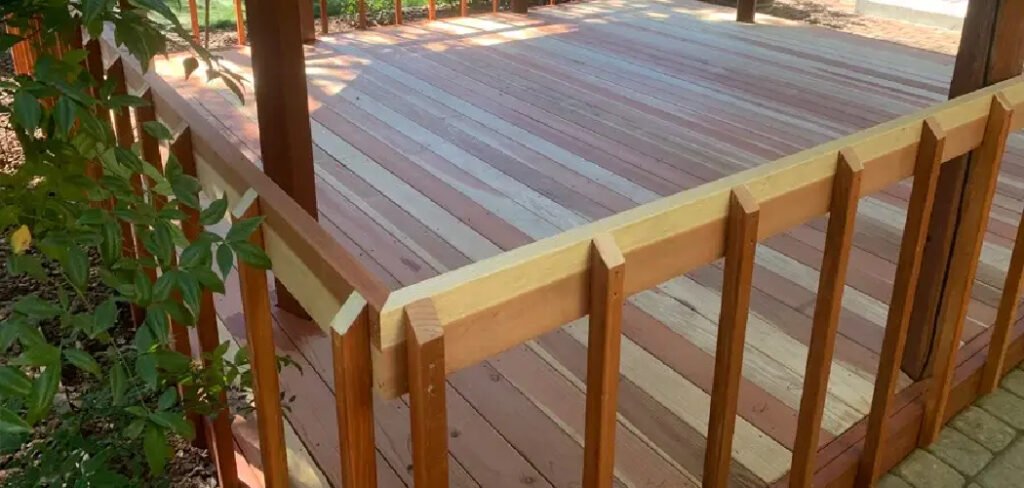
Safety is paramount, and if your porch is more than 30 inches off the ground, building codes will require a railing. Even for lower porches, railings add a finished, decorative touch. Install 4×4 posts at the corners and at the top and bottom of the stairs. Connect these posts with top and bottom horizontal rails.
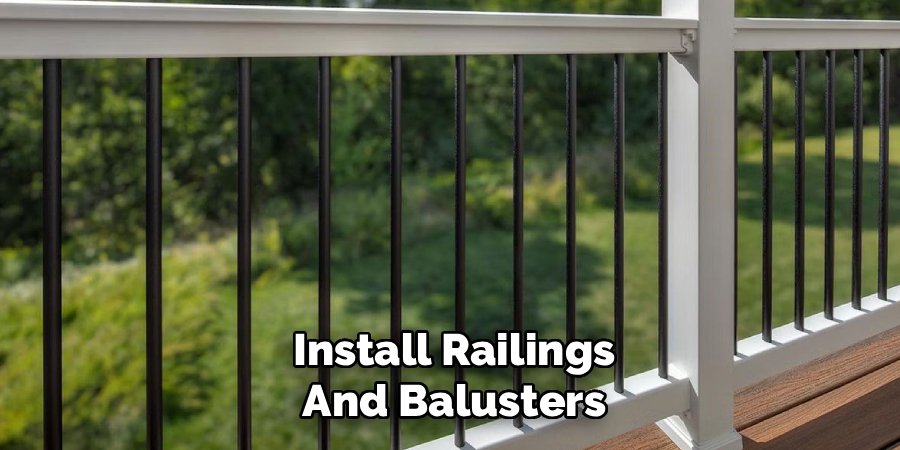
Then, install the vertical balusters or spindles. Code typically dictates that a 4-inch sphere should not be able to pass between the balusters, so verify the maximum spacing allowed in your area. Secure everything with sturdy screws or bolts, as people will lean on these railings for support.
Step 8: Apply Finishes and Sealant
The construction is done, but the protection phase is just beginning. If you used pressure-treated lumber, you generally need to wait a few weeks or even months for the wood to dry out completely before applying a finish. Once the wood is dry enough to absorb water, sand down any rough spots or splintered edges. Apply a high-quality exterior sealant, stain, or paint to protect the wood from UV rays and moisture. This step not only customizes the look of your new entry but also significantly extends the lifespan of the materials. Regular maintenance, such as re-sealing every few years, will keep your small porch looking brand new.
Frequently Asked Questions (FAQ)
Do I Need a Permit for a Small Porch?
In almost all cases, yes. Most municipalities require a building permit for any structure attached to the house or any deck over a certain height (often 30 inches).
- Safety: Permits ensure the structure is safe for use.
- Resale Value: Unpermitted work can cause major issues when you try to sell your home.
- Property Lines: The permit process checks that you aren’t building too close to your property boundaries.
What Is the Best Wood for a Porch?
The most common and budget-friendly choice is pressure-treated pine, which is chemically treated to resist rot and insects. However, other options include:
- Cedar or Redwood: Naturally resistant to rot and beautiful, but more expensive.
- Composite: Made from recycled plastic and wood fibers; it requires very little maintenance but costs significantly more upfront.
- Tropical Hardwoods: Woods like Ipe are incredibly durable but difficult to work with.
How Deep Should My Footings Be?
Footing depth is dictated by the “frost line” in your specific geographic area. You must dig below the depth where the ground freezes in winter to prevent the frost from heaving the ground upward and damaging your porch structure.
- In warm climates, 12 inches might be sufficient.
- In colder northern regions, you may need to dig 36 to 48 inches deep.
- Always check your local building code for the exact requirement.
How Much Does It Cost to Build a Small Porch?
The cost varies wildly based on materials and whether you do the labor yourself.
- DIY Material Cost: A simple 6×8 foot pressure-treated wood porch might cost between $500 and $1,000 in materials.
- Composite Materials: Using composite decking and high-end railings can double or triple the material cost.
- Contractor Labor: Hiring a pro will typically cost significantly more, often ranging from $3,000 to $8,000 for a small project.
Can I Build a Porch on Top of Concrete Blocks?
While you might see sheds built on floating concrete blocks, a porch attached to a house generally requires permanent, poured concrete footings. If the ground shifts under floating blocks, the porch moves, but the house doesn’t. This differential movement can rip the ledger board away from your house, causing severe structural damage and potential collapse. Always use proper footings for attached structures.
Conclusion
Building a small porch is a rewarding project that pays dividends in both satisfaction and home value. By carefully planning your design, respecting local building codes, and taking your time with the structural connections, you can create a professional-quality addition with your own hands. The process transforms a blank entryway into a functional extension of your living space. While the measuring and digging can be labor-intensive, the result is a sturdy platform where you can relax and enjoy the outdoors. Now that you understand the fundamental steps of how to build a small porch, you have the knowledge to pick up your hammer and start enhancing your home’s exterior today.

About
Jovie Mathews is a backyard and outdoor expert writer with over 12 years of hands-on experience transforming neglected outdoor spaces into thriving gardens and functional retreats. Raised in a family where weekends meant digging in the soil and building raised beds from scratch, Jovie developed a genuine love for the outdoors long before it became a career.
She writes with a practical, no-fluff approach — always testing ideas in her own backyard before sharing them with readers. From composting systems and native plant selection to patio design and pest control, Jovie covers the full spectrum of backyard life with equal parts expertise and enthusiasm.
Education
B.Sc. in Horticulture Science
University of Florida (UF) · Gainesville, FL · 2014
IFAS College of Agricultural and Life Sciences
Minor in Environmental Studies
University of Florida (UF) · Gainesville, FL · 2014
College of Liberal Arts and Sciences
Areas of expertise
- Lawn & Garden Care
- Soil prep, planting, seasonal care
- Outdoor DIY Projects
- Raised beds, fencing, pathways
- Composting & Soil Health
- Organic methods, amendments
- Native Plants & Wildlife
- Pollinators, habitat gardening
When she is not writing, Jovie can be found testing new composting techniques, growing tomatoes in questionable quantities, or convincing her neighbors that clover lawns are actually a great idea. She currently gardens in the Pacific Northwest.