There is nothing quite like stepping out onto a warm wooden deck on a sunny morning, coffee in hand. However, that peaceful moment can be ruined instantly by the sharp pain of a splinter finding its way into your foot. Over time, exposure to sun, rain, and foot traffic causes wood fibers to separate and lift, creating a rough, hazardous surface. Many homeowners look at their weathering deck and assume that expensive replacement is the only option, but that is rarely the case.
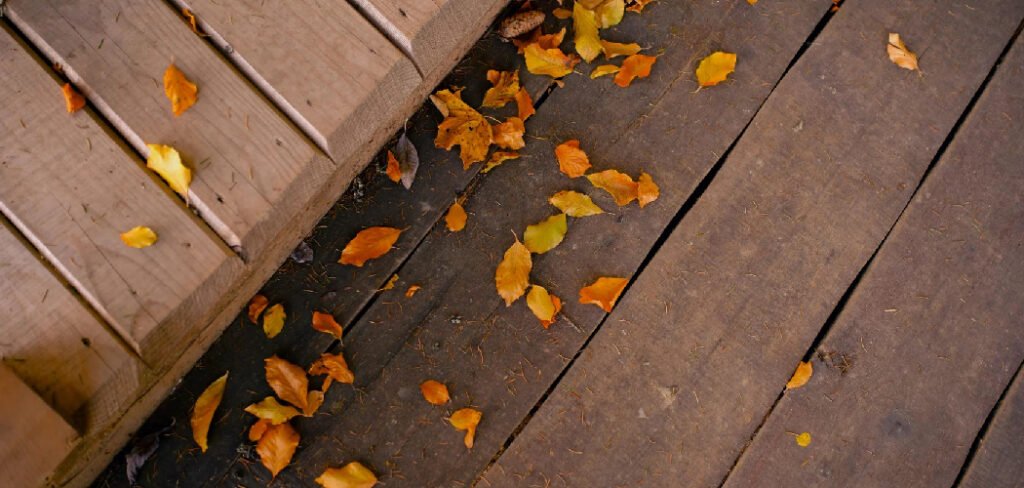
With a little elbow grease and the right materials, you can restore your deck to a smooth, safe condition. This guide is designed to help you tackle this common problem head-on. We will walk you through exactly how to fix splintered wood deck surfaces, transforming your outdoor space back into the comfortable, inviting retreat it was meant to be, all without breaking the bank on professional contractors.
Why Fixing a Splintered Wood Deck is Important
A splintered wood deck is more than just an eyesore; it can pose serious safety risks and degrade the overall functionality of your outdoor space. Splinters can cause painful injuries, especially for children and pets who might run or play barefoot on the deck. Additionally, untreated splintering can worsen over time, leading to further structural damage and costly repairs. Restoring your deck not only improves safety but also extends its lifespan, enhances the aesthetic appeal of your property, and preserves its value. Taking action now ensures you can enjoy your outdoor space comfortably and confidently for years to come.
7 Step-by-Step Guide on How to Fix Splintered Wood Deck
Step 1: Clean the Deck Thoroughly
Before you can address the texture of the wood, you must start with a clean slate. Dirt, mildew, algae, and old stain can hide the true extent of the damage and prevent repairs from bonding effectively. Begin by sweeping away all loose debris, leaves, and dirt. Then, use a specialized deck cleaner and a stiff-bristled brush to scrub the surface vigorously. If you have access to a pressure washer, it can speed up the process, but be extremely careful. Use a low-pressure setting and keep the wand moving constantly to avoid gouging the wood, which would only create more splinters. Allow the wood to dry completely for at least 48 hours before moving on to the next step.
Step 2: Inspect and Secure Loose Boards
Once the deck is clean and dry, take the time to inspect every board closely. You are looking for more than just splinters; you need to identify structural issues like loose nails, screws that have popped up, or boards that are warping. If you find any protruding fasteners, drive them back down below the surface of the wood using a hammer or screwdriver. If a nail refuses to stay down, pull it out and replace it with a slightly longer deck screw for a secure hold. Securing these boards now ensures a stable surface for sanding and prevents your sanding equipment from getting damaged by hitting metal, which is a crucial preparation step.
Step 3: Remove Large Splinters and Gouges manually
Before you bring in the power tools, you need to address the largest, most dangerous splinters by hand. If you try to sand over a large, loose shard of wood, you might just rip it out further, causing a deeper gouge. Use a utility knife or a pair of sharp chisels to carefully slice off these large pieces. Cut them off at the base where they are still attached to the solid wood. If there are deep cracks or gouges left behind, you can fill them with a high-quality, exterior-grade wood filler. Press the filler firmly into the void and leave it slightly mounded, as it will shrink when it dries.
Step 4: Power Sanding
Sanding is the heart of this restoration project. Renting a large floor sander for the main decking area can save you hours of back-breaking work. For the handrails and edges, a handheld belt sander or orbital sander is perfect. Start with a coarse-grit sandpaper, such as 60 or 80-grit, to aggressively remove the old finish and the layer of gray, splintered wood. Move the sander continuously in the direction of the wood grain to avoid creating cross-grain scratches. This process essentially shaves off the damaged top layer, revealing the fresh, smooth wood underneath. This is the most transformative part of learning how to fix splintered wood deck surfaces.
Step 5: Refine the Surface with Fine Grit
After the initial heavy sanding, the wood will look clean but might still feel a bit rough to the touch. To achieve that barefoot-friendly finish, you need to do a second pass with a finer grit sandpaper. Switch to 100 or 120-grit paper. This stage removes the small scratches left by the coarse paper and smooths down any remaining fuzziness. Pay special attention to high-traffic areas and handrails where people are most likely to touch the wood. This extra step makes a significant difference in the final feel of the deck and helps the stain or sealer absorb more evenly later on.
Step 6: Clean Up All Dust and Debris
Sanding creates a tremendous amount of fine dust that can ruin your finish if left behind. Once you have finished sanding, sweep the entire deck thoroughly. After sweeping, use a vacuum with a hose attachment to get into the cracks between the boards and along the edges. Finally, wipe down the wood with a tack cloth or a rag dampened with mineral spirits. This picks up the microscopic dust particles that the broom and vacuum missed. Ensuring the wood is perfectly dust-free is critical for the sealant to bond properly to the wood fibers.
Step 7: Apply a High-Quality Deck Sealer or Stain
Now that the wood is smooth and clean, you must protect it to prevent splinters from returning. Choose a high-quality exterior semi-transparent stain or a solid deck sealer. These products penetrate the wood fibers, binding them together and locking out moisture. Using a paint roller with an extension pole, apply the product evenly along the length of the boards. Back-brush the stain with a wide brush to work it into the grain and smooth out any puddles. This protective coating acts as a shield against the UV rays and water damage that caused the splintering in the first place.
Frequently Asked Questions (FAQ)
Can I Use a Regular Interior Wood Filler on My Deck?
No, you should never use interior wood filler for an outdoor deck project. Interior fillers are not designed to withstand the harsh expansion and contraction caused by temperature changes and moisture. They will quickly crack, crumble, and fall out when exposed to the elements. Always choose a product specifically labeled as “exterior wood filler” or “two-part epoxy wood filler” for durable, long-lasting repairs.
Is It Better to Paint or Stain an Old Deck?
For older, splintered decks, a solid stain or a specialized deck restoration coating is often better than paint. Paint sits on top of the wood and can peel and trap moisture, leading to rot. Solid stains penetrate the wood fibers while providing heavy coverage that fills in small cracks and hides imperfections. “Deckover” type products are specifically thick coatings designed to encapsulate splinters and create a new, slip-resistant surface.
How Much Does It Cost to Rent a Floor Sander?
Renting a floor sander is a cost-effective alternative to buying one. Prices vary by location and rental company, but you can typically expect to pay between $50 and $80 for a four-hour rental, or around $70 to $100 for a full day. You will also need to purchase the sanding pads or belts, which usually cost a few dollars each. It is a worthwhile investment for the time and physical effort it saves.
Why Does My Deck Keep Splintering Even After I Fix It?
If your deck continues to splinter despite your best efforts, the wood may be nearing the end of its lifespan, or it may be a softwood variety like pine that is naturally prone to splintering. Lack of regular maintenance is the most common culprit; if the sealer wears off, UV rays dry out the wood fibers, causing them to separate. Ensuring you re-seal the deck every 1-2 years is key to preventing recurrence.
Can I Just Flip the Deck Boards Over?
Flipping deck boards is a clever trick that can work in some cases, but it is not a guaranteed fix. The underside of the boards has been exposed to moisture and lack of airflow for years, potentially leading to rot or mold that isn’t visible until you flip them. Additionally, the joists underneath might have different screw patterns, meaning you will have new holes to drill. However, if the wood is sound, flipping can reveal a “new” face for a fraction of the cost of replacement.
Conclusion
Restoring a weathered, splintered deck does not have to be an intimidating nightmare. It is a straightforward process that rewards patience and effort with a renewed outdoor living space. By following the steps of cleaning, sanding, filling, and sealing, you essentially turn back the clock on your wood’s condition.
Not only does this improve the aesthetics of your home, but it also removes safety hazards, allowing your family to enjoy the outdoors without worry. Regular maintenance will ensure that your hard work lasts for years to come. Now that you have mastered how to fix splintered wood deck issues, you can look forward to a summer full of barefoot barbecues and relaxing sunsets on your beautifully restored deck.

About
Jovie Mathews is a backyard and outdoor expert writer with over 12 years of hands-on experience transforming neglected outdoor spaces into thriving gardens and functional retreats. Raised in a family where weekends meant digging in the soil and building raised beds from scratch, Jovie developed a genuine love for the outdoors long before it became a career.
She writes with a practical, no-fluff approach — always testing ideas in her own backyard before sharing them with readers. From composting systems and native plant selection to patio design and pest control, Jovie covers the full spectrum of backyard life with equal parts expertise and enthusiasm.
Education
B.Sc. in Horticulture Science
University of Florida (UF) · Gainesville, FL · 2014
IFAS College of Agricultural and Life Sciences
Minor in Environmental Studies
University of Florida (UF) · Gainesville, FL · 2014
College of Liberal Arts and Sciences
Areas of expertise
- Lawn & Garden Care
- Soil prep, planting, seasonal care
- Outdoor DIY Projects
- Raised beds, fencing, pathways
- Composting & Soil Health
- Organic methods, amendments
- Native Plants & Wildlife
- Pollinators, habitat gardening
When she is not writing, Jovie can be found testing new composting techniques, growing tomatoes in questionable quantities, or convincing her neighbors that clover lawns are actually a great idea. She currently gardens in the Pacific Northwest.