There is nothing quite like extending your outdoor entertaining season with the cozy warmth of a patio heater. However, frustration sets in quickly when the pilot light ignites but refuses to stay lit the moment you release the control knob.
This common issue is almost always caused by a faulty safety device known as the thermocouple. While its job is to shut off the gas if the flame goes out, a malfunction means it shuts off the gas even when the flame is perfectly fine.
Before you spend money on expensive replacement parts or a service call, you might want to test the system to confirm the diagnosis.
Learning how to bypass a thermocouple on a patio heater is a useful troubleshooting skill that can help you identify the root cause of your heating woes. This guide offers a clear, step-by-step approach to safely bypassing this sensor for testing purposes, helping you get your outdoor space warm and inviting once again.
Why Bypass the Thermocouple?
The thermocouple is a critical safety feature in a patio heater, designed to shut off the gas supply if the flame is extinguished to prevent gas leaks and potential hazards. However, when the thermocouple malfunctions, it can mistakenly cut off the gas supply even if the flame is functioning properly.
Bypassing the thermocouple temporarily allows you to determine whether it is the source of the problem. By isolating the issue, you can decide whether the thermocouple needs to be repaired or replaced, saving time and money by avoiding unnecessary repairs or equipment replacements.
How to Bypass a Thermocouple on a Patio Heater: A Step-by-Step Guide
Step 1: Prioritize Safety and Gather Tools
Before attempting any work on a gas appliance, safety must be your absolute priority. Ensure the propane tank valve is completely closed and the heater has had ample time to cool down if it was recently used.
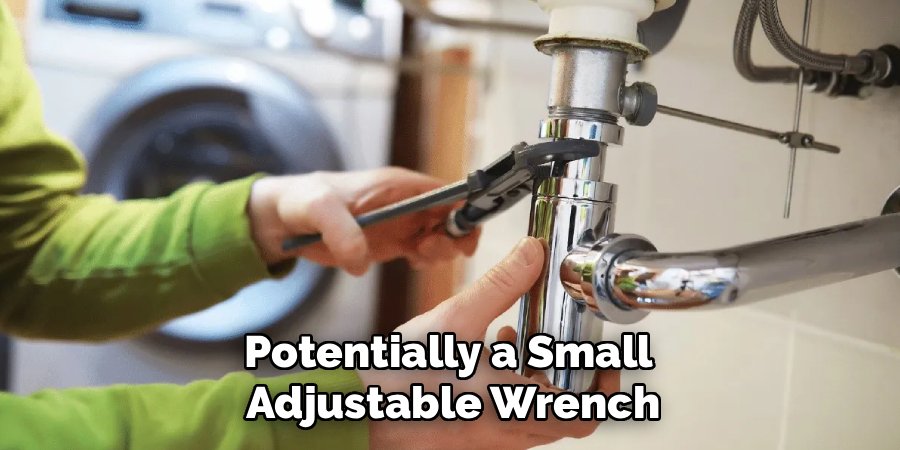
You are dealing with flammable gas, so working in a well-ventilated outdoor area is non-negotiable. Gather the necessary tools for the job, which typically include a screwdriver set (usually Phillips head), a pair of needle-nose pliers, and potentially a small adjustable wrench.
You will also need a small piece of electrical wire or a specialized alligator clip lead to create the electrical bridge. Preparing your workspace and mindset ensures that you approach the task of bypassing the sensor methodically and safely, minimizing risks while you troubleshoot the heating element.
Step 2: Access the Burner Assembly
To reach the internal components, you must remove the protective housing at the top of the heater. This usually involves unscrewing the reflector shield if it obstructs your access, followed by removing the screws that hold the burner head assembly together.
Carefully lift the cover to reveal the inner workings, specifically the pilot light assembly, the gas valve, and the copper thermocouple line. This copper line runs from the pilot flame area down to the back of the gas control valve.
Take a moment to observe how everything is connected. Taking a quick photo with your phone is a great expert tip, as it provides a visual reference for reassembly later. This access is crucial for understanding how to bypass a thermocouple on a patio heater effectively.
Step 3: Identify the Thermocouple Connections
Once inside the housing, locate the specific connections for the thermocouple. It is the thin copper tubing that sits directly in the pilot flame path. Follow this copper tube down to where it connects to the main gas control valve.
You will see it screwed into a port on the valve body. In many modern heaters, there is also a tilt switch (or dump switch) wired in series with the thermocouple. This safety switch is designed to cut the gas if the heater falls over.
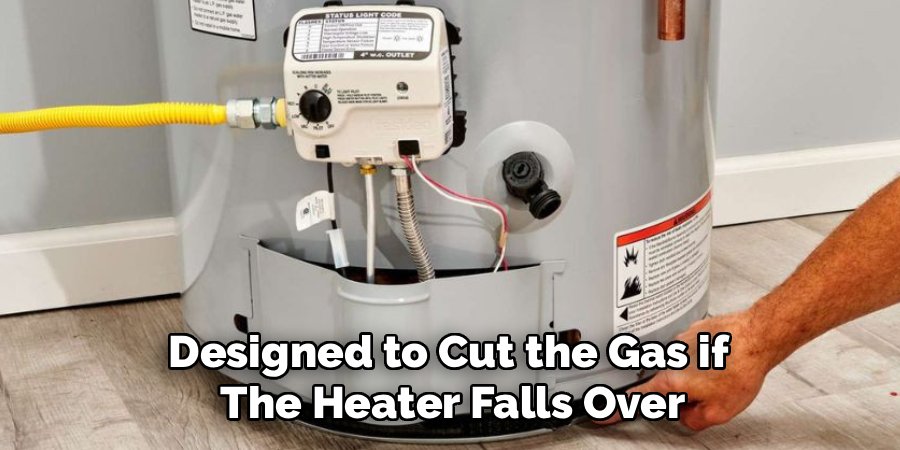
Identifying these two components—the thermocouple lead and the tilt switch terminals—is essential because the bypass usually involves bridging the connection around these safety interrupters to test if the magnetic valve itself is still functional.
Step 4: Disconnect the Tilt Switch Circuit
For testing purposes, you need to isolate the thermocouple circuit. Often, the issue isn’t the thermocouple itself but the tilt switch connected to it. Locate the two wires leading to the tilt switch. Depending on your model, these might be spade connectors or simple slide-on terminals.
Carefully disconnect these wires. This breaks the safety loop that might be causing the open circuit. By focusing on this junction, you are preparing to create a direct path for the millivolt current generated by the heat.
This step is critical because a faulty tilt switch mimics a bad thermocouple perfectly; eliminating it from the equation helps pinpoint exactly which part has failed.
Step 5: Create a Jumper
Now you will perform the actual bypass. The goal is to complete the electrical circuit that keeps the gas valve open, bypassing the safety interruptions. Take your piece of conductive wire or alligator clips and connect the two terminals on the thermocouple line where the tilt switch was previously connected.
] Essentially, you are joining the two wire ends together directly, bypassing the tilt switch entirely. If you are bypassing the thermocouple itself for a direct valve test, you might need to use a specialized testing adapter or firmly hold the valve open manually while bridging the solenoid contacts.

This jumper wire simulates a closed circuit, allowing the electrical signal to flow uninterrupted to the magnetic valve.
Step 6: Test the Heater Operation
With the bypass jumper securely in place, it is time to test the heater. Reconnect your propane tank and open the valve slowly. Follow your standard lighting procedure: press and turn the control knob to “Pilot” and ignite the flame.
Once the pilot is lit, continue holding the knob for about 30 seconds to heat the thermocouple probe. Release the knob slowly.
If the pilot flame stays lit this time, you have successfully confirmed that the problem lies with the component you bypassed—likely the tilt switch or the connection integrity, rather than the gas valve itself.
If it still goes out, the thermocouple probe itself may be dead and failing to generate any voltage at all.
Step 7: Remove the Bypass and Replace Faulty Parts
It is vital to understand that this bypass is strictly for troubleshooting and testing purposes. You must never leave a patio heater operating permanently with safety features bypassed. Once you have identified whether the pilot stays lit with the jumper in place, turn off the gas immediately.
Remove your jumper wire or alligator clips. If the heater worked during the test, you know you need to replace the tilt switch or clean the connections. If it did not work, you likely need a new thermocouple.
Reassemble the heater with new, functioning safety parts before using it for your next gathering. This ensures you maintain the necessary safety protocols while solving the underlying issue.
Frequently Asked Questions (FAQ)
Is It Safe to Use the Heater with the Thermocouple Bypassed?
No, it is absolutely not safe for regular use. The thermocouple is a critical safety device that stops the flow of gas if the flame blows out.
- Risk: Without it, unburned propane continues to pump out, creating an explosion hazard.
- Purpose: The bypass is solely a temporary diagnostic method to identify faulty parts.
- Action: Once diagnosed, immediately remove the bypass and repair the unit properly.
How Do I Know if My Thermocouple Is Bad?
There are distinct signs that point to a failing thermocouple.
- Pilot Issues: The pilot light ignites but goes out immediately when you release the control knob.
- Visual Damage: The probe tip looks burnt, corroded, or bent away from the flame.
- Voltage Test: If you have a multimeter, a good thermocouple should generate between 25 and 30 millivolts when heated. If it reads significantly lower, it is dead.
What Is the Difference Between a Thermocouple and a Tilt Switch?
While they work together, they serve different safety functions.
- Thermocouple: Detects heat. It ensures gas only flows when a flame is present to burn it.
- Tilt Switch: Detects orientation. It breaks the electrical circuit from the thermocouple if the heater tips over, shutting off the gas valve.
- Connection: Often, the tilt switch is wired into the thermocouple circuit, so if either fails, the heater shuts down.
Can I Clean a Thermocouple Instead of Replacing It?
Sometimes, yes. Carbon buildup and soot can insulate the sensor, preventing it from getting hot enough to generate the required voltage.
- Cleaning Method: Use a piece of steel wool or fine-grit sandpaper to gently scrub the tip of the thermocouple probe.
- Result: This removes the soot barrier. If the heater works after cleaning, you have saved yourself a replacement part.
Where Can I Buy a Replacement Thermocouple?
Replacement parts are widely available and generally inexpensive.
- Hardware Stores: Most large home improvement stores carry universal gas heater repair kits.
- Online: Websites like Amazon or specialty HVAC parts suppliers offer model-specific replacements.
- Compatibility: Always check your heater’s model number to ensure the threading and length of the new thermocouple match your unit.
Conclusion
Troubleshooting a patio heater does not have to be a guessing game that leaves you shivering in the cold. By understanding the mechanics of the safety loop, you can use a bypass method to isolate the problem quickly and effectively.
Whether the culprit is a faulty tilt switch, a dirty connection, or a dead sensor, this diagnostic process gives you the answers you need to perform the right repair. Remember, however, that safety mechanisms exist for a reason.
The knowledge of how to bypass a thermocouple on a patio heater is a powerful tool for finding the fix, but the ultimate goal is always to restore the system to its full, safe functionality. With your diagnosis complete and new parts installed, you can look forward to many more warm, comfortable evenings under the stars.

About
Jovie Mathews is a backyard and outdoor expert writer with over 12 years of hands-on experience transforming neglected outdoor spaces into thriving gardens and functional retreats. Raised in a family where weekends meant digging in the soil and building raised beds from scratch, Jovie developed a genuine love for the outdoors long before it became a career.
She writes with a practical, no-fluff approach — always testing ideas in her own backyard before sharing them with readers. From composting systems and native plant selection to patio design and pest control, Jovie covers the full spectrum of backyard life with equal parts expertise and enthusiasm.
Education
B.Sc. in Horticulture Science
University of Florida (UF) · Gainesville, FL · 2014
IFAS College of Agricultural and Life Sciences
Minor in Environmental Studies
University of Florida (UF) · Gainesville, FL · 2014
College of Liberal Arts and Sciences
Areas of expertise
- Lawn & Garden Care
- Soil prep, planting, seasonal care
- Outdoor DIY Projects
- Raised beds, fencing, pathways
- Composting & Soil Health
- Organic methods, amendments
- Native Plants & Wildlife
- Pollinators, habitat gardening
When she is not writing, Jovie can be found testing new composting techniques, growing tomatoes in questionable quantities, or convincing her neighbors that clover lawns are actually a great idea. She currently gardens in the Pacific Northwest.