

A beautiful stone or brick patio can be the centerpiece of your outdoor living space, but over time, nature has a way of creeping in. Shady, damp corners can encourage the growth of a velvety green carpet of moss. While it might look quaint in a forest, on your patio it’s not only unsightly but also dangerously slippery when wet.
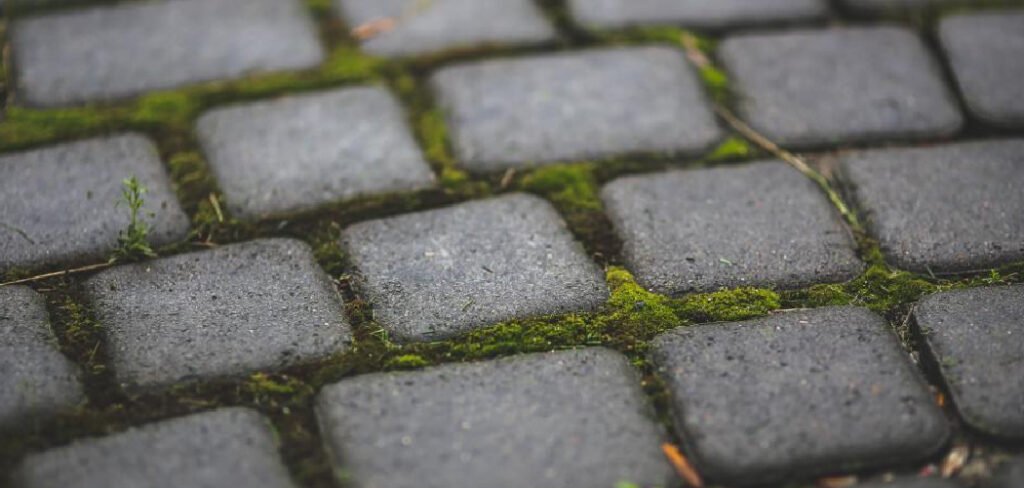
Moss traps moisture against the pavers, which can accelerate wear and staining, while its roots can widen the joints between stones. Many homeowners assume that getting rid of this persistent growth requires harsh, toxic chemicals, but that isn’t the case. With a bit of elbow grease and the right techniques, you can restore your patio to its former glory. This guide will show you exactly how to remove moss from patio pavers and, more importantly, how to keep it from coming back.
7 Step-by-Step Guide on How to Remove Moss from Patio Pavers
Step 1: Clear and Prepare the Patio Area
Before you can begin the cleaning process, you need a clear and safe workspace. Remove all patio furniture, planters, grills, and any other decorative items from the area. Use a stiff-bristled broom or a leaf blower to sweep away loose debris like fallen leaves, twigs, and surface dirt.
This initial sweep ensures that you are treating the moss directly and not just pushing around other garden waste. It also helps you see the full extent of the moss growth. Take this opportunity to protect any delicate plants or grass bordering the patio by covering them with plastic sheeting, especially if you plan on using any cleaning solutions later in the process.
Step 2: Manually Scrape Away Thick Moss Growth
The most effective initial attack is a physical one. For thick, established patches of moss, start by scraping them off the surface. You can use a variety of tools for this job, such as a stiff wire brush, a flat-bladed shovel, or a specialized patio-weeding tool designed to fit into the joints between pavers.
Apply firm pressure to dislodge the bulk of the green growth. For the stubborn moss wedged in the cracks, a putty knife or a painter’s 5-in-1 tool works wonders. The goal here is not to get every last bit, but to remove the heavy top layers, which will make the subsequent cleaning steps much more effective and less labor-intensive.
Step 3: Apply a Cleaning Solution
After scraping, it is time to treat the remaining roots and spores. A simple and effective home remedy is a solution of equal parts white vinegar and water, with a few drops of dish soap added to help it stick. Pour this mixture into a garden sprayer for easy application.
Thoroughly saturate all the areas where moss was growing, paying special attention to the joints between the pavers. Let the solution sit and work its magic for at least 15 to 20 minutes, but do not let it dry completely. The acidity of the vinegar will begin to break down the cellular structure of the moss, causing it to turn yellow or brown and making it much easier to scrub away for good.
Step 4: Scrub the Pavers Thoroughly
With the moss weakened by your cleaning solution, it is time for the main scrubbing event. Use a long-handled deck brush with stiff synthetic bristles to scrub the entire patio surface vigorously. Work in small sections, applying consistent pressure to lift the dead moss and any underlying grime from the pavers and the joints.
The combination of the vinegar solution and the abrasive action of the brush should be sufficient to remove the vast majority of the remaining growth. For particularly stubborn spots, you might need to reapply your cleaning solution and scrub a second time. This is the most physically demanding part of learning how to remove moss from patio pavers, but it is essential for a clean finish.
Step 5: Rinse the Patio Clean
Once you have finished scrubbing, you need to rinse away all the dislodged moss and cleaning residue. Use a garden hose with a high-pressure nozzle to thoroughly spray down the entire patio. Start at the highest point and work your way down, directing the stream of water to push all the debris off the edge of the patio and into a designated cleanup area.
A powerful rinse is crucial for washing away any lingering spores that could lead to new growth. If you have access to a pressure washer, it can make this step much faster, but be sure to use a wide-angle fan tip and keep the nozzle at a safe distance to avoid damaging the paver joints or the surface of the stones.
Step 6: Refill the Paver Joints
The scrubbing and rinsing process will likely have dislodged some of the sand from the joints between your pavers. These joints are a prime location for moss to take root. To prevent a rapid return, you must refill these gaps. Once the patio is completely dry, sweep new paver sand or polymeric sand into all the joints until they are full.
Polymeric sand is an excellent choice as it contains a binding agent that hardens when wetted, creating a firm, durable barrier that is much more resistant to both weed and moss growth than regular sand. This step not only helps with moss prevention but also enhances the stability and longevity of your entire patio.
Step 7: Apply a Preventative Treatment
After all your hard work, the final step is to apply a preventative measure to keep the moss from coming back. There are several options for this. You can use a commercial moss prevention spray designed for hardscapes, which creates an invisible barrier that inhibits growth.
Alternatively, for a more natural approach, you can lightly sprinkle baking soda into the paver joints or spray the area with a diluted zinc sulfate solution. These treatments alter the pH of the surface, making it inhospitable for moss. Reapplying your chosen preventative treatment once or twice a year, especially in the fall before the rainy season, is the best way to ensure your patio stays moss-free.
Frequently Asked Questions (FAQ)
What Causes Moss to Grow on Pavers?
Moss thrives in specific conditions. The three main culprits are:
- Moisture: Consistently damp surfaces are ideal for moss.
- Shade: Lack of direct sunlight prevents moisture from evaporating.
- Acidity: Moss prefers a slightly acidic environment.
If your patio is in a shady, damp part of your yard with poor drainage, you are creating the perfect habitat for moss growth.
Will Boiling Water Kill Moss on My Patio?
Yes, boiling water is a very effective and completely natural way to kill moss and weeds. The extreme heat instantly shocks and kills the plant cells on contact. Carefully pour a kettle of boiling water directly onto the mossy patches.
The moss will turn brown and wither within a few hours, making it easy to scrape or brush away. However, be extremely cautious when carrying and pouring boiling water to avoid severe burns, and keep it away from the edges of your lawn or desirable plants.
Can I Use Bleach to Remove Moss?
While bleach will kill moss, it is generally not recommended for use on patio pavers. Bleach is a harsh chemical that can discolor or etch the surface of some types of stone.
More importantly, the runoff is toxic to surrounding plants, grass, and aquatic life if it enters storm drains. Safer and equally effective alternatives like vinegar, specialized patio cleaners, or even just boiling water are much better choices for both your patio and the environment.
Does Pressure Washing Remove Moss Permanently?
Pressure washing is very effective at blasting away existing moss, but it does not kill the spores and will not prevent regrowth on its own.
In fact, if done improperly with too much pressure, it can damage the surface of the pavers, creating a more porous texture that is even more inviting for future moss growth. It can also strip out all the jointing sand, leaving a perfect trench for moss to return. It is best used as a rinsing tool after other treatments.
How Can I Prevent Moss from Coming Back?
Prevention is all about changing the environment.
- Improve Sunlight: Trim overhanging tree branches to allow more sun to reach the patio.
- Fix Drainage: Ensure water runs off the patio and does not pool.
- Sweep Regularly: Keep the surface free of leaves and dirt that trap moisture.
- Use Polymeric Sand: Refill joints with polymeric sand to block growth.
- Apply Preventatives: Use a preventative spray or baking soda in the fall and spring.
Conclusion
Reclaiming your patio from a moss invasion is a completely manageable weekend project that yields fantastic results. By following a methodical approach of scraping, cleaning, and rinsing, you can effectively lift away the unsightly green growth and restore the beauty of your pavers. Remember that the key to long-term success lies in prevention.
By addressing the underlying issues of shade and moisture and by taking proactive steps like refilling joints with polymeric sand, you can make your patio a far less inviting place for moss to settle. Now that you have a clear plan on how to remove moss from patio pavers, you are ready to transform your slippery, green-tinged space back into the clean, safe, and welcoming outdoor oasis you deserve.

About
Jovie Mathews is a backyard and outdoor expert writer with over 12 years of hands-on experience transforming neglected outdoor spaces into thriving gardens and functional retreats. Raised in a family where weekends meant digging in the soil and building raised beds from scratch, Jovie developed a genuine love for the outdoors long before it became a career.
She writes with a practical, no-fluff approach — always testing ideas in her own backyard before sharing them with readers. From composting systems and native plant selection to patio design and pest control, Jovie covers the full spectrum of backyard life with equal parts expertise and enthusiasm.
Education
B.Sc. in Horticulture Science
University of Florida (UF) · Gainesville, FL · 2014
IFAS College of Agricultural and Life Sciences
Minor in Environmental Studies
University of Florida (UF) · Gainesville, FL · 2014
College of Liberal Arts and Sciences
Areas of expertise
- Lawn & Garden Care
- Soil prep, planting, seasonal care
- Outdoor DIY Projects
- Raised beds, fencing, pathways
- Composting & Soil Health
- Organic methods, amendments
- Native Plants & Wildlife
- Pollinators, habitat gardening
When she is not writing, Jovie can be found testing new composting techniques, growing tomatoes in questionable quantities, or convincing her neighbors that clover lawns are actually a great idea. She currently gardens in the Pacific Northwest.




