

Fire pits are the heart of backyard entertainment, providing warmth and ambiance that draws people together. However, many homeowners struggle with gas burners that look bare or wood fires that don’t radiate heat efficiently. The solution to both problems is a natural, volcanic wonder: lava rock. These porous stones are not just decorative; they are functional powerhouses that improve flame distribution and heat retention.
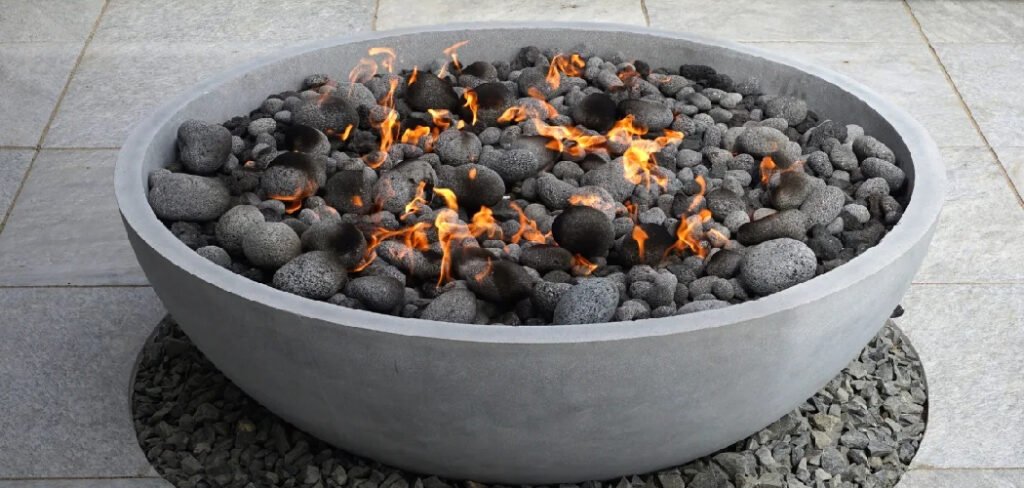
Unlike smooth river stones which can explode under high heat, volcanic rock is born from fire and built to withstand it. Whether you are setting up a sleek propane table or upgrading a traditional wood-burning ring, understanding the proper application of this material is essential for safety and performance. This guide is designed to take the mystery out of volcanic media. We will walk you through exactly how to use lava rocks for a fire pit to create a stunning, efficient, and long-lasting centerpiece for your outdoor living space.
Lava rocks are not just visually appealing; they play a crucial role in enhancing the performance and longevity of your fire pit. Properly utilizing this natural material ensures even heat distribution, reduces the risk of fire damage, and adds an extra layer of safety. With their durability and heat resistance, lava rocks are an excellent choice for creating a warm, inviting outdoor ambiance that can be enjoyed year-round.
7 Step-by-Step Guide on How to Use Lava Rocks for a Fire Pit
Step 1: Clean and Inspect the Fire Pit
Before adding any new media, you must ensure your fire pit is clean and structurally sound. Remove any old ash, debris, or previous filler material from the burner pan or the bottom of the pit. Use a stiff brush and a vacuum to clear out dust and spiderwebs, especially around gas burner ports.
If you are using a gas unit, check the burner ring for clogged holes and ensure the ignition system is functioning correctly. Inspect the basin for rust or damage that needs repair. Starting with a pristine surface ensures that your new rocks will sit evenly and that airflow remains unobstructed. This preparation prevents future maintenance headaches and ensures the longevity of your heating element.
Step 2: Calculate the Amount of Rock Needed
One of the most common mistakes is either buying too little rock, leaving the burner exposed, or buying too much and smothering the flame. You need to calculate the volume of your fire pit to determine how many pounds of lava rock are required. Measure the length, width, and depth of the burner pan for square pits, or the diameter and depth for round ones.
Most manufacturers recommend a depth of two to four inches. Remember that lava rocks come in various sizes, typically ranging from small pebbles to large stones. Smaller rocks pack tighter, while larger ones leave more gaps. Getting the quantity right is a crucial part of learning how to use lava rocks for a fire pit economically and effectively.
Step 3: Rinse and Dry the Lava Rocks
Lava rocks are natural minerals mined from the earth, which means they often come covered in volcanic dust and grit. If you dump them straight from the bag into your fire pit, this fine dust can clog your gas burner ports or create a messy cloud of ash when you first light the fire.
Pour your new rocks into a bucket or spread them out on a driveway. Rinse them thoroughly with a garden hose until the water runs clear. Once washed, spread them out in a single layer in a sunny spot and let them dry completely. You never want to put wet porous rocks into a fire, as the trapped moisture can turn to steam and cause the rocks to crack or pop violently.
Step 4: Create a Base Layer for Drainage
For wood-burning pits or deep gas pits, you do not need to fill the entire depth with expensive premium lava rock. You can save money and improve functionality by creating a base layer. For wood pits, use sand or gravel at the very bottom to facilitate drainage and protect the metal bowl from intense heat.
For deep gas pits, you can use a cheaper, filler lava rock for the bottom few inches, reserving the high-quality, aesthetically pleasing stones for the top visible layer. This foundation ensures that water drains away quickly after rainstorms, preventing the pooling that breeds mosquitoes and rusts your equipment. Proper drainage is essential for maintaining a safe and functional fire feature.
Step 5: Arrange the Rocks
Now comes the artistic and functional placement of the stones. Pour the dry lava rocks gently into the fire pit. Do not just dump them in one pile; distribute them evenly by hand. For gas fire pits, your goal is to cover the burner ring completely but lightly. You want to hide the metal plumbing without burying it under a mountain of heavy stone. The layer over the burner should be just thick enough to obscure the stainless steel. This allows the gas to percolate up through the gaps in the porous rock, creating a natural-looking flame that appears to dance on the surface of the stones rather than shooting out of drilled holes.
Step 6: Verify Airflow and Flame Distribution
Once the rocks are placed, you need to test the system to ensure you haven’t suffocated the burner. Light the fire pit and observe the flame pattern. The fire should look full and natural, spreading across the bed of rocks.
If you see the flame struggling to break through in certain spots or lifting away from the burner (a condition called “lifting”), you may have packed the rocks too tightly or piled them too high. Use a fireplace poker or a stick to gently shift the rocks around while the fire is low. Open up gaps where the flame is weak to improve airflow. Adjusting the density of the coverage is key to achieving that professional, resort-style look.
Step 7: Maintain and Refresh Periodically
Your lava rocks are durable, but they are not indestructible. Over time, they can degrade due to the extreme thermal cycling of heating up and cooling down. Soot from propane or wood smoke can also discolor them. Periodically inspect your rock bed for crumbled pieces or excessive dust buildup that could clog the burner.
Remove any broken fragments that have fallen to the bottom. If the rocks look dingy, you can take them out and wash them again with water and mild vinegar. Refreshing the top layer with a new bag of rocks every few years keeps your fire pit looking brand new and ensures optimal heat radiation for your evening gatherings.
Alternatives to Lava Rocks
If lava rocks aren’t your preferred choice for a fire pit, there are several appealing alternatives to consider. Fire glass is a popular option, offering a modern and polished look. These tempered glass pieces come in various colors and reflect light beautifully, adding an elegant touch to your fire feature.
Another alternative is ceramic fire balls, which provide a sleek, contemporary aesthetic and are available in different shapes and sizes. For a more natural appearance, consider fire pit stones or river pebbles, which mimic the raw simplicity of nature while still being heat-resistant. Additionally, metal fire media, such as steel spheres or shapes, can give your fire pit an industrial flair. It’s important to ensure that any alternative material you choose is specifically designed for high heat applications to maintain safety and functionality.
Frequently Asked Questions (FAQ)
Why Do My Lava Rocks Pop or Explode?
Lava rocks are porous, meaning they are full of tiny holes. If water gets trapped inside these holes—either from rain or washing—and is then heated rapidly, the water turns to steam. The expanding steam builds pressure until the rock cracks or pops.
- The Fix: Always cover your fire pit when not in use to keep rain out.
- The Cure: If rocks are wet, light the fire on a very low setting for 20 minutes to slowly evaporate the moisture before turning it up high.
Can I Use Rocks from My Garden Instead?
No, absolutely not. Standard garden rocks, river stones, or gravel are often sedimentary or contain trapped moisture pockets. When exposed to the high heat of a fire pit, these non-porous stones can explode violently, sending hot shrapnel flying. Lava rocks (and specialized fire glass) are volcanic minerals that have already been subjected to extreme heat naturally, making them safe for thermal applications. Never compromise safety to save a few dollars.
How Deep Should the Lava Rock Layer Be?
For a standard gas fire pit, the ideal depth is usually between 2 to 4 inches.
- Coverage: You need enough depth to completely hide the burner ring and pan.
- Economy: Going deeper than 4 inches is generally a waste of material unless the pit design specifically requires it.
- Wood Pits: For wood-burning pits, a 1-2 inch layer at the bottom helps protect the metal bowl and radiate heat upwards.
Do Lava Rocks Need to Be Replaced?
Lava rocks are very long-lasting, but they don’t last forever. Depending on usage and weather exposure, they generally last for about two to three years before showing signs of wear. You will know it is time to replace them when they start crumbling into small bits, changing color significantly due to soot buildup, or if the flame pattern becomes uneven due to compacted debris clogging the airflow.
Can I Mix Lava Rocks with Fire Glass?
Yes, this is a popular design choice. Lava rock is often used as an inexpensive base filler to take up volume in deep fire pits, with a layer of more expensive, decorative fire glass placed on top. Alternatively, you can mix them together for a rustic-meets-modern aesthetic. Just ensure that the materials are compatible in size so smaller glass pieces don’t slip through the lava rocks and clog the burner ports below.
Conclusion
Incorporating lava rocks into your fire feature is one of the simplest yet most impactful upgrades you can make for your outdoor space. These volcanic stones do double duty by protecting your equipment and enhancing the visual appeal of the flame. By cleaning your materials, ensuring proper drainage, and arranging the stones to allow for optimal airflow, you create a fire that burns warmer and looks more natural.
It is a small investment of time and money that pays off in cozy, safe evenings under the stars. Remember to keep them dry to prevent popping and inspect them regularly for wear. Now that you have mastered how to use lava rocks for a fire pit, you can light up your backyard with confidence, knowing you have created a safe and inviting environment for everyone to enjoy.

About
Jovie Mathews is a backyard and outdoor expert writer with over 12 years of hands-on experience transforming neglected outdoor spaces into thriving gardens and functional retreats. Raised in a family where weekends meant digging in the soil and building raised beds from scratch, Jovie developed a genuine love for the outdoors long before it became a career.
She writes with a practical, no-fluff approach — always testing ideas in her own backyard before sharing them with readers. From composting systems and native plant selection to patio design and pest control, Jovie covers the full spectrum of backyard life with equal parts expertise and enthusiasm.
Education
B.Sc. in Horticulture Science
University of Florida (UF) · Gainesville, FL · 2014
IFAS College of Agricultural and Life Sciences
Minor in Environmental Studies
University of Florida (UF) · Gainesville, FL · 2014
College of Liberal Arts and Sciences
Areas of expertise
- Lawn & Garden Care
- Soil prep, planting, seasonal care
- Outdoor DIY Projects
- Raised beds, fencing, pathways
- Composting & Soil Health
- Organic methods, amendments
- Native Plants & Wildlife
- Pollinators, habitat gardening
When she is not writing, Jovie can be found testing new composting techniques, growing tomatoes in questionable quantities, or convincing her neighbors that clover lawns are actually a great idea. She currently gardens in the Pacific Northwest.




