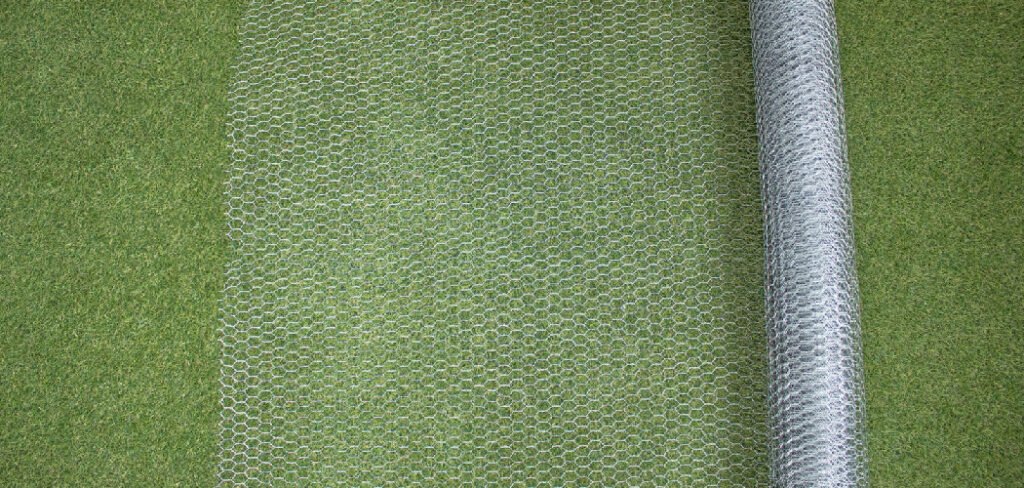
Chicken wire is one of the most versatile materials in a gardener’s toolkit. It protects vegetable patches from hungry rabbits, creates sturdy enclosures for poultry, and even serves as a structure for climbing plants or craft projects. However, anyone who has purchased a fresh roll knows the struggle that awaits. This lightweight hexagonal mesh arrives tightly wound and under tension, seemingly determined to spring back into a coil or snag on everything in its path.
Without the right approach, a simple DIY project can quickly devolve into a wrestling match resulting in scratched arms and uneven fencing. The good news is that there is a trick to taming this unruly material. By following a methodical process and using gravity to your advantage, you can flatten and install your fencing with minimal stress. This guide is designed to teach you how to unroll chicken wire efficiently and safely, ensuring your next project looks professional and your patience remains intact.
Unrolling chicken wire doesn’t have to be an exercise in frustration. With some basic tools and a clear step-by-step strategy, you can work smarter and avoid co mmon pitfalls. Taking the time to prepare properly not only simplifies the process but also ensures a cleaner, more secure installation that will last.
Alternative Fencing Materials
While chicken wire is a popular choice for many projects, there are several alternative fencing materials worth considering depending on your specific needs. Hardware cloth, for example, offers greater durability and a tighter mesh, making it ideal for deterring small predators.
Welded wire fencing provides a sturdy, long-lasting option for larger enclosures, while plastic mesh fencing offers a lightweight and cost-effective solution for temporary barriers. For a more refined look, wooden lattice or picket fencing can add both functionality and aesthetic appeal to your space. Evaluating these options can help you select a material that best suits your project’s requirements and overall design.
7 Step-by-Step Guide on How to Unroll Chicken Wire
Step 1: Prepare Your Workspace
Before you even touch the wire, you need to establish a safe and spacious working environment. Chicken wire is notoriously springy and can easily recoil, snagging on clothes or nearby objects. Find a large, flat area such as a driveway, a garage floor, or a clear patch of lawn where you have plenty of room to maneuver. Clear away any tripping hazards or tools that could get tangled in the mesh. You will also need to gather your essential safety gear and tools.
Heavy-duty leather gloves are non-negotiable, as the cut ends of the wire are razor-sharp. You will also need a pair of wire snips and some heavy objects like bricks, cinder blocks, or scrap lumber to act as weights. Having everything within arm’s reach prevents you from having to let go of the wire mid-task.
Step 2: Reverse Rolling
The biggest challenge with rolled wire is its “memory.” The metal wants to return to the tightly coiled shape it has held since manufacturing. To counteract this, you need to break that memory. Start by unrolling a small section of the wire, perhaps two or three feet. Instead of just laying it flat, roll it back up in the opposite direction of the original curl. Apply firm but gentle pressure to bend the wire slightly past straight.
Do not crease it sharply, as this can weaken the metal strands or distort the hexagonal pattern. You are simply aiming to overcorrect the curve. Perform this reverse rolling technique gradually along the length of the material as you need it. This simple action significantly reduces the wire’s tendency to spring back at you.
Step 3: Anchor the Starting End Securely
Once you have begun to relax the curve, you need to secure the starting end of the roll. This is where your heavy weights come into play. Lay the beginning edge of the wire flat against the ground or your work surface. Place a row of bricks, heavy timber, or rocks along the entire width of this edge.
It is crucial to weigh down the corners specifically, as these are the most likely points to curl inward or pop up unexpectedly. If you are installing the wire directly onto fence posts, this step involves stapling or tying the starting edge firmly to your first post. Ensuring this first anchor point is immovable gives you the necessary tension to pull against as you unroll the rest of the length without it retracting.
Step 4: Unroll the Wire Slowly and Evenly
With the first end anchored, you can begin to deploy the rest of the fencing. Walk backward slowly, unrolling the wire as you go. It is vital to keep the roll centered and low to the ground to prevent it from twisting or spiraling off to one side. If you unroll it too quickly or hold it too high, the roll can flop over, creating kinks in the mesh that are nearly impossible to smooth out later.
If you are working alone, you might need to stop every few feet to place additional weights along the edges to keep it flat. If you have a helper, they can hold the roll while you pull the wire taut, ensuring a smooth and even deployment along your measured path.
Step 5: Walk on the Mesh
This step might sound counterintuitive, but it is incredibly effective for flattening stubborn wire. As you unroll the chicken wire on a flat surface like a driveway or lawn, walk directly on top of the unrolled section. Wear flat-soled shoes or boots to avoid getting caught in the holes. The distributed weight of your body helps to press the wire flat against the ground, further relaxing the metal’s memory.
Walk back and forth along the length you have just exposed. This technique acts like a giant iron, smoothing out minor waves and humps. Be careful not to scuff your feet or stomp, which could bend the wires; simply walking normally with deliberate steps is usually sufficient to get the mesh to lay surprisingly flat.
Step 6: Maintain Tension While Cutting
Eventually, you will reach the desired length for your project and need to make a cut. Before you reach for your wire snips, ensure the wire is pulled taut and weighed down on both sides of your intended cut line. If you cut the wire while it is loose, the free end can snap back violently, potentially causing injury or tangling the remainder of the roll.
Place a heavy board or a line of bricks just past where you plan to cut. This secures the main roll. Then, measure your length and verify it twice. Using sharp wire cutters, snip the wire cleanly. By keeping tension on the material until the very last moment, you ensure a straight cut and prevent the remaining roll from unraveling into a chaotic mess.
Step 7: Secure the Second End Immediately
After making your cut, do not leave the newly cut end free. It will immediately try to curl back toward the anchored start. Quickly place weights on this end or attach it to your fence post if you are installing it vertically. If you are preparing panels for a project, you might staple this end to a wooden frame right away.
The key is to never leave both ends of a cut section unanchored. If you need to move the sheet of wire, keep it weighed down until the moment you are ready to attach it to its final destination. Managing these loose ends is the secret to keeping the wire flat and workable rather than fighting with a giant metal slinky.
Frequently Asked Questions (FAQ)
What Is the Best Tool for Cutting Chicken Wire?
While you might be tempted to use standard scissors or pruning shears, this will ruin the blades quickly. The best tool is a pair of aviation snips (tin snips) or specialized wire cutters (diagonal pliers).
- Aviation Snips: Excellent for long, straight cuts and offer great leverage.
- Diagonal Pliers: Good for snipping individual wires in tight spots.
- Always choose tools with comfortable grips, as you will be making many repetitive cuts.
How Do I Straighten Chicken Wire That Is Already Bent?
If your wire has developed kinks or creases, you can often smooth them out by hand. Wear heavy leather gloves and manually massage the bent area, bending it gently in the opposite direction of the kink. Laying the wire on a hard, flat surface like concrete and hammering the kink gently with a rubber mallet can also help flatten it without damaging the galvanized coating.
Why Does Chicken Wire Curl Back Up?
Chicken wire is made of galvanized steel wire that is wound under high tension during the manufacturing process. This creates “metal memory,” meaning the wire is physically conditioned to hold that coiled shape. It is similar to a coiled spring; unless you actively work to relax the metal by reverse bending or weighting it down, it will naturally try to return to its packaged form.
Can I Unroll Chicken Wire by Myself?
Yes, it is possible to do it solo, but it requires patience and weights. You cannot simply pull it out with one hand and work with the other. You must rely heavily on bricks, lumber, or landscape staples to anchor the wire as you go. Walking on the wire (as mentioned in step 5) is particularly helpful for solo workers as it flattens the mesh without needing a second pair of hands to hold it down.
What Is the Difference Between Chicken Wire and Hardware Cloth?
Chicken wire (hexagonal netting) is made of thin, twisted wires and is flexible. It is designed to keep chickens in and small predators out, but a strong dog or raccoon could chew through it. Hardware cloth is a welded wire mesh with a square or rectangular grid. It is much stiffer, heavier, and more durable. Hardware cloth is harder to unroll but offers superior protection against determined predators.
Conclusion
Working with chicken wire does not have to be a battle of wills between you and a roll of metal. The secret lies in preparation and patience. By taking the time to set up a proper workspace, using weights to control the tension, and employing techniques like reverse rolling, you can transform a springy coil into a flat, usable sheet.
Whether you are building a safe run for your flock, protecting your prize tulips, or crafting a rustic frame, these steps will ensure professional-looking results without the usual frustration. Now that you have mastered how to unroll chicken wire effectively, you can tackle your garden and home improvement projects with confidence, knowing you have the upper hand over your materials.

About
Jovie Mathews is a backyard and outdoor expert writer with over 12 years of hands-on experience transforming neglected outdoor spaces into thriving gardens and functional retreats. Raised in a family where weekends meant digging in the soil and building raised beds from scratch, Jovie developed a genuine love for the outdoors long before it became a career.
She writes with a practical, no-fluff approach — always testing ideas in her own backyard before sharing them with readers. From composting systems and native plant selection to patio design and pest control, Jovie covers the full spectrum of backyard life with equal parts expertise and enthusiasm.
Education
B.Sc. in Horticulture Science
University of Florida (UF) · Gainesville, FL · 2014
IFAS College of Agricultural and Life Sciences
Minor in Environmental Studies
University of Florida (UF) · Gainesville, FL · 2014
College of Liberal Arts and Sciences
Areas of expertise
- Lawn & Garden Care
- Soil prep, planting, seasonal care
- Outdoor DIY Projects
- Raised beds, fencing, pathways
- Composting & Soil Health
- Organic methods, amendments
- Native Plants & Wildlife
- Pollinators, habitat gardening
When she is not writing, Jovie can be found testing new composting techniques, growing tomatoes in questionable quantities, or convincing her neighbors that clover lawns are actually a great idea. She currently gardens in the Pacific Northwest.