

Discovering orange-brown spots on your favorite outdoor furniture can be disheartening, but it doesn’t mean you need to drag your set to the curb. Rust is a common issue for metal furniture exposed to the elements, yet it is often surprisingly easy to remedy with a little elbow grease and the right supplies.
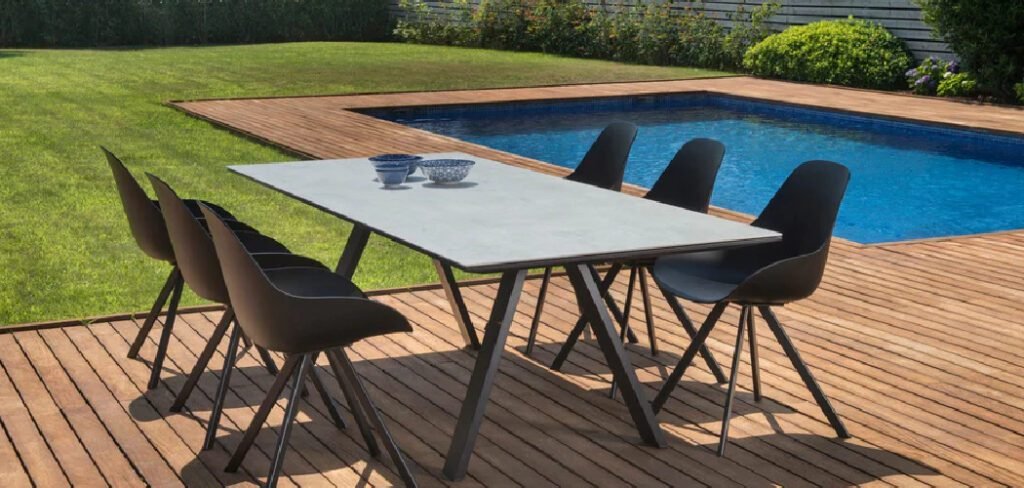
Whether your chairs are wrought iron, steel, or aluminum, catching corrosion early can save you money and extend the life of your patio set significantly. This guide is designed for complete beginners who want to restore their outdoor oasis without hiring a professional.
We will walk you through a simple, effective process to remove unsightly oxidation and protect the metal from future damage. By learning how to fix rusted patio chair legs yourself, you can transform weathered furniture back into a beautiful, sturdy seating arrangement that is ready for your next backyard barbecue or quiet morning coffee.
Understanding Why Metal Furniture Rusts
Before diving into the repair process, it is helpful to understand the enemy. Rust, scientifically known as iron oxide, occurs when iron reacts with oxygen and moisture. This chemical reaction is accelerated by environmental factors common in outdoor settings, such as rain, humidity, and even morning dew.
Salt air in coastal regions can make the process happen even faster. The legs of patio chairs are particularly vulnerable because they are constantly in contact with the ground, where moisture lingers longest. Puddles, damp grass, and soil can keep the metal feet wet long after the rest of the chair has dried.
Furthermore, the protective coating on chair legs often gets scratched or chipped from being dragged across concrete patios or decks, creating an entry point for moisture to reach the bare metal.
Recognizing these triggers helps you not only fix the current issue but also take preventative measures to keep your furniture looking pristine for years to come.
Step-by-Step Guide: How to Fix Rusted Patio Chair Legs
Step 1: Prepare the Work Area and Safety Gear
Before you begin restoring your furniture, it is essential to set up a proper workspace. Choose a well-ventilated area, preferably outdoors on a sunny day or in an open garage, to ensure dust and fumes dissipate quickly.
Lay down a drop cloth, old tarp, or heavy cardboard to protect your patio floor or driveway from rust flakes, paint drips, and chemical runoff. Safety is paramount when working with metal and rust removal products. You should wear protective gloves to shield your hands from sharp edges and chemicals.

A dust mask or respirator is also crucial to prevent inhaling fine rust particles or paint fumes. Finally, put on safety goggles to protect your eyes from flying debris while sanding or scrubbing. Having everything organized beforehand makes the entire project smoother and safer.
Step 2: Clean the Surface Thoroughly
The restoration process starts with a comprehensive cleaning of the chair legs. Mix a solution of warm water and mild dish soap in a bucket. Using a stiff bristle brush or a sponge, scrub the rusted areas and the surrounding metal vigorously.
Your goal here is to remove dirt, grease, spiderwebs, and any loose flakes of paint or rust that might interfere with the repair. Pay special attention to the crevices and joints where grime tends to accumulate. If there is mold or mildew present, you might need to add a splash of white vinegar to your cleaning solution.
Rinse the legs thoroughly with a garden hose to wash away all soap residue. Allow the furniture to dry completely before moving on to the next step, as moisture trapped under new paint will only cause more rust later.
Step 3: Remove Loose Rust and Flaking Paint
Now comes the most labor-intensive part of the project: mechanical removal. You need to get down to the bare metal or at least a stable surface. Use a wire brush or coarse sandpaper (around 80-grit) to aggressively scrub the rusted spots. For stubborn areas, a drill with a wire wheel attachment can save time and effort.
Continue sanding until you no longer see loose flakes or bubbling paint. The surface should feel relatively smooth to the touch, even if it looks discolored. It is critical to remove as much oxidation as possible because painting over active rust will not stop it from spreading.
As you work on this stage of learning how to fix rusted patio chair legs, remember that thorough preparation is the key to a long-lasting finish that won’t peel after a few months.
Step 4: Apply a Rust Converter or Remover
After mechanical sanding, microscopic rust particles often remain in the pits of the metal. To neutralize this, apply a commercial rust converter or a chemical rust remover. A rust converter chemically changes the iron oxide into a stable, black compound that acts as a primer, sealing the metal against further corrosion.
Follow the manufacturer’s instructions carefully, usually applying it with a disposable brush or rag. If you choose a rust remover (like a naval jelly), you will typically need to rinse it off after a set time.
This chemical step ensures that any lingering corrosion is halted in its tracks. Let the product cure for the recommended time—often 24 hours—before proceeding. This creates a solid, non-reactive base that ensures your topcoat will adhere properly and look professional.
Step 5: Sand for a Smooth Finish
Once the rust converter or remover has fully cured, the surface may feel rough or uneven. To ensure your final paint job looks sleek, you need to smooth out the transitions between the repaired spots and the original paint. Switch to a finer grit sandpaper, such as 220-grit, and gently sand the treated areas and the surrounding metal.
Feather the edges of the old paint so there are no hard lines or ridges. This step is purely about aesthetics and adhesion; a slightly roughened surface helps the primer stick better.
Wipe the legs down with a clean, damp cloth or a tack cloth to remove all sanding dust. Any dust left behind will create a gritty finish in your final paint layer, so take your time to ensure the metal is perfectly clean and dry.
Step 6: Apply Metal Primer
Priming is a non-negotiable step for outdoor metal furniture. A high-quality metal primer provides an extra layer of protection against moisture and helps the topcoat bond securely. Choose a primer specifically designed for metal and rust prevention.
If you are using spray primer, hold the can about 6 to 12 inches away from the surface and apply it in steady, sweeping motions. Apply two or three thin coats rather than one thick coat to avoid drips and runs.
Let each coat dry according to the can’s instructions. If you are painting by hand, use a brush with natural bristles for oil-based primers or synthetic bristles for latex-based ones. Ensure you cover every inch of the exposed metal, including the undersides of the feet, to seal the entire surface effectively.
Step 7: Paint and Seal the Chair Legs
The final step restores the beauty of your chair. Select a high-quality outdoor paint designed for metal, preferably one that includes rust inhibitors. Spray paint is often the easiest choice for chair legs as it gets into curves and corners effortlessly. Just like with the primer, apply multiple thin coats, allowing adequate drying time in between.
This builds up a durable shell that resists chipping and scratching. Once the color coat is dry, consider applying a clear specialized sealant for extra durability against UV rays and rain. This clear coat acts as a final barrier, locking in your hard work.
By following these steps on how to fix rusted patio chair legs, you ensure a finish that rivals factory-new furniture. Let the chairs cure for at least 24 to 48 hours before placing them back on the patio or sitting in them.
Eco-friendly Restoration Supplies
For a more sustainable approach to restoring your patio chair legs, consider using eco-friendly restoration supplies. Opt for non-toxic, water-based rust removers and paints that are free from harsh chemicals and solvents. These products are safer for both the environment and your personal health.
Look for primers and sealants labeled as biodegradable or low-VOC (volatile organic compounds) to minimize air pollution. Instead of disposable materials, use reusable tools like sanding blocks and washable brushes.
Additionally, you can source natural fiber sandpaper or abrasives made from renewable resources. These eco-friendly options ensure your project reduces environmental impact while delivering excellent results.
Frequently Asked Questions (FAQ)
What Is The Best Type Of Paint For Metal Furniture?
For outdoor metal furniture, use an oil-based enamel or a high-quality acrylic latex paint specifically formulated for metal. Spray paints labeled “rust-preventative” (like Rust-Oleum or Krylon) are excellent choices because they offer durable protection against moisture and UV rays while providing a smooth, professional-looking finish.
Do I Need To Remove All The Rust Before Painting?
You should remove as much loose rust and flaking paint as possible using a wire brush or sandpaper. However, you do not need to strip the metal entirely bare if you use a rust converter. The converter chemically neutralizes remaining surface rust, turning it into a stable base for painting.
How Can I Prevent My Patio Chairs From Rusting Again?
To prevent future rust, clean your furniture regularly with mild soap and water, and cover it with waterproof tarps during rain or winter months. Additionally, apply a coat of clear car wax or paste wax to the metal legs once a season to create an invisible water-repellent barrier.
Can I Use Vinegar To Remove Rust From Chair Legs?
Yes, white vinegar is an effective natural rust remover. For small spots, soak a rag in vinegar and wrap it around the rusted leg for several hours. The acetic acid dissolves the rust, making it easy to scrub away with a brush or aluminum foil before you rinse and paint.
Why Do My Chair Legs Rust Even On A Concrete Patio?
Concrete is porous and holds moisture, which can transfer to metal chair legs. Additionally, dragging chairs across concrete scratches the protective coating on the feet, exposing bare metal to water and oxygen. Using plastic glides or rubber caps on the bottom of the legs helps separate the metal from damp surfaces.
Conclusion
Restoring your outdoor furniture is a rewarding weekend project that saves money and reduces waste. By taking the time to address corrosion early, you prevent structural damage and keep your patio looking inviting for guests.
The process involves simple cleaning, sanding, and repainting, all of which can be done with basic tools found at any hardware store. Remember that preparation is 90% of the success; rushing the sanding or cleaning steps often leads to peeling paint later on.
Maintaining your outdoor oasis doesn’t have to be a chore. Now that you have mastered the skill of how to fix rusted patio chair legs, you can apply these same techniques to tables, plant stands, and decorative railings.
With a fresh coat of paint and proper sealing, your furniture will withstand the elements for many seasons to come. So, grab your sandpaper and spray paint, and give your favorite chair a second life—it’s easier than you think!

About
Jovie Mathews is a backyard and outdoor expert writer with over 12 years of hands-on experience transforming neglected outdoor spaces into thriving gardens and functional retreats. Raised in a family where weekends meant digging in the soil and building raised beds from scratch, Jovie developed a genuine love for the outdoors long before it became a career.
She writes with a practical, no-fluff approach — always testing ideas in her own backyard before sharing them with readers. From composting systems and native plant selection to patio design and pest control, Jovie covers the full spectrum of backyard life with equal parts expertise and enthusiasm.
Education
B.Sc. in Horticulture Science
University of Florida (UF) · Gainesville, FL · 2014
IFAS College of Agricultural and Life Sciences
Minor in Environmental Studies
University of Florida (UF) · Gainesville, FL · 2014
College of Liberal Arts and Sciences
Areas of expertise
- Lawn & Garden Care
- Soil prep, planting, seasonal care
- Outdoor DIY Projects
- Raised beds, fencing, pathways
- Composting & Soil Health
- Organic methods, amendments
- Native Plants & Wildlife
- Pollinators, habitat gardening
When she is not writing, Jovie can be found testing new composting techniques, growing tomatoes in questionable quantities, or convincing her neighbors that clover lawns are actually a great idea. She currently gardens in the Pacific Northwest.




