

Gathering around a crackling fire pit is one of life’s simple pleasures, offering warmth, light, and a natural focal point for social connection. However, anyone who has struggled to get a fire started knows the frustration of a smoky, sputtering flame that refuses to catch.
The secret to a long-lasting, beautiful fire isn’t just about the quality of the wood; it’s about the architecture of the fire itself. The way you arrange the wood determines airflow, heat distribution, and how efficiently it burns. A well-built fire is easy to light, produces less smoke, and requires less maintenance throughout the evening.
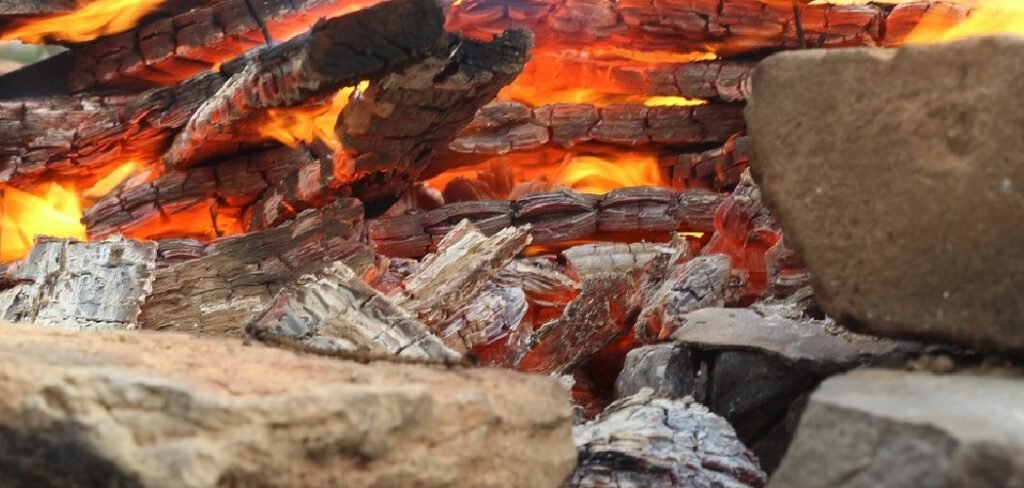
Whether you are hosting a backyard barbecue or enjoying a quiet night under the stars, mastering this skill is essential. This guide will teach you exactly how to stack logs in a fire pit, ensuring you can create a safe, stable, and mesmerizing fire every time.
Building the perfect fire begins with understanding the key elements of structure, fuel, and oxygen. By strategically arranging your logs, kindling, and tinder, you can create a fire that lights quickly and burns evenly.
Taking the time to prepare and stack your firewood correctly not only enhances your experience but also ensures safety and reduces smoke output. No matter your setting, a carefully constructed fire can become the heart of your gathering, providing warmth, light, and an inviting atmosphere.
Different Firewood Types
Choosing the right firewood is just as important as stacking it properly. Different types of wood burn at varying rates, produce distinct levels of heat, and emit unique aromas that can enhance your experience. Hardwood, such as oak, hickory, and maple, is an excellent choice for long-lasting fires because it burns slowly and generates significant heat.
These woods are ideal for colder nights or when you want an extended burn time. On the other hand, softwood, such as pine, cedar, or fir, ignites quickly and is perfect for starting a fire or creating a short burst of heat. Be mindful, however, that softwoods tend to produce more smoke and can leave behind resin buildup.
Additionally, seasoned or dried wood is always preferable since it burns cleaner and more efficiently than freshly cut, or green, wood. Understanding the characteristics of each firewood type helps ensure a functional, enjoyable, and efficient fire experience.
Step-by-Step Guide How to Stack Logs in a Fire Pit
Step 1: Prepare Your Fire Pit and Gather Materials
Before you even think about stacking logs, safety and preparation are paramount. Ensure your fire pit is on a stable, non-flammable surface like stone or dirt, well away from any overhanging branches, structures, or dry grass. Clean out any excessive ash from previous fires, as a thick layer of old ash can block airflow from underneath.
Next, gather your three essential fire-building materials. You will need tinder, which is small, fluffy material that catches a spark easily like dryer lint or cotton balls. You’ll also need kindling, which are small twigs and sticks no thicker than a pencil.
Finally, you will need your primary fuel: seasoned, dry firewood logs that have been split. Having all your materials organized and within reach makes the entire process smoother and safer.
Step 2: Create a Foundation of Tinder
The heart of your fire begins with the tinder. This is the most flammable component, responsible for catching the initial flame and transferring it to the kindling. Take a generous handful of your tinder and place it in a loose ball right in the center of the fire pit. It is crucial that the tinder is not packed too tightly.
Air needs to be able to circulate freely through the material for it to ignite properly. If you are using cotton balls with petroleum jelly, commercial fire starters, or even crumpled newspaper, ensure they are positioned centrally to become the core from which the rest of your fire structure will be built. This small foundation is the critical first stage of ignition.
Step 3: Build a Teepee Structure with Kindling
With your tinder in place, it is time to add the kindling. This is a crucial step in learning how to stack logs in a fire pit for a fast start. Take your small sticks and twigs and begin leaning them against each other over the tinder ball, forming a conical or teepee shape.

Start with the smallest pieces of kindling and gradually add slightly larger ones. Leave a small opening on one side of your teepee, facing the prevailing wind. This opening will allow you to light the tinder at its base while also providing a channel for oxygen to feed the young flame.
The teepee structure is effective because as the kindling burns, it collapses inward, adding more fuel to the growing fire.
Step 4: Add Your Main Logs in a Log Cabin Formation
Now you will add your main fuel source. A log cabin build is one of the most stable and efficient methods for a fire pit. Place two of your larger, parallel firewood logs on either side of the kindling teepee, leaving a gap between them.
Then, place two more logs on top of the first pair, but perpendicular to them, forming a square or “log cabin” shape around the teepee. This structure provides excellent stability and creates an internal chimney that directs airflow upwards, helping the fire to burn hot and evenly.
The space between the logs allows oxygen to reach the core, which is essential for a clean, less smoky burn.
Step 5: Add a Second Layer
To create a fire that will last, you need to build up your log cabin structure. Add another layer of logs on top of the first, again placing them perpendicular to the pair below them. You can make this second layer slightly smaller to create a pyramid-like shape. This multi-level structure provides a steady supply of fuel.

As the kindling teepee ignites the inner walls of the first layer of logs, the heat will rise and begin to preheat the second layer. When the first layer burns through and collapses, the preheated second layer will already be primed to catch fire, ensuring a seamless transition and a long-lasting burn without you having to constantly tend to it.
Step 6: Light the Tinder from the Bottom
With your structure complete, it is time to bring it to life. Use a long-reach lighter or a match and reach through the opening you left in the kindling teepee. Light the tinder at the base in several spots to ensure it catches evenly.
As the tinder ignites, it will transfer the flame to the driest, thinnest pieces of kindling directly above it. You should hear a satisfying crackle as the small sticks begin to burn. Avoid the temptation to add more logs or blow on the fire excessively at this stage.
A well-built structure has all the oxygen it needs to grow on its own. Patience is key; let the fire establish itself naturally.
Frequently Asked Questions (FAQ)
What Is the Best Type of Wood to Use in a Fire Pit?
Hardwoods like oak, maple, and birch are the best choices.
- Density: They are denser than softwoods, so they burn longer and hotter.
- Smoke: Hardwoods produce less smoke and fewer sparks, making for a more pleasant experience.
- Seasoning: Always use “seasoned” wood, which has been dried for at least six months. Green or wet wood is hard to light and produces a lot of smoke.
How Do I Stop My Fire Pit from Smoking So Much?
Excessive smoke is almost always a sign of one of two things:
- Wet Wood: You are using wood that has not been properly seasoned and dried. The fire is spending its energy boiling off water, which creates steam and smoke.
- Poor Airflow: Your logs are packed too tightly together, suffocating the fire and preventing a complete, clean combustion. Make sure there are gaps between your logs for oxygen to circulate.
Is It Safe to Use Lighter Fluid in a Fire Pit?
No, you should never use lighter fluid, gasoline, or any other flammable liquid to start a fire in a fire pit. These liquids can create a dangerous flare-up that can cause serious burns. They also release harmful chemical fumes. A proper structure with dry tinder and kindling will light easily without the need for chemical accelerants.
How Big Should the Logs Be?
The size of your logs should be proportionate to the size of your fire pit. As a general rule, use split logs that are about 3-6 inches in diameter. You want the logs to fit comfortably inside the pit with several inches of clearance from the walls. Using logs that are too large will restrict airflow and make the fire harder to manage.
What Is the Difference Between a Teepee and a Log Cabin Fire?
- Teepee: A conical structure that is great for starting a fire quickly. It produces a tall, hot flame but burns down fast. It’s often used for the kindling stage.
- Log Cabin: A square, layered structure that is very stable and provides excellent airflow. It burns longer and more evenly, making it ideal for a fire that you want to last all evening.
Many people use a combination: a teepee of kindling inside a log cabin of larger logs.
Conclusion
Building a fire is a timeless skill that connects us to our past and enhances our present moments. It is a process that rewards patience and preparation. The key is not to just throw wood into a pit, but to construct a stable, breathable structure that allows the fire to thrive.
By starting with a good foundation of tinder, building a kindling teepee, and then erecting a log cabin around it, you create the perfect environment for a hot, clean, and long-lasting fire. The structure does the work for you, ensuring consistent airflow and a steady supply of fuel. Now that you know how to stack logs in a fire pit, you are ready to create countless evenings of warmth, conversation, and cherished memories around a perfect, crackling flame.

About
Jovie Mathews is a backyard and outdoor expert writer with over 12 years of hands-on experience transforming neglected outdoor spaces into thriving gardens and functional retreats. Raised in a family where weekends meant digging in the soil and building raised beds from scratch, Jovie developed a genuine love for the outdoors long before it became a career.
She writes with a practical, no-fluff approach — always testing ideas in her own backyard before sharing them with readers. From composting systems and native plant selection to patio design and pest control, Jovie covers the full spectrum of backyard life with equal parts expertise and enthusiasm.
Education
B.Sc. in Horticulture Science
University of Florida (UF) · Gainesville, FL · 2014
IFAS College of Agricultural and Life Sciences
Minor in Environmental Studies
University of Florida (UF) · Gainesville, FL · 2014
College of Liberal Arts and Sciences
Areas of expertise
- Lawn & Garden Care
- Soil prep, planting, seasonal care
- Outdoor DIY Projects
- Raised beds, fencing, pathways
- Composting & Soil Health
- Organic methods, amendments
- Native Plants & Wildlife
- Pollinators, habitat gardening
When she is not writing, Jovie can be found testing new composting techniques, growing tomatoes in questionable quantities, or convincing her neighbors that clover lawns are actually a great idea. She currently gardens in the Pacific Northwest.




