An old tree stump sitting in the middle of your yard doesn’t have to be an eyesore that you trip over while mowing the lawn. Instead of paying for expensive removal services or grinding it down, you can embrace its natural charm by turning it into a beautiful focal point. Many gardeners overlook the potential of these wooden remnants, missing out on a unique opportunity for creativity.
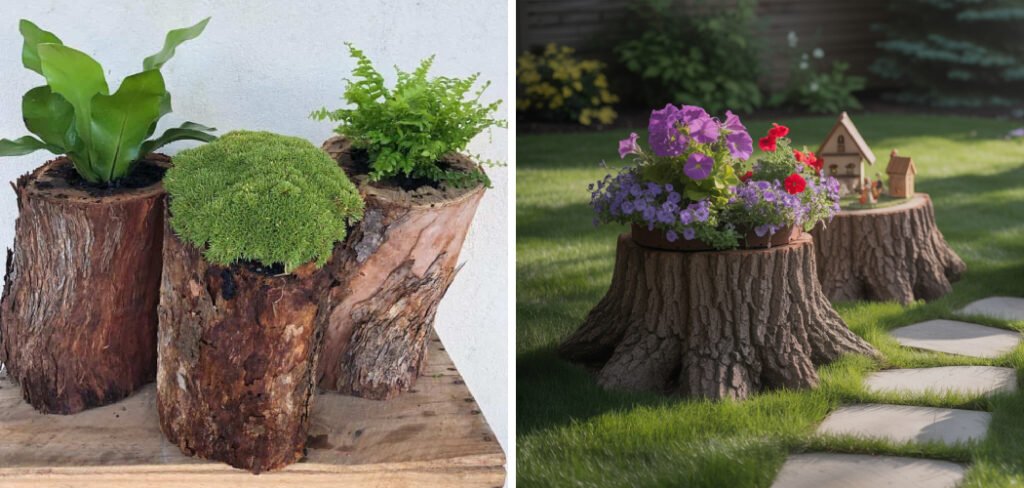
Transforming a leftover trunk allows you to add whimsy, rustic elegance, or functional art to your outdoor space without breaking the bank. Whether you want a fairy garden base, a natural planter, or a quirky sculpture stand, the possibilities are endless. In this guide, we will walk you through exactly how to decorate a stump so you can breathe new life into your landscape and enjoy a customized piece of garden art for years to come.
Why Decorating a Tree Stump Enhances Your Landscape
Leaving a tree stump in your yard offers more than just a place to rest your coffee cup. When you choose to style and preserve a stump rather than remove it, you are adding a layer of history and organic texture to your garden design. It creates vertical interest in flat spaces and provides a habitat for beneficial insects if handled correctly. Furthermore, integrating natural wood elements into your flower beds grounds the aesthetic, making the transition between manicured lawn and wild growth feel seamless and intentional.
10 Step-by-Step Guide on How to Decorate a Stump
Step 1: Assess the Stump’s Condition and Location
Before you begin any creative work, you must thoroughly evaluate the current state of the wood. Check for signs of active decay, insect infestations like termites or carpenter ants, and the structural integrity of the bark. If the wood is too soft or crumbling significantly, it might not support heavy decorations or planters long-term. You should also consider the location relative to sun exposure and foot traffic. A stump sitting in full shade will require different plants and sealants than one baking in the direct afternoon sun. Understanding these factors ensures your hard work lasts through the seasons.
Step 2: Clean and Prepare the Surface Area
Once you have determined the wood is solid enough for a makeover, you need to prepare the canvas. Start by removing any loose bark, moss, or fungal growth using a stiff wire brush or a scraper. You want to get down to a relatively clean surface so that any paints, stains, or adhesives will bond correctly.
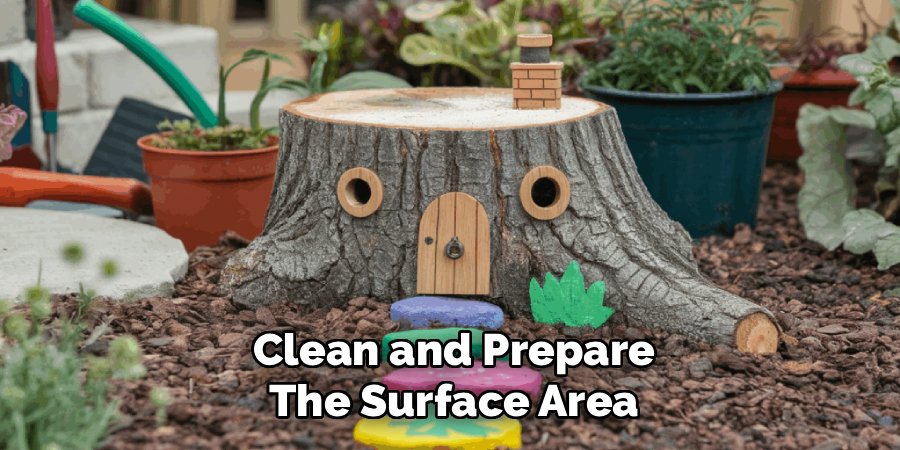
Sweep away all debris and dirt from the top and sides. If the cut on the top is uneven or jagged, use a saw or a sander to level it out. Creating a flat surface is crucial if you plan to place pots or sculptures on top later.
Step 3: Treat the Wood for Longevity
To ensure your decorative project withstands the elements, applying a preservative is a vital step. untreated wood will rot quickly when exposed to rain and soil moisture. Apply a clear wood sealer or a quality exterior varnish to lock out moisture and prevent rapid decay. If you prefer a specific color scheme, you can use a wood stain at this stage to darken or lighten the timber. Allow the treatment to dry completely according to the manufacturer’s instructions before moving on. This protective layer acts as a barrier, keeping your garden feature looking fresh and preventing it from becoming a home for unwanted pests.
Step 4: Hollow Out the Center for Planting
If you intend to use the stump as a natural planter, you will need to create a cavity in the center. Use a drill with a large spade bit or a chisel and hammer to carefully hollow out the middle portion of the trunk. Aim for a depth of at least six to eight inches to allow adequate room for root growth.
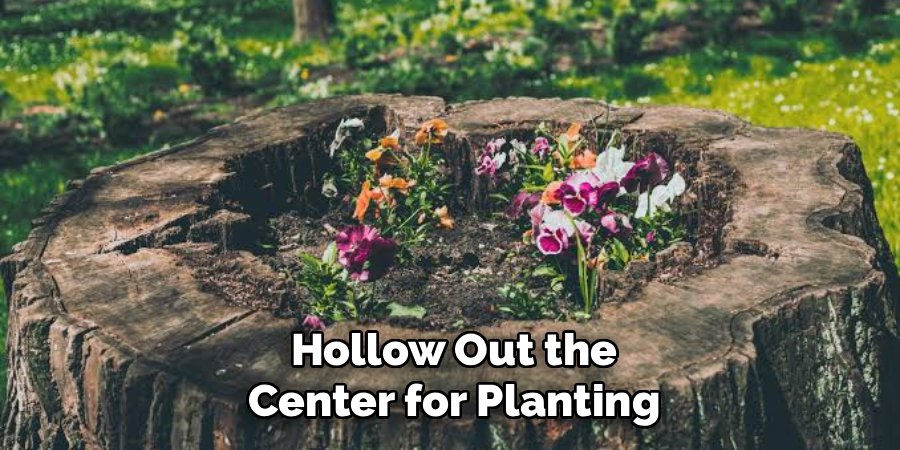
This process can be labor-intensive depending on the hardness of the wood, so take your time and wear safety glasses. Ensure you drill a few drainage holes out the side or bottom of the hollowed area so water doesn’t pool and drown your plants.
Step 5: Add Drainage Gravel and Potting Soil
Proper drainage is essential for the health of any plants you introduce to the stump. Before adding soil, place a layer of small gravel or pebbles at the bottom of the hollowed-out section you created in the previous step. This prevents the drainage holes from getting clogged with dirt and helps regulate moisture levels. Top the gravel with a high-quality potting mix suitable for the types of plants you have chosen. Avoid using heavy garden soil from the ground, as it can compact too tightly in a container environment. Leave about an inch of space from the rim to prevent water runoff when watering.
Step 6: Select Plants for How to Decorate a Stump
Choosing the right greenery is the fun part of learning how to decorate a stump effectively. Select plants that suit the light conditions you identified in step one. Trailing plants like ivy, creeping jenny, or vinca vine look spectacular spilling over the edges of the bark. For height and color, consider vibrant annuals like petunias, marigolds, or pansies. If you prefer a lower-maintenance option, succulents and sedums are excellent choices for sunny, dry spots as they require minimal watering. Arrange the plants while they are still in their nursery pots to visualize the layout before committing to planting them in the soil.
Step 7: Install Whimsical Accessories and Decor
Beyond plants, hardscape accessories can define the personality of your stump. This is where you can get creative with themes. For a fairy garden look, attach a small wooden door to the base of the trunk and add miniature windows or a tiny ladder.
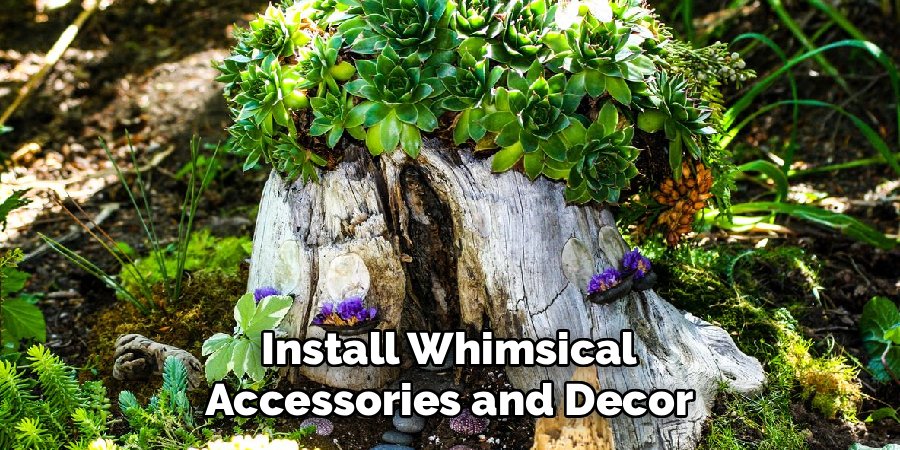
If you prefer a rustic vibe, place a vintage lantern, an old birdhouse, or a cast-iron sculpture on the flat surface alongside your flowers. You can secure these items using outdoor-rated adhesive or small screws to keep them safe during windy weather. These small details invite viewers to look closer and add a storytelling element to the garden.
Step 8: Incorporate Lighting for Nighttime Appeal
Your garden feature shouldn’t disappear when the sun goes down. Adding lighting ensures your hard work is visible and appreciated in the evening hours. You can drape solar-powered fairy lights around the base or wrap them gently around the remaining branches if any exist. Alternatively, install a small solar spotlight in the ground nearby, angled upward to illuminate the texture of the bark and the flowers. This creates a warm, inviting glow and serves as a safety feature by highlighting the obstacle in the dark. Soft lighting transforms the stump into a magical focal point during summer barbecues or quiet nights on the patio.
Step 9: Surround the Base with Complementary Landscaping
The area immediately surrounding the stump is just as important as the stump itself. To integrate the feature into the rest of the yard, create a small garden bed around the base. Remove the grass and add a ring of mulch, stones, or decorative bricks to define the space. Plant hostas, ferns, or other shade-loving perennials around the bottom to soften the transition between the wood and the lawn. This technique, often called “skirting,” hides any unsightly roots and makes the stump look like an intentional part of the landscape design rather than a leftover remnant of a tree removal.
Step 10: Maintain Your Creation Each Season
Decorating is not a one-time event; it requires ongoing care to stay beautiful. Check the stump periodically for signs of new rot or insect activity and reapply sealer every year or two as needed. Swap out annual flowers as the seasons change—pansies in spring, petunias in summer, and mums in autumn keep the display fresh and relevant.
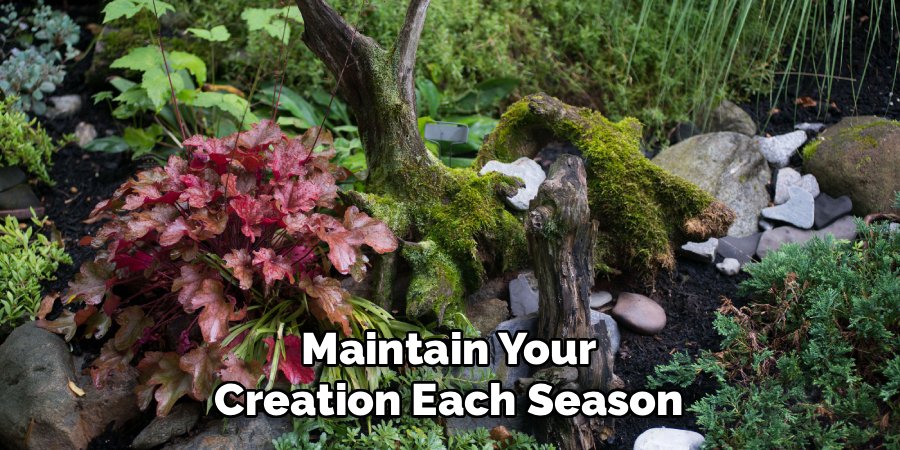
Clean off any moss or algae that might make the accessories look grimy. By committing to this simple maintenance routine, you ensure that your decorative stump remains a stunning highlight of your garden for many years, evolving as your garden grows.
Frequently Asked Questions
Can I Plant Flowers Directly into a Rotten Stump?
It depends on the severity of the rot.
- Minor Rot: If the outer shell is hard but the center is soft, it is actually easier to hollow out for a planter.
- Severe Rot: If the stump crumbles when touched, it won’t hold soil or water well.
- Alternative: In cases of severe decay, place a plastic pot inside the hollowed area rather than planting directly against the wood.
How Do I Keep Bugs Away from My Decorated Stump?
Insects are naturally attracted to decaying wood, but you can manage them.
- Sealant: Apply a strong wood sealer or varnish to close off entry points.
- Cleanliness: Keep the area around the base free of wet leaf litter.
- Natural Repellents: Plant herbs like mint, lavender, or marigolds directly in the stump, as their scents tend to repel many common garden pests.
- Inspections: Regularly check for termite tunnels or ant hills.
What Is the Best Way to Hollow Out a Stump Without Power Tools?
Hollowing out a stump manually is possible but labor-intensive.
- Charring: Build a small, controlled fire on top of the stump to burn out the center (check local fire codes first).
- Chisel and Hammer: Use a wide wood chisel to chip away the center, starting from the middle and working outward.
- Patience: Accelerate decay in the center by drilling holes and adding high-nitrogen fertilizer or Epsom salts, though this takes months.
Do I Need to Remove the Bark Before Decorating?
Removing the bark is a stylistic choice and a practical one.
- Rustic Look: Leaving the bark on provides a rugged, natural texture that fits well in woodland gardens.
- Longevity: Bark eventually separates from the wood as it dries, which can ruin paint jobs or cause attached decorations to fall off.
- Recommendation: For painted designs or long-term structural integrity, it is usually better to strip the bark.
How Long Will a Decorated Stump Last in the Garden?
The lifespan varies significantly based on wood type and climate.
- Hardwoods: Oak or walnut stumps can last 10 years or more.
- Softwoods: Pine or willow may only last 3 to 5 years before decomposing significantly.
- Treatment: Applying wood preservative and keeping the stump slightly elevated from standing water can double its lifespan.
- Environment: Humid, wet climates will accelerate decomposition faster than dry climates.
Conclusion
Turning an old tree remnant into a piece of garden art is a rewarding project that blends creativity with nature. By following these steps, you have learned that you don’t need to spend a fortune on removal services to deal with a leftover trunk. Instead, you can embrace the opportunity to add character, color, and texture to your outdoor space. From preparing the wood to choosing the perfect flowers and accessories, every choice you make personalizes your landscape.
We hope this guide motivates you to head outside, grab your gardening gloves, and experiment with your own design ideas. Whether you turn it into a fairy village, a blooming planter, or a rustic table, the result will be a unique conversation piece. Now that you know how to decorate a stump, you can confidently transform that forgotten piece of wood into the highlight of your garden.

About
Jovie Mathews is a backyard and outdoor expert writer with over 12 years of hands-on experience transforming neglected outdoor spaces into thriving gardens and functional retreats. Raised in a family where weekends meant digging in the soil and building raised beds from scratch, Jovie developed a genuine love for the outdoors long before it became a career.
She writes with a practical, no-fluff approach — always testing ideas in her own backyard before sharing them with readers. From composting systems and native plant selection to patio design and pest control, Jovie covers the full spectrum of backyard life with equal parts expertise and enthusiasm.
Education
B.Sc. in Horticulture Science
University of Florida (UF) · Gainesville, FL · 2014
IFAS College of Agricultural and Life Sciences
Minor in Environmental Studies
University of Florida (UF) · Gainesville, FL · 2014
College of Liberal Arts and Sciences
Areas of expertise
- Lawn & Garden Care
- Soil prep, planting, seasonal care
- Outdoor DIY Projects
- Raised beds, fencing, pathways
- Composting & Soil Health
- Organic methods, amendments
- Native Plants & Wildlife
- Pollinators, habitat gardening
When she is not writing, Jovie can be found testing new composting techniques, growing tomatoes in questionable quantities, or convincing her neighbors that clover lawns are actually a great idea. She currently gardens in the Pacific Northwest.